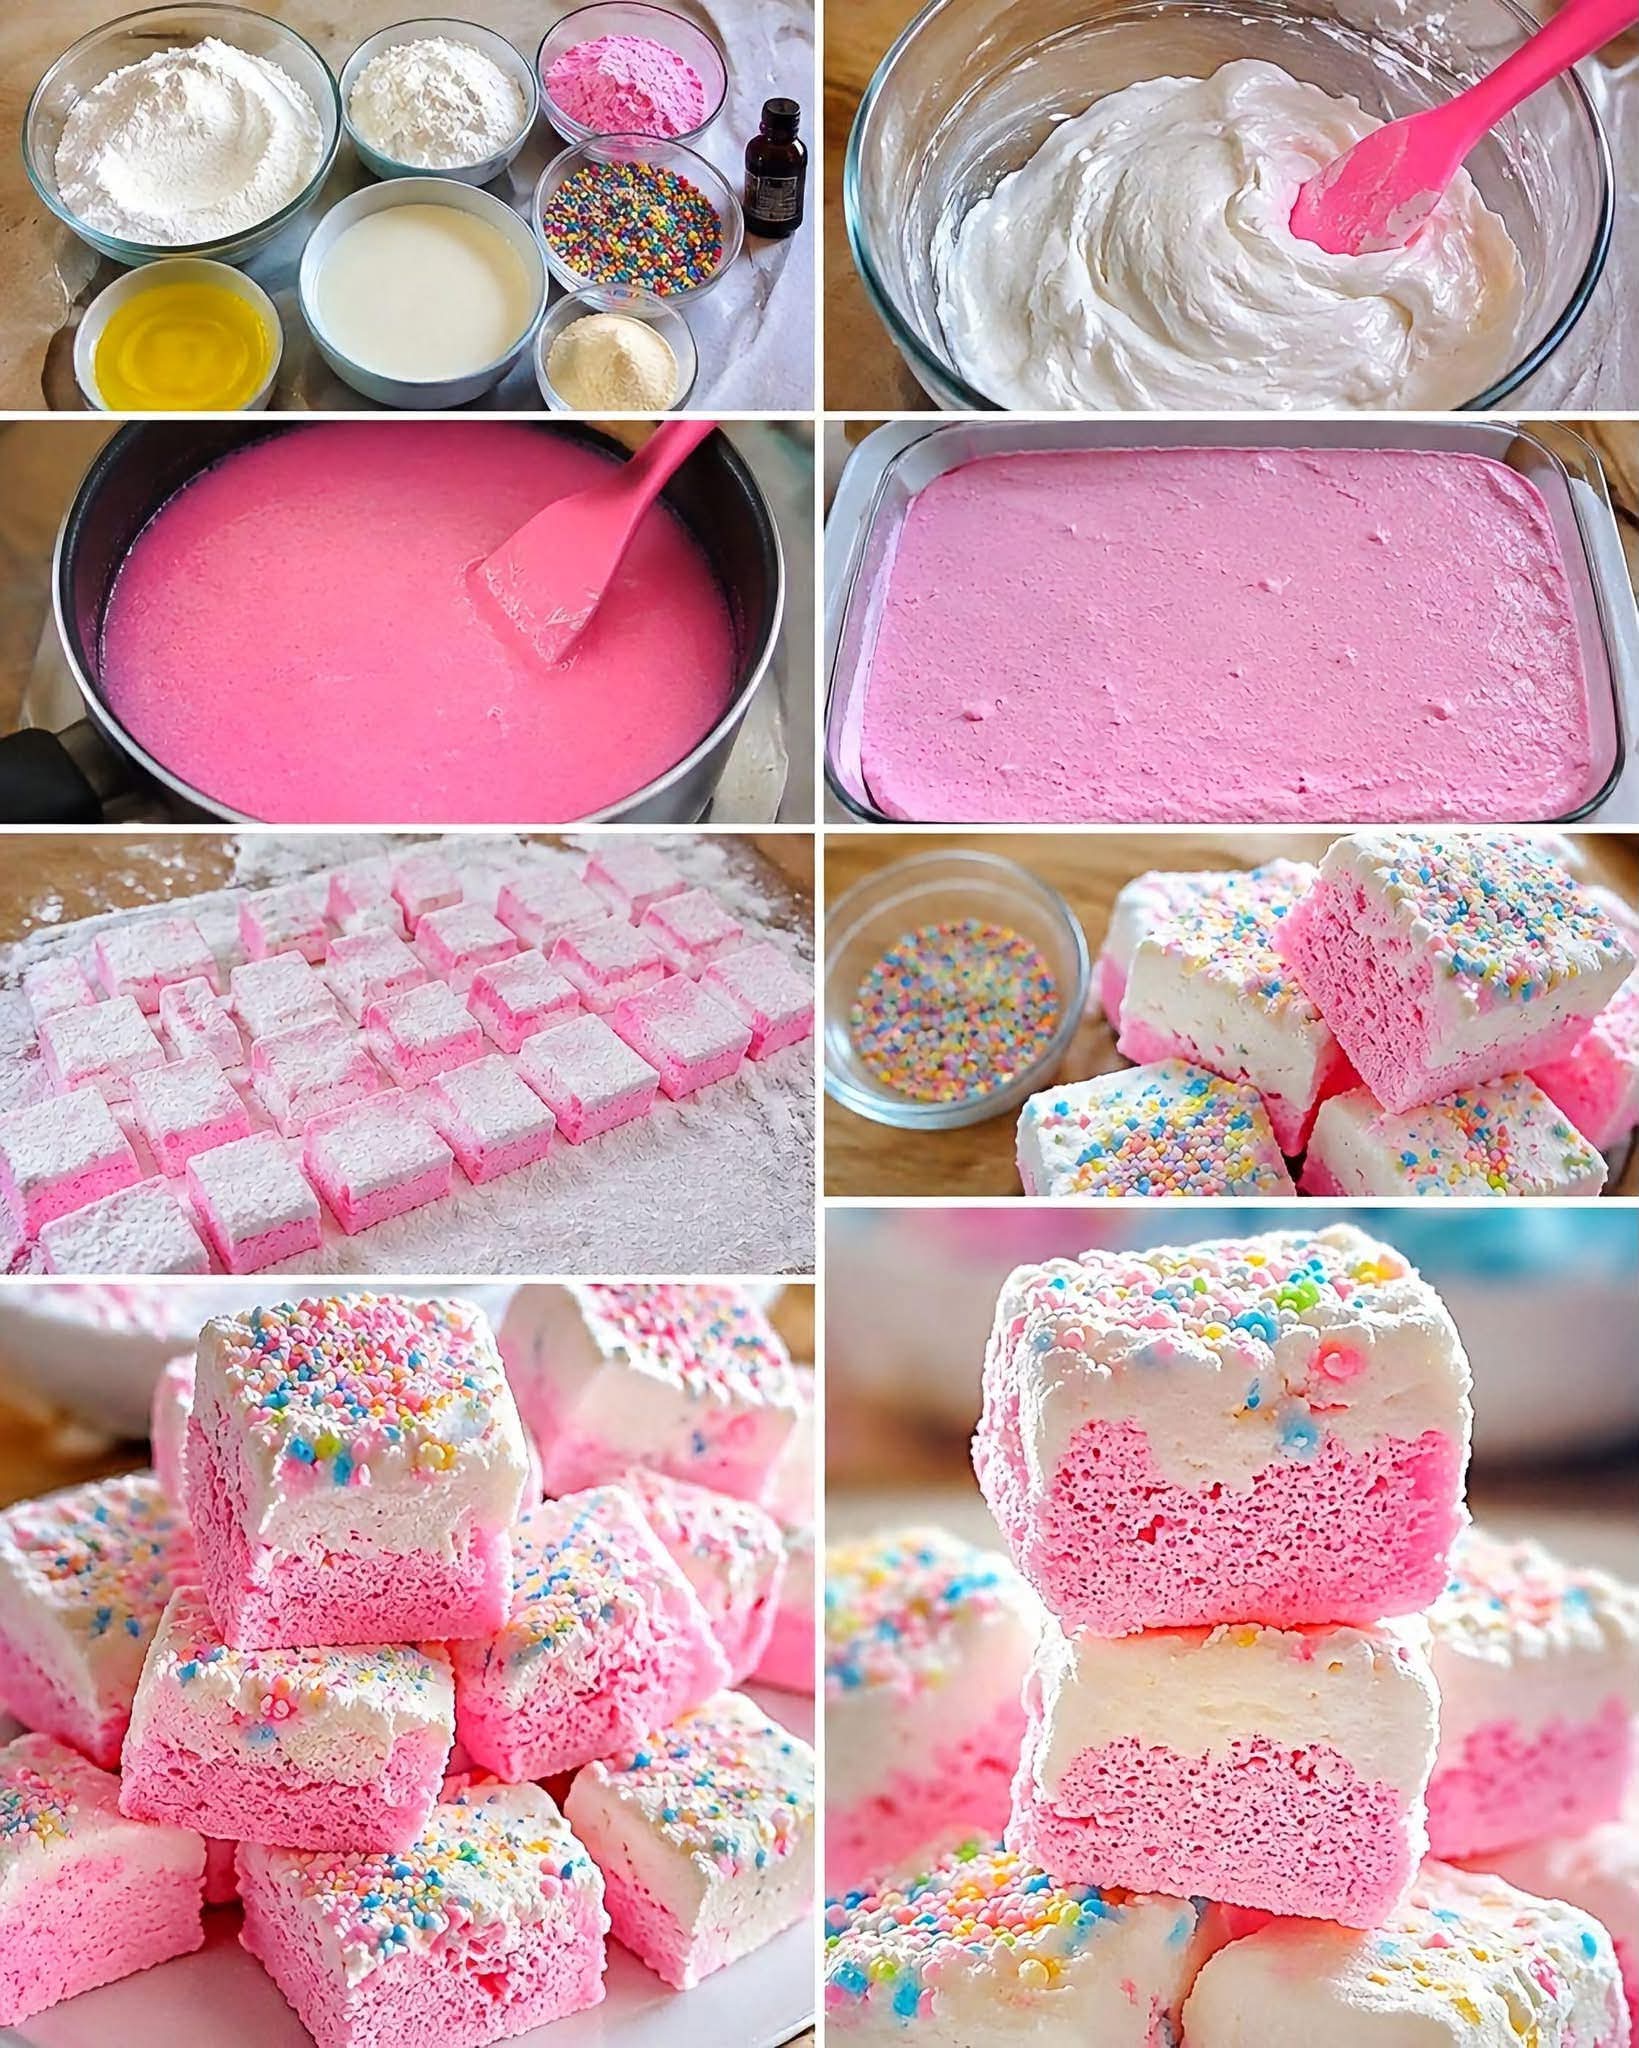
Pink and White Sprinkle Marshmallow Squares
Introduction
Pink and White Sprinkle Marshmallow Squares are a delightful homemade confection made with a light, fluffy marshmallow mixture, a beautiful two-tone finish, and a generous coating of colorful rainbow sprinkles. They are soft, airy, sweet, and wonderfully chewy, with a delicate vanilla flavor that makes every bite nostalgic and comforting.
The combination of white and soft pink marshmallow creates an attractive layered appearance, while the sprinkles add color, texture, and a festive touch. These squares are perfect for birthday celebrations, baby showers, afternoon treats, holiday dessert tables, bake sales, parties, or simply making something special at home.
Although homemade marshmallows require a few more steps than store-bought versions, the result is well worth the effort. The key is cooking the sugar syrup to the correct temperature and whipping the gelatin and syrup long enough to create a thick, stable, cloud-like texture.
Ingredients
For the Marshmallow
- 1/2 cup cold water, approximately 120 g
- 3 tablespoons unflavoured gelatin, approximately 27 g
- 1 1/2 cups granulated sugar, approximately 300 g
- 1/2 cup glucose syrup or light corn syrup, approximately 170 g
- 1/2 cup water, approximately 120 g
- 1 teaspoon vanilla extract, approximately 5 g
- 1/2 teaspoon salt, approximately 3 g
- Pink food colouring, as needed
For the Coating
- 1/2 cup icing sugar, approximately 60 g
- 1/2 cup cornflour or cornstarch, approximately 60 g
- Rainbow sprinkles, as needed
For Preparing the Pan
- A little neutral oil or non-stick spray
- Parchment paper
History of Marshmallows
Marshmallows have a much older history than the soft confection commonly associated with modern sweets. The name comes from the marsh mallow plant, which grows naturally in wet areas. Ancient civilizations used preparations made from the plant for various purposes, including soothing preparations.
Over time, confectioners discovered ways to transform the idea into a sweet treat. Early versions of marshmallow candy were made using the plant’s natural properties, but modern marshmallows generally use gelatin to create their characteristic soft and airy texture.
The development of modern confectionery techniques made it possible to combine hot sugar syrup with gelatin and whip the mixture until it became light and voluminous. Today, marshmallows are enjoyed around the world in many forms, including flavored, coated, chocolate-covered, toasted, and layered varieties.
These Pink and White Sprinkle Marshmallow Squares take inspiration from that classic confection while giving it a colorful homemade presentation.
Formation and Preparation
The beautiful texture of these marshmallow squares depends on several important stages.
First, the gelatin is bloomed in cold water. This allows the gelatin granules to absorb water and become ready to dissolve properly when the hot sugar syrup is added.
The sugar, glucose syrup, and water are then heated together. The syrup must reach approximately 115–118°C (239–244°F). This temperature is important because it gives the finished marshmallow enough structure to set while remaining soft and chewy.
Once the hot syrup is combined with the bloomed gelatin, the mixture is whipped vigorously. During this process, air becomes incorporated into the mixture, transforming the glossy syrup into a thick, pale, fluffy marshmallow.
The mixture is then divided into two portions. One remains white while the other is gently colored pink. Layering the two colors creates the attractive two-tone effect.
Finally, the marshmallow is allowed to set before being cut into squares and coated with the icing-sugar and cornflour mixture.
Detailed Instructions
1. Prepare the Pan
Lightly grease an 8-inch (20 cm) square baking pan.
Line the bottom and sides with parchment paper, leaving some parchment extending over the edges. These overhanging pieces will make it easier to lift the finished marshmallow from the pan.
Mix the icing sugar and cornflour together in a small bowl. Lightly dust the lined pan with this mixture, making sure the bottom and sides receive a thin coating.
Set the prepared pan aside.
2. Bloom the Gelatin
Pour 1/2 cup of cold water into the bowl of a stand mixer.
Sprinkle the unflavoured gelatin evenly over the water. Avoid dumping all the gelatin into one spot because this can create lumps.
Allow the gelatin to stand for approximately 5–10 minutes.
During this time, it will absorb the water and become thick and softened. This process is known as blooming.
3. Prepare the Sugar Syrup
Place the granulated sugar, glucose syrup or corn syrup, and the remaining 1/2 cup of water into a medium saucepan.
Place the saucepan over medium heat.
Stir gently while the sugar dissolves. Once the mixture begins cooking, avoid excessive stirring because sugar crystals can form around the sides of the pan.
Continue cooking until the syrup reaches 115–118°C (239–244°F).
A reliable candy thermometer is strongly recommended because the temperature is important for achieving the correct marshmallow consistency.
4. Combine the Syrup and Gelatin
Once the syrup reaches the correct temperature, remove the saucepan from the heat.
Carefully pour the hot syrup into the bowl containing the bloomed gelatin.
Take care during this step because the syrup is extremely hot.
Begin mixing at a low speed to combine the ingredients safely, then gradually increase the speed.
5. Whip the Marshmallow
Increase the mixer to high speed.
Whip the mixture for approximately 8–12 minutes, or until it becomes very thick, fluffy, pale, and significantly increased in volume.
The mixture should hold its shape when lifted with the whisk.
Add the vanilla extract and salt.
Continue whipping briefly until everything is evenly incorporated.
Do not overwork the mixture once it reaches the desired consistency, because it will become increasingly difficult to spread as it cools.
6. Create the White Layer
Immediately transfer approximately half of the marshmallow mixture into the prepared pan.
Spread it evenly using a lightly greased spatula or another utensil that will not cause the marshmallow to stick excessively.
Work relatively quickly because the marshmallow begins setting as it cools.
7. Create the Pink Layer
Add a small amount of pink food colouring to the remaining marshmallow mixture.
Mix gently until the color is evenly distributed.
For an elegant pastel appearance, use only a small amount of coloring. You can always add a little more, but adding too much at once can produce a stronger color than desired.
Spread the pink marshmallow evenly over the white layer.
If you prefer the pink layer underneath, simply reverse the order and place the pink mixture into the pan first, followed by the white marshmallow.
8. Add the Sprinkles
Immediately scatter rainbow sprinkles generously over the top.
Gently press them into the surface so they adhere to the marshmallow.
Avoid pressing too firmly because you want to preserve the soft, fluffy surface.
Pastel rainbow sprinkles work particularly well with the delicate pink-and-white color combination.
9. Allow the Marshmallow to Set
Leave the pan uncovered at room temperature for approximately 4–6 hours.
For the best texture and easiest cutting, allowing the marshmallow to set overnight is recommended.
Do not cover it while it is still setting, because trapped moisture can affect the surface texture.
The finished marshmallow should feel firm enough to handle while remaining soft and springy.
10. Prepare the Cutting Surface
Once the marshmallow has completely set, mix the icing sugar and cornflour again if necessary.
Dust a clean cutting board generously with the mixture.
Lightly dust the top of the marshmallow as well.
11. Remove the Marshmallow
Use the parchment paper overhang to carefully lift the marshmallow slab from the pan.
Place it onto the prepared cutting board.
If it sticks to the parchment, gently loosen the edges with a lightly dusted knife or spatula.
12. Cut Into Squares
Lightly grease or dust a sharp knife with the icing-sugar and cornflour mixture.
Cut the marshmallow into neat squares.
Wipe and redust the knife between cuts if necessary.
The exact size is up to you, but approximately 1 1/2- to 2-inch squares make attractive individual portions.
13. Coat the Marshmallow
Lightly coat every cut side with the icing-sugar and cornflour mixture.
This prevents the squares from sticking to one another and makes them easier to handle.
Shake off any excess coating.
Method for the Perfect Two-Tone Effect
For the most attractive appearance, keep the colors soft and delicate.
Place a pale strawberry-pink marshmallow layer on the bottom and a clean white layer on top. Finish the surface with pastel rainbow sprinkles.
Alternatively, place the white layer underneath and pink layer on top for a different presentation.
The most important detail is to spread each layer quickly and evenly before the marshmallow becomes too firm.
Important Tips for Success
Use a Candy Thermometer
The sugar syrup temperature is one of the most important factors. Aim for approximately 115–118°C. If the syrup is undercooked, the marshmallow may not set firmly enough. If it is cooked too far, the finished texture can become firmer and less delicate.
Bloom the Gelatin Properly
Allow the gelatin to sit in cold water for several minutes before adding the hot syrup. This helps it hydrate properly and prevents an uneven texture.
Work Quickly
Marshmallow begins to set as it cools. Have the pan, spatula, food coloring, sprinkles, and other equipment ready before beginning.
Keep the Color Pastel
Start with only a tiny amount of pink food coloring. A soft pastel pink complements the white layer beautifully.
Prevent Sticking
The icing-sugar and cornflour mixture is essential. Use it on the pan, cutting board, knife, and finished marshmallow as needed.
Do Not Refrigerate While Setting
Allow the marshmallow to set at room temperature. Refrigeration can introduce moisture and may affect the texture.
Storage
Store the finished marshmallow squares in an airtight container at room temperature.
Place parchment paper between layers if necessary to prevent the pieces from sticking together.
For the best texture, keep them away from humidity and excessive heat. Properly stored marshmallow squares can remain soft and enjoyable for several days.
Serving Suggestions
These marshmallow squares are beautiful served on a dessert platter alongside cookies, cupcakes, brownies, and other homemade sweets.
They are particularly suitable for:
- Birthday parties
- Baby showers
- Afternoon tea
- Children’s celebrations
- Holiday dessert tables
- Bake sales
- Gift boxes
- Dessert buffets
- Family gatherings
- Homemade party favors
They can also be individually wrapped in clear food-safe bags and tied with ribbon for an attractive homemade gift.
Variations
Strawberry Marshmallow Squares
Add a small amount of strawberry flavoring along with the vanilla and use strawberry-colored sprinkles for a stronger strawberry theme.
Vanilla Sprinkle Squares
Leave the entire marshmallow white and decorate the top with colorful rainbow sprinkles.
Chocolate-Dipped Squares
Once completely set, dip the bottoms of the marshmallow squares into melted chocolate and allow them to firm up before serving.
Holiday Marshmallow Squares
Change the sprinkle colors according to the occasion. Red and green work beautifully for Christmas, while pastel colors are ideal for spring celebrations.
Coconut Marshmallow Squares
Lightly sprinkle finely shredded coconut over the surface before the marshmallow sets for a tropical variation.
Conclusion
Pink and White Sprinkle Marshmallow Squares are a wonderful example of how simple ingredients can be transformed into an impressive homemade treat. The combination of fluffy marshmallow, delicate pink and white layers, vanilla sweetness, and colorful sprinkles creates a dessert that is both visually appealing and delicious.
The secret to success is patience and precision: bloom the gelatin properly, cook the sugar syrup to the correct temperature, whip the mixture until it becomes thick and airy, and work quickly when forming the layers.
Once you master the basic technique, you can customize these marshmallow squares with different colors, flavors, coatings, and decorations for almost any occasion.
For Marshmallow Lovers
If you love soft, fluffy, old-fashioned sweets, these marshmallow squares are especially satisfying. They have that wonderfully light texture that practically melts in the mouth while still offering a pleasant chew.
They are also a fun recipe to make because the transformation is so dramatic. What begins as a hot sugar syrup becomes a thick, fluffy confection after whipping, and then develops into beautiful, sliceable squares after setting.
For anyone who enjoys homemade treats, colorful desserts, or classic confectionery, these Pink and White Sprinkle Marshmallow Squares are a recipe worth keeping.