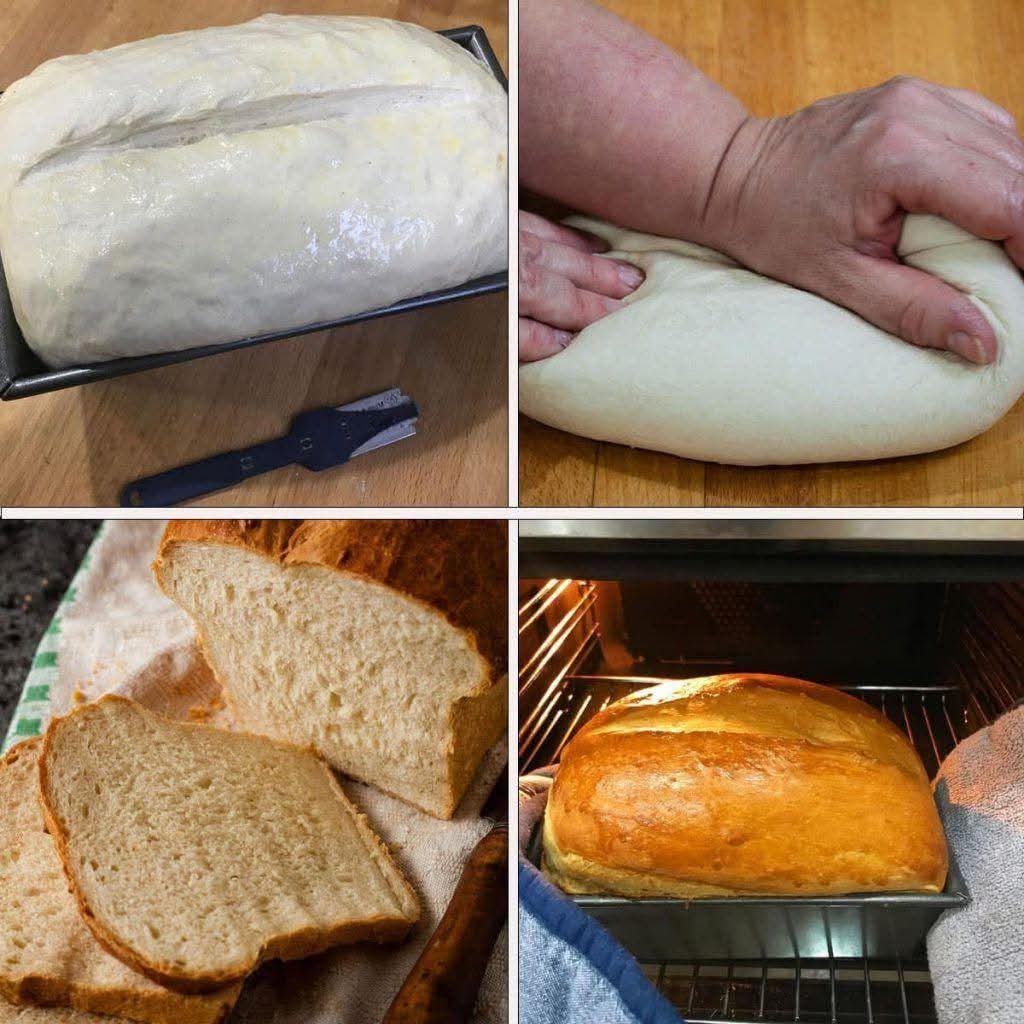
Homemade Soft White Bread
Introduction
There is something special about homemade bread. The aroma of yeast, warm milk, and butter filling the kitchen makes even an ordinary day feel comforting. This soft homemade white bread is simple enough for a beginner, yet delicious enough to become a regular favorite.
The loaf has a tender, fluffy interior, a lightly golden crust, and a wonderful buttery flavor. It is perfect for sandwiches, toast, breakfast, or simply tearing off a warm slice and spreading it with butter.
Ingredients
For the Bread
- 1 cup warm milk, about 105–110°F (40–43°C)
- 1/2 cup warm water
- 2 1/4 teaspoons active dry yeast, 1 standard packet
- 1/4 cup granulated sugar
- 2 tablespoons butter, melted
- 1 teaspoon salt
- 4 to 4 1/2 cups all-purpose flour
- Additional butter for brushing the finished loaf, optional
Instructions
1. Activate the Yeast
Combine the warm milk, warm water, sugar, and active dry yeast in a large mixing bowl. Stir gently and let the mixture stand for approximately 5–10 minutes.
The yeast should become foamy or bubbly. This is a good indication that the yeast is active and ready to use.
If there is no foam after about 10 minutes, the yeast may be inactive, or the liquid may have been too hot or too cold. It is best to correct this before continuing.
2. Add the Butter and Salt
Stir the melted butter and salt into the yeast mixture.
Begin adding the flour gradually, starting with about 3 1/2 cups. Mix well after each addition.
Continue adding flour a little at a time until the dough begins to pull away from the sides of the bowl. The dough should be soft and slightly tacky but should not be excessively sticky.
3. Knead the Dough
Transfer the dough to a lightly floured surface.
Knead for approximately 8–10 minutes by hand, folding the dough over itself and pushing it forward with the heel of your hand.
If using a stand mixer, knead with the dough hook on low to medium-low speed for approximately 6–8 minutes.
The finished dough should feel smooth, elastic, and soft.
Avoid adding too much flour. Excess flour can produce a dense or dry loaf.
4. First Rise
Place the kneaded dough in a lightly greased bowl.
Turn the dough once so the surface is lightly coated with oil or butter. Cover the bowl with a clean kitchen towel or plastic wrap.
Allow the dough to rise in a warm, draft-free place for approximately 1–1 1/2 hours, or until it has doubled in size.
The exact rising time will depend on the temperature of your kitchen.
5. Shape the Loaf
Once the dough has doubled, gently press it down to release excess air.
Turn it onto a lightly floured surface and shape it into a loaf.
For a traditional sandwich loaf, flatten the dough into a rectangle, roll it tightly from one short end to the other, and pinch the seam closed.
Place the shaped dough seam-side down into a greased 9 x 5-inch loaf pan.
6. Second Rise
Cover the pan loosely and let the dough rise again for approximately 30–45 minutes.
The dough should become noticeably puffy and rise close to or slightly above the edge of the pan.
Do not allow it to rise excessively, because an over-proofed loaf can collapse during baking.
7. Bake
Preheat your oven to 350°F (175°C).
Bake the bread for approximately 30–35 minutes, or until the top is beautifully golden brown and the loaf sounds hollow when gently tapped.
If the top begins browning too quickly, loosely cover it with aluminum foil during the final portion of baking.
8. Finish With Butter
Remove the bread from the oven and immediately brush the top with a little butter.
This gives the crust a beautiful softness and adds another layer of buttery flavor.
Allow the loaf to cool in the pan for about 10 minutes, then transfer it to a wire rack.
For the best texture, allow the bread to cool substantially before slicing.
Method
The secret to this bread is patience rather than complicated technique. Yeast needs warmth, moisture, and time to create the gas that makes the dough rise.
The first rise develops the structure and flavor of the bread. Kneading strengthens the gluten so the dough can hold the air produced by the yeast. The second rise gives the shaped loaf its final volume and creates the light, fluffy texture everyone loves.
One of the most important details is flour control. Start with less flour and add more only as necessary. A soft dough generally produces a softer loaf than a stiff, heavily floured dough.
History of Homemade Bread
Bread is one of the oldest prepared foods in human history. Long before modern ovens, people combined grains with water and cooked the resulting dough over heated stones or other primitive cooking surfaces.
Leavened bread became especially important as people learned that naturally occurring yeast could make dough rise. Over generations, bread-making developed into a fundamental part of home cooking in cultures around the world.
Soft white sandwich bread became particularly popular with the development of commercial milling and baking during the industrial era. Its mild flavor, soft texture, and versatility made it a household staple.
Homemade bread continues that tradition while allowing the baker to control the ingredients and enjoy the unmistakable aroma of a freshly baked loaf.
Formation of the Bread
The formation of this loaf happens in several stages.
First, yeast is activated in warm liquid. The yeast begins consuming available sugars and producing carbon dioxide.
Next, flour is incorporated and gluten begins forming. Kneading strengthens this gluten network, allowing the dough to stretch without breaking.
During the first rise, the yeast produces gas that becomes trapped within the dough. This causes the dough to expand.
After shaping, the second rise gives the loaf additional volume. Finally, baking causes the trapped gases to expand rapidly while the proteins and starches set, transforming the soft dough into a finished loaf.
Tips for the Softest Bread
- Use warm rather than hot milk and water.
- Do not add all the flour at once.
- Keep the dough soft and slightly tacky.
- Knead thoroughly to develop gluten.
- Give the dough enough time to double during the first rise.
- Avoid adding excessive flour during shaping.
- Do not over-proof the loaf.
- Brush the hot loaf with butter for a softer crust.
- Allow the bread to cool before cutting for cleaner slices.
Variations
For a richer loaf, replace some of the milk with additional whole milk.
For a slightly sweeter breakfast bread, increase the sugar to 1/3 cup.
For a buttery dinner-table loaf, brush the finished bread generously with melted butter and sprinkle the top lightly with salt.
You can also shape the dough into individual rolls instead of one loaf. Reduce the baking time and watch them closely as they become golden.
For Bread Lovers
For anyone who loves fresh bread, this recipe is a wonderful starting point. It is inexpensive, requires ordinary pantry ingredients, and can be adapted for sandwiches, toast, French toast, breakfast bread, or dinner rolls.
There is also something deeply satisfying about slicing into a loaf you made yourself. The crisp sound of the crust, the soft interior, and the aroma of warm butter make homemade bread difficult to resist.
Conclusion
This homemade bread proves that you do not need complicated ingredients or professional equipment to make a delicious loaf. With warm milk, yeast, butter, flour, and a little patience, you can create bread that is soft, fragrant, tender, and wonderfully fresh.
Serve it warm with butter, use it for sandwiches, toast it for breakfast, or simply enjoy a thick slice straight from the loaf.
Once you experience the aroma and texture of freshly baked homemade bread, you may find yourself reaching for this recipe instead of a store-bought loaf again and again.