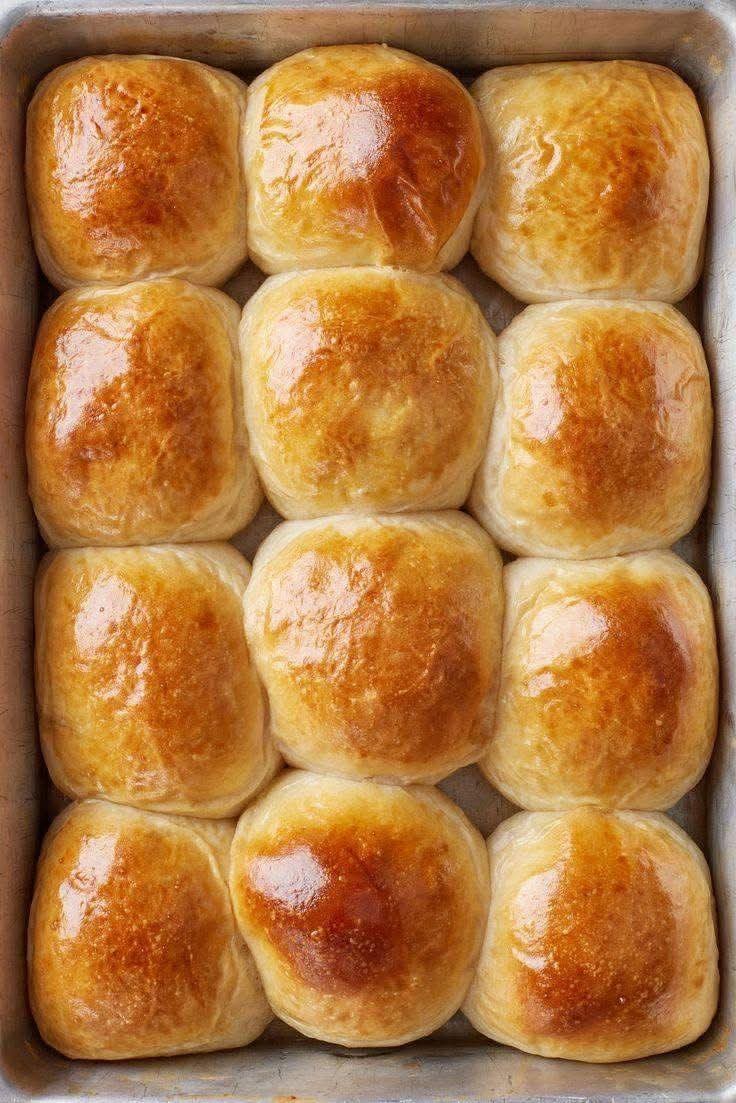
Condensed Milk Bread — Super Soft, Fluffy, and Almost No-Knead
.
Introduction
This condensed milk bread is wonderfully soft, tender, lightly sweet, and rich with a delicate milky flavor. The best part is that it requires very little hands-on work. Instead of spending a long time kneading the dough, you simply mix the ingredients until a sticky, cohesive dough forms, allow it to rise, shape it gently, and bake.
The combination of sweetened condensed milk, butter, and eggs gives this bread a soft, rich crumb and beautiful golden crust. It is delicious while still warm, especially when torn apart and served with butter, jam, honey, or simply enjoyed on its own.
The dough will be softer and stickier than traditional bread dough, and that is exactly what helps create the fluffy finished texture.
Ingredients
For the Bread
- 3 cups all-purpose flour, approximately 375 g
- 1/4 cup granulated sugar
- 1/4 teaspoon salt
- 2 1/4 teaspoons instant yeast
- 1/2 cup warm water, approximately 120 ml
- 1/2 cup sweetened condensed milk, approximately 120 ml
- 1/4 cup unsalted butter, melted, approximately 60 g
- 2 large eggs, preferably at room temperature
For the Top
- 1 tablespoon melted butter, optional
- 1 tablespoon condensed milk, optional, for a sweeter finish
Equipment
- Large mixing bowl
- Wooden spoon or sturdy spatula
- 9 x 5-inch loaf pan
- Kitchen towel or plastic wrap
- Wire cooling rack
Instructions
Step 1: Prepare the Yeast Mixture
Pour the warm water into a large mixing bowl. The water should feel comfortably warm rather than hot.
Add the instant yeast and a small portion of the sugar. Stir briefly and allow the mixture to sit for about 5 minutes.
Instant yeast can generally be mixed directly into the flour, but allowing it to sit briefly gives you an opportunity to make sure the yeast is active.
Step 2: Add the Wet Ingredients
Add the condensed milk, melted butter, and eggs to the yeast mixture.
Whisk or stir until everything is well combined.
Make sure the melted butter is warm rather than very hot. Excessive heat can negatively affect the yeast and may partially cook the eggs.
Step 3: Add the Dry Ingredients
Add the flour, remaining sugar, and salt.
Using a wooden spoon or sturdy spatula, mix everything together until no large patches of dry flour remain.
This should take only about 2 minutes.
Do not add large amounts of extra flour simply because the dough feels sticky. This recipe is designed to produce a soft dough, and too much flour can make the finished bread heavy and dry.
Step 4: Develop the Dough Without Traditional Kneading
Once the dough comes together, continue mixing and folding it with the spoon for another minute or two.
The dough should be thick, soft, elastic, and somewhat sticky.
You are not looking for a firm dough that can immediately be shaped with your hands. The moisture from the eggs, condensed milk, and water contributes to the tenderness of the final bread.
Step 5: First Rise
Cover the bowl tightly with plastic wrap or a clean kitchen towel.
Place it in a warm, draft-free location and allow the dough to rise for approximately 60 to 90 minutes.
The exact time depends on the temperature of your kitchen. The dough should become noticeably larger and ideally close to double in volume.
A warmer environment will speed up fermentation, while a cooler kitchen will require more time.
Step 6: Prepare the Pan
Lightly grease a 9 x 5-inch loaf pan with butter or cooking spray.
You can also line the bottom with parchment paper for easier removal.
Step 7: Shape the Dough
Lightly grease your hands or use a lightly floured work surface.
Gently transfer the risen dough from the bowl.
Avoid aggressively punching it down. Instead, gently press out some of the larger air pockets and shape the dough into a loaf.
Place the dough into the prepared loaf pan with the seam underneath.
If the dough is very sticky, lightly grease your hands rather than adding excessive flour.
Step 8: Second Rise
Cover the loaf loosely and allow it to rise again for approximately 30 to 45 minutes.
The dough should become visibly puffy and rise toward the top of the pan.
Do not let it rise excessively. If it becomes dramatically overinflated, it can collapse during baking.
Step 9: Bake
Preheat your oven to 350°F (175°C).
Place the loaf in the center of the oven and bake for approximately 30 to 38 minutes.
The exact baking time will depend on your oven and the shape of your loaf.
The bread should have a beautiful golden-brown top and should sound somewhat hollow when gently tapped.
If the top is browning too quickly, loosely cover it with aluminum foil during the final portion of baking.
Step 10: Add the Finishing Touch
As soon as the bread comes out of the oven, brush the top with melted butter.
For an especially rich and sweet finish, you can mix a small amount of condensed milk with melted butter and lightly brush it over the warm crust.
This creates a soft, glossy, milky finish.
Step 11: Cool
Allow the bread to remain in the pan for approximately 5 to 10 minutes.
Carefully remove it and transfer it to a wire rack.
Let it cool for at least 20 to 30 minutes before slicing.
Although the bread is tempting when hot, allowing it to cool slightly gives the interior time to finish setting and makes slicing easier.
The Method Behind This Bread
The defining feature of this recipe is the minimal mixing and kneading.
Traditional bread recipes often rely on extended kneading to develop gluten. Here, the combination of hydration, resting time, and gentle mixing allows the flour to hydrate and the gluten structure to develop gradually during fermentation.
The eggs add richness and structure, while butter contributes tenderness. Sweetened condensed milk provides sugar, milk solids, sweetness, and richness, giving the bread its characteristic soft texture and milky flavor.
Because the dough is relatively soft, it is important not to compensate by adding excessive flour. A sticky dough can feel difficult to handle, but that softness is one of the reasons the finished loaf is so tender.
Important Tips for Perfect Bread
Use the Correct Water Temperature
Water that is too hot can damage the yeast. Aim for comfortably warm water.
Measure Flour Carefully
Too much flour is one of the most common reasons homemade bread becomes dense or dry. If possible, weigh the flour for the most consistent results.
Do Not Over-Flour the Dough
The dough should remain soft and slightly sticky. Use lightly greased hands when shaping instead of continuously adding flour.
Give the Dough Enough Time
Bread dough does not always rise according to an exact clock. Temperature, humidity, yeast activity, and flour can all affect fermentation.
Look at the dough rather than relying only on the timer.
Do Not Overbake
Overbaking removes moisture and can turn a soft loaf into a dry one. Once the bread is properly golden and baked through, remove it from the oven.
Let It Cool Before Cutting
Cutting extremely hot bread can compress the delicate crumb. A short cooling period helps preserve its fluffy texture.
Serving Suggestions
This condensed milk bread is wonderful served warm with:
- Soft butter
- Strawberry or raspberry jam
- Honey
- Peanut butter
- Chocolate spread
- Cream cheese
- Fruit preserves
- A light dusting of powdered sugar
It also makes excellent toast the following day.
For breakfast, serve thick slices alongside coffee, tea, or hot chocolate. For an afternoon treat, toast the bread lightly and spread it with butter and condensed milk.
Storage
Once completely cooled, store the bread in an airtight container or tightly wrapped at room temperature for up to 2 to 3 days.
For longer storage, wrap the loaf well and freeze it.
Individual slices can also be wrapped separately and frozen, making it easy to remove only what you need.
Allow frozen slices to thaw at room temperature or warm them gently before serving.
A Little History and Tradition
Sweet, enriched breads have a long history in many parts of the world. Unlike simple lean breads made primarily from flour, water, yeast, and salt, enriched breads incorporate ingredients such as eggs, butter, milk, and sugar.
These additions produce a softer crumb, richer flavor, and more tender texture.
Sweetened condensed milk became especially useful in baking because it provides both dairy richness and concentrated sweetness in a convenient ingredient. Over time, home bakers incorporated it into cakes, buns, rolls, and breads.
This style of soft milk bread reflects the broader tradition of enriched homemade breads: simple ingredients transformed through fermentation into something warm, fragrant, and comforting.
Why Bakers Love This Recipe
The appeal of this bread is its simplicity.
There is no complicated kneading technique, no need for specialized equipment, and no requirement to spend a long time working the dough.
You mix the ingredients, let fermentation do much of the work, shape the dough gently, and bake.
The result is a loaf with a soft interior, delicate sweetness, buttery richness, and a wonderfully tender crumb.
Conclusion
Condensed milk bread is proof that homemade bread does not have to be complicated. With just a few basic ingredients, a short mixing process, and enough time for the dough to rise, you can create a beautiful loaf that is soft, fluffy, rich, and deeply satisfying.
The most important lessons are to keep the dough soft, avoid adding unnecessary flour, give it sufficient rising time, and watch the bread carefully during baking.
Once you pull that golden loaf from the oven and brush the warm crust with butter, the aroma alone will make the effort worthwhile. Tear off a warm piece, spread it with butter or jam, and enjoy the simple pleasure of freshly baked homemade bread.