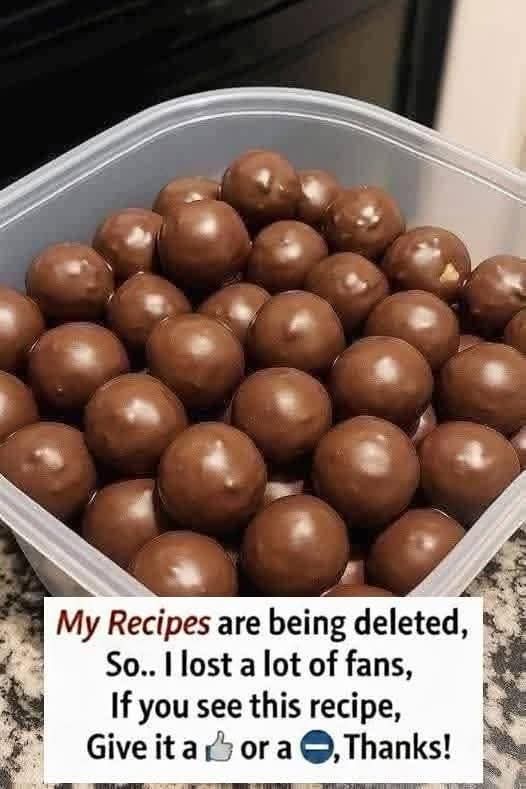
No-Bake Chocolate Peanut Butter Balls
Introduction
If you love the classic combination of chocolate and peanut butter, these No-Bake Chocolate Peanut Butter Balls are an easy treat to keep in your recipe collection. They require only three simple ingredients, involve no oven, and come together with minimal preparation.
The result is a creamy, rich, satisfying bite with the unmistakable flavor of peanut butter and chocolate. They are especially convenient when you want a quick dessert without making an entire cake or batch of cookies.
Ingredients
Main Ingredients
- 1 cup creamy peanut butter
- 1 cup chocolate chips, preferably sugar-free or your preferred variety
- 1 cup crushed or finely ground crisp cereal, such as unsweetened cereal or a low-calorie crisp cereal
Optional Ingredients
The recipe is designed around three ingredients, but you can customize the finished balls if desired.
- A small pinch of salt, especially if using unsalted peanut butter
- Unsweetened cocoa powder for dusting
- Finely chopped peanuts for coating
- Shredded coconut for coating
If you are following a specific points-based plan, check the nutrition and serving information for the exact brands you use, because points can vary considerably between products.
Instructions
Step 1: Prepare the Peanut Butter
Place the peanut butter in a medium mixing bowl. If the peanut butter is very thick, warm it gently for a few seconds in the microwave or over a double boiler.
Do not make it hot. You simply want it soft enough to mix easily.
Step 2: Add the Crisp Ingredient
Add the finely crushed cereal to the peanut butter. Stir thoroughly until the mixture is evenly combined.
The mixture should be thick enough to hold together when pressed between your fingers. If it seems too soft, allow it to rest for a few minutes so the cereal can absorb some of the moisture.
Step 3: Form the Balls
Using a small cookie scoop or approximately one tablespoon of mixture at a time, portion out the mixture.
Roll each portion gently between your palms to form a smooth ball.
Place the finished balls on a parchment-lined plate or baking sheet.
Step 4: Prepare the Chocolate
Melt the chocolate chips gently in the microwave in short intervals, stirring between each interval.
Alternatively, place the chocolate in a heatproof bowl over a saucepan containing a small amount of gently simmering water.
Stir until smooth and completely melted.
Step 5: Coat the Peanut Butter Balls
Dip each peanut butter ball into the melted chocolate. Use a fork to lift it out, allowing excess chocolate to drip back into the bowl.
Return each coated ball to the parchment.
For a lighter chocolate coating, drizzle the chocolate over the balls instead of completely covering them.
Step 6: Chill
Place the chocolate-covered peanut butter balls in the refrigerator for approximately 30 to 60 minutes, or until the chocolate has completely set.
Once firm, they are ready to serve.
Method
The key to making these successfully is controlling the consistency of the peanut butter mixture.
If the mixture is too loose, add a little more crushed cereal. If it is too dry, add a small amount of peanut butter.
For the smoothest chocolate coating, melt the chocolate slowly and avoid introducing water into it. Even a small amount of water can cause melted chocolate to become thick and grainy.
For evenly sized portions, use a small cookie scoop. Consistent portions make the recipe easier to serve and help you keep track of the nutritional value per piece.
Formation and Texture
The formation of these treats is wonderfully simple. The peanut butter provides richness and helps bind the mixture, while the crisp ingredient gives the center structure and a pleasant texture.
Once the balls are formed, the chocolate creates a firm outer shell around the soft peanut butter center.
After refrigeration, the finished treats should be firm on the outside while remaining creamy and satisfying inside.
A Little History
Chocolate and peanut butter have been one of America’s most recognizable dessert combinations for generations. Peanut butter became increasingly popular in American households during the late nineteenth and early twentieth centuries, while chocolate confectionery developed into a major industry during the same period.
The combination eventually became a favorite in candies, cookies, cakes, pies, bars, and homemade treats.
No-bake peanut butter balls became particularly popular because they are inexpensive, require very little equipment, and can be prepared without heating the kitchen. Variations have appeared in family cookbooks, holiday collections, community cookbooks, and home kitchens for decades.
Tips for the Best Results
Use Creamy Peanut Butter
Creamy peanut butter produces the smoothest texture and makes the mixture easier to roll.
Do Not Overheat the Chocolate
Chocolate should be melted gently. Heating it too aggressively can cause it to seize or become thick.
Chill Before Serving
Refrigeration gives the balls a firmer texture and allows the chocolate coating to set properly.
Make Them Ahead
These treats are excellent for preparing ahead of time. Store them in an airtight container in the refrigerator.
Make Smaller Portions
For a bite-sized dessert, make smaller balls rather than large ones. This also makes them easier to serve at parties and gatherings.
Storage
Store the finished chocolate peanut butter balls in an airtight container in the refrigerator for up to one week, depending on the freshness of your ingredients.
They can also be frozen in a freezer-safe container. Separate layers with parchment paper so the chocolate-covered balls do not stick together.
Allow frozen treats to sit in the refrigerator or at room temperature for a short time before serving.
Serving Ideas
These little treats are perfect alongside coffee, tea, or a glass of cold milk.
They can also be arranged on a dessert platter with fresh berries, sliced fruit, or other small homemade treats.
For holidays, you can vary the coating or decoration while keeping the basic three-ingredient concept intact.
For Peanut Butter Lovers
This recipe is especially appealing to peanut butter lovers because the peanut butter flavor remains at the center of every bite.
The chocolate adds richness without overpowering the nutty filling, creating the familiar sweet-and-salty combination that makes chocolate and peanut butter such a timeless pairing.
If you prefer a stronger peanut butter flavor, choose a natural peanut butter with a pronounced roasted-peanut taste. If you prefer a sweeter candy-like center, use a conventional creamy peanut butter.
Conclusion
No-Bake Chocolate Peanut Butter Balls prove that a satisfying homemade dessert does not have to be complicated. With a simple peanut butter center, a crisp element for structure, and a smooth chocolate coating, you can create a delicious treat without turning on the oven.
They are quick enough for an everyday craving, attractive enough for a party platter, and simple enough for beginners to make successfully.
If chocolate and peanut butter are among your favorite combinations, this is definitely a recipe worth keeping.
And if you love easy homemade treats, simply say “Yum” for this one.