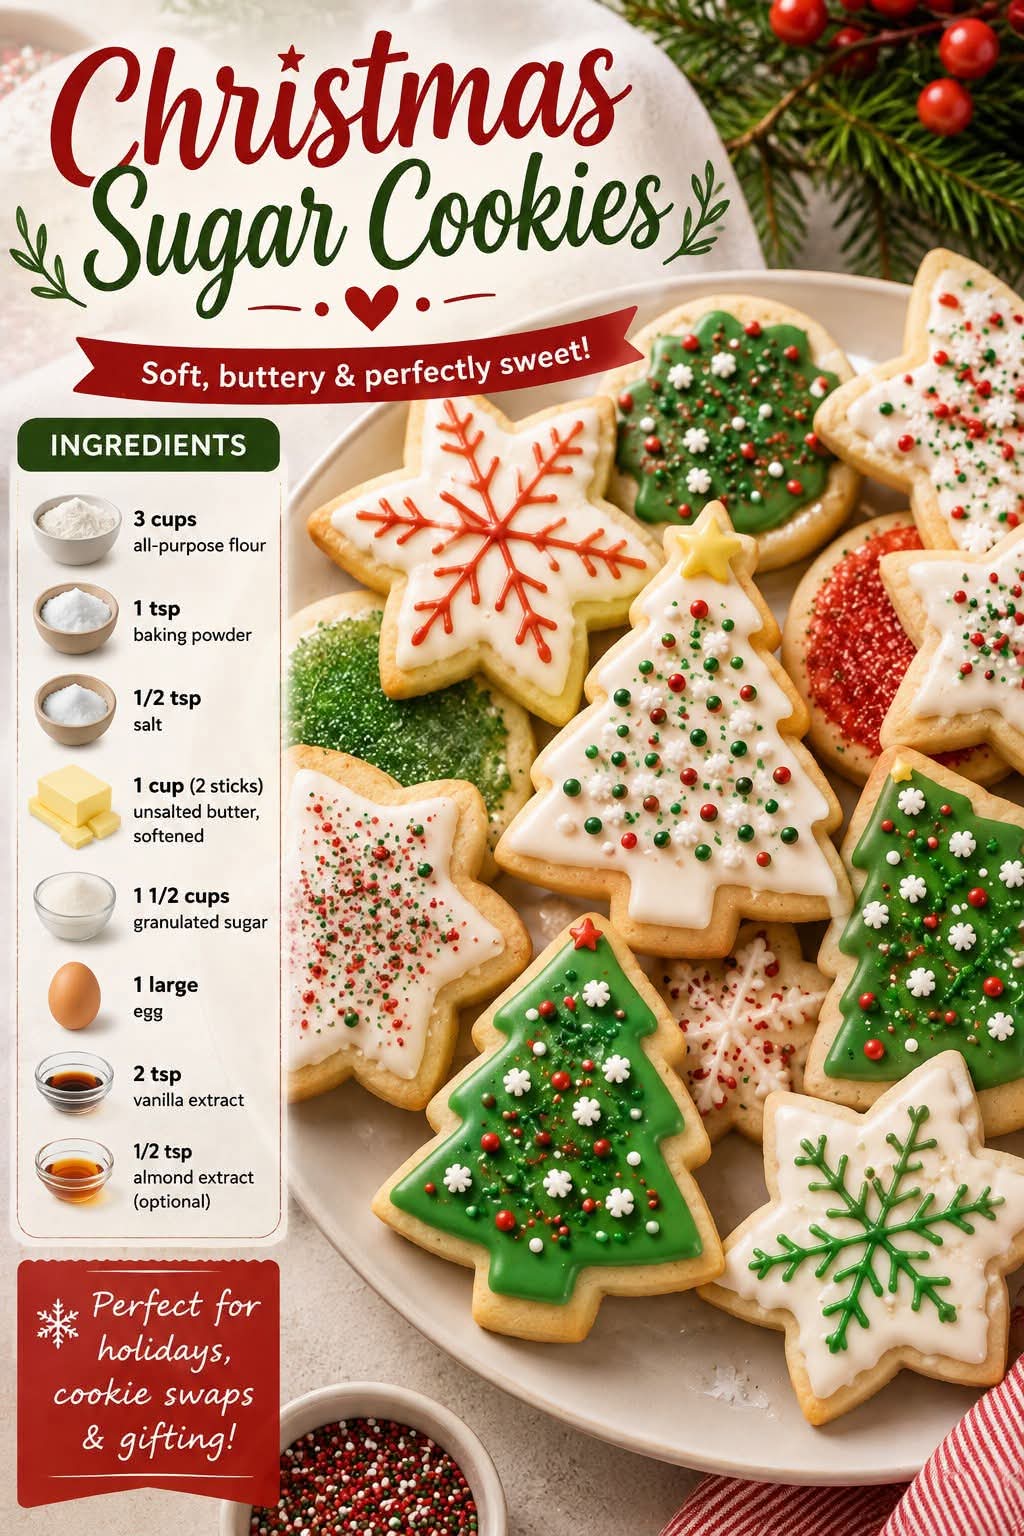
🎄 Classic Christmas Sugar Cookies 🎄
Soft, Buttery, Sweet & Beautifully Decorated Holiday Cookies
❤️ Introduction
There is something magical about homemade Christmas sugar cookies. The smell of butter and vanilla filling the kitchen, colorful sprinkles scattered across the counter, and trays of freshly decorated cookies waiting to be shared all make the holiday season feel extra special.
These Christmas Sugar Cookies are soft in the center, lightly crisp around the edges, buttery, sweet, and full of delicious vanilla flavor. They are perfect for cutting into Christmas trees, stars, snowflakes, candy canes, gingerbread people, or any festive shape you love.
They make wonderful treats for Christmas parties, cookie exchanges, school celebrations, holiday dessert tables, homemade gifts, and cozy family baking days.
🍪 Ingredients
For the Sugar Cookies
- 1 cup (226 g) unsalted butter, softened
- 1 cup (200 g) granulated sugar
- 1 large egg, room temperature
- 2 teaspoons pure vanilla extract
- ¼ teaspoon almond extract, optional
- 2¾ cups (345 g) all-purpose flour
- 1 teaspoon baking powder
- ½ teaspoon salt
For the Royal Icing
- 4 cups (480 g) powdered sugar, sifted
- 3 tablespoons meringue powder
- 5–6 tablespoons warm water
- 1 teaspoon vanilla extract
- 1–2 teaspoons lemon juice, optional
For Decorating
- Red, green, white, and gold food coloring
- Christmas sprinkles
- Red and green sanding sugar
- Mini candy pearls
- Edible glitter, optional
- Assorted Christmas sprinkles
- Small candies for decoration, optional
🎄 Equipment
- Large mixing bowl
- Electric mixer
- Measuring cups and spoons
- Rolling pin
- Parchment paper
- Cookie cutters
- Baking sheets
- Cooling rack
- Piping bags or small decorating bottles
- Small bowls for icing colors
🧈 Method 1: Preparing the Cookie Dough
Step 1 — Cream the Butter and Sugar
Place the softened butter and granulated sugar into a large mixing bowl.
Beat for about 2–3 minutes, until the mixture becomes pale, light, and fluffy.
Do not rush this step. Properly creamed butter and sugar help create a tender, flavorful cookie.
Step 2 — Add the Egg and Flavoring
Add the egg and beat until completely incorporated.
Mix in the vanilla extract and almond extract if using.
The mixture should look smooth and creamy.
Step 3 — Combine the Dry Ingredients
In another bowl, whisk together:
- Flour
- Baking powder
- Salt
Gradually add the dry ingredients to the butter mixture.
Mix on low speed just until a soft dough forms.
Do not overmix. Overworking the dough can make the cookies tougher instead of soft and tender.
❄️ Method 2: Chilling the Dough
Divide the dough into two portions.
Flatten each portion into a disk and wrap it tightly in plastic wrap.
Refrigerate for approximately 30–60 minutes.
Chilling is important because it makes the dough easier to roll and helps the cookies maintain their beautiful shapes during baking.
⭐ Method 3: Rolling and Forming the Cookies
Preheat the oven to 350°F (175°C).
Line baking sheets with parchment paper.
Lightly flour your work surface and rolling pin.
Roll the chilled dough to approximately ¼ inch (6 mm) thick.
For softer cookies, avoid rolling the dough too thin.
Now comes the fun part!
Use Christmas cookie cutters to cut the dough into shapes such as:
🎄 Christmas trees
⭐ Stars
❄️ Snowflakes
❤️ Hearts
🍭 Candy canes
⛄ Snowmen
🎅 Santa shapes
🔔 Bells
Carefully transfer the cookies to the prepared baking sheets, leaving a little space between them.
If the dough becomes too soft while working, place it back in the refrigerator for a few minutes.
🔥 Method 4: Baking
Bake the cookies for approximately 8–11 minutes, depending on their size and thickness.
The cookies should look set and the edges should be just beginning to turn lightly golden.
Do not overbake them if you want a soft, tender center.
Remove the baking sheet from the oven and allow the cookies to cool for about 5 minutes.
Then transfer them to a wire rack and allow them to cool completely.
Important: The cookies must be completely cool before decorating.
🎨 Method 5: Making the Royal Icing
Place powdered sugar and meringue powder into a mixing bowl.
Add 5 tablespoons of warm water and the vanilla extract.
Beat until smooth and glossy.
If the icing is too thick, add water ½ teaspoon at a time.
If it becomes too thin, add a little more powdered sugar.
The perfect consistency depends on how you want to decorate your cookies.
For outlining:
Use a slightly thicker icing.
For flooding:
Thin the icing slightly so it spreads smoothly inside the outline.
🌈 Method 6: Coloring the Icing
Divide the icing between several small bowls.
Create festive Christmas colors such as:
- ❤️ Red
- 💚 Green
- 🤍 White
- 💛 Gold
- 💙 Light blue
- 🩷 Pink
Cover the bowls while you’re working so the icing doesn’t dry out.
Transfer the icing into piping bags or decorating bottles.
🎄 Method 7: Decorating the Christmas Cookies
Begin by outlining each cookie with royal icing.
For example, outline a Christmas tree in green.
Allow the outline to sit for a few minutes, then fill the center with thinner green icing.
Use a toothpick to gently spread the icing into the corners.
Add decorations while the icing is still wet:
✨ Sprinkles
✨ Sugar pearls
✨ Edible glitter
✨ Small candy pieces
✨ Colored sugar
For snowflakes, white icing with silver or white sprinkles creates a beautiful winter effect.
For Christmas trees, use green icing and decorate them with colorful sprinkles as ornaments.
For Santa cookies, use red, white, and black icing.
❤️ Method 8: Letting the Cookies Set
Once decorated, place the cookies on a flat surface.
Allow the icing to dry completely.
Depending on the thickness of the icing and the humidity, this may take several hours or overnight.
Do not stack the cookies until the icing has completely hardened.
🎁 Packaging for Gifts
Once completely dry, place the cookies into:
- Clear cellophane bags
- Christmas cookie tins
- Small gift boxes
- Decorative holiday containers
Tie each package with a festive ribbon.
A homemade assortment of Christmas sugar cookies makes a beautiful and inexpensive holiday gift.
📜 A Little History of Sugar Cookies
Sugar cookies have a long history in European and American baking traditions.
Early versions of sweet butter cookies were made with simple ingredients such as flour, butter, sugar, and eggs. As baking traditions developed, cookies became associated with holidays, celebrations, and special occasions.
Decorated Christmas cookies became especially popular as families began using festive cookie cutters and colorful icing to create recognizable holiday shapes.
Over generations, Christmas sugar cookies became more than just a dessert. They became part of the holiday experience—something families could make together, decorate together, and give to friends and loved ones.
Today, decorated sugar cookies remain one of the most popular Christmas baking traditions.
🎄 The Formation of the Perfect Sugar Cookie
The secret to a beautiful Christmas sugar cookie is balance.
Butter
Butter provides richness, tenderness, and that classic buttery flavor.
Sugar
Sugar adds sweetness and contributes to the cookie’s delicate texture.
Egg
The egg helps bind the ingredients together and gives the cookies structure.
Flour
Flour provides the framework that allows the cookies to hold their Christmas shapes.
Baking Powder
A small amount of baking powder gives the cookies a gentle lift without making them too puffy.
Chilling
Chilling prevents the butter from melting too quickly in the oven and helps the cookies maintain their shapes.
Gentle Baking
Baking just until the cookies are set helps preserve their soft, tender texture.
💡 Tips for Perfect Christmas Sugar Cookies
1. Use softened butter
The butter should be soft enough to mix easily but not melted.
2. Don’t overmix
Once the flour is incorporated, stop mixing.
3. Chill when necessary
If the dough becomes sticky or difficult to handle, refrigerate it.
4. Keep the thickness consistent
Roll all cookies to approximately the same thickness so they bake evenly.
5. Don’t overbake
For soft cookies, remove them when the centers are set and the edges are only lightly golden.
6. Cool completely before decorating
Warm cookies can cause royal icing to melt or spread.
7. Let decorated cookies dry
Give the icing plenty of time to harden before packaging.
❤️ Storage
Store completely cooled and decorated cookies in an airtight container.
Place parchment paper between layers if necessary.
They can generally be kept at room temperature for several days while maintaining their best texture and flavor.
For longer storage, the baked, undecorated cookies can also be frozen in an airtight container.
🎅 Make Them Extra Special
For an unforgettable Christmas cookie platter, make several different designs from the same dough.
Create:
🎄 Green Christmas trees
⭐ Golden stars
❄️ White snowflakes
❤️ Red hearts
⛄ Snowmen
🎅 Santa cookies
🔔 Christmas bells
🍭 Candy canes
Arrange them on a large festive platter and add a few candy canes or wrapped chocolates around the cookies.
It becomes a beautiful centerpiece for your holiday table.
👩🍳 For Christmas Cookie Lovers
These cookies are especially wonderful for people who love traditional holiday baking.
They are simple enough for beginners but fun enough for experienced bakers who enjoy decorating.
Children can help cut the shapes, sprinkle decorations, and create their own colorful designs. Every cookie can be different, which makes the activity even more enjoyable.
The best part is that these cookies aren’t just about eating—they’re about creating Christmas memories together.
❤️ Serving Ideas
Serve your Christmas sugar cookies with:
- Hot chocolate
- Coffee
- Tea
- Warm milk
- Eggnog
- Vanilla ice cream
- Whipped cream
They also make a beautiful addition to:
🎄 Christmas dessert tables
🎁 Cookie exchanges
🎅 Santa’s cookie plate
❤️ Family gatherings
🎉 Holiday parties
🎁 Homemade gift baskets
🎄 Conclusion
These Classic Christmas Sugar Cookies are soft, buttery, sweet, festive, and wonderfully customizable.
From mixing the dough to cutting out the shapes and decorating every cookie with colorful icing, the entire process is part of the holiday fun.
Whether you’re making them with children, preparing a tray for a Christmas party, exchanging cookies with friends, or packaging them as gifts, these cookies are sure to bring smiles.
And perhaps the sweetest part is this: every batch has the opportunity to become a holiday memory.
So turn on your favorite Christmas music, gather your cookie cutters, prepare your colorful icing, and enjoy a little homemade holiday magic. 🎄🍪❤️
🎅 Happy Christmas Baking!
Soft cookies, sweet icing, colorful decorations, and lots of love—that’s what makes a Christmas cookie truly special.