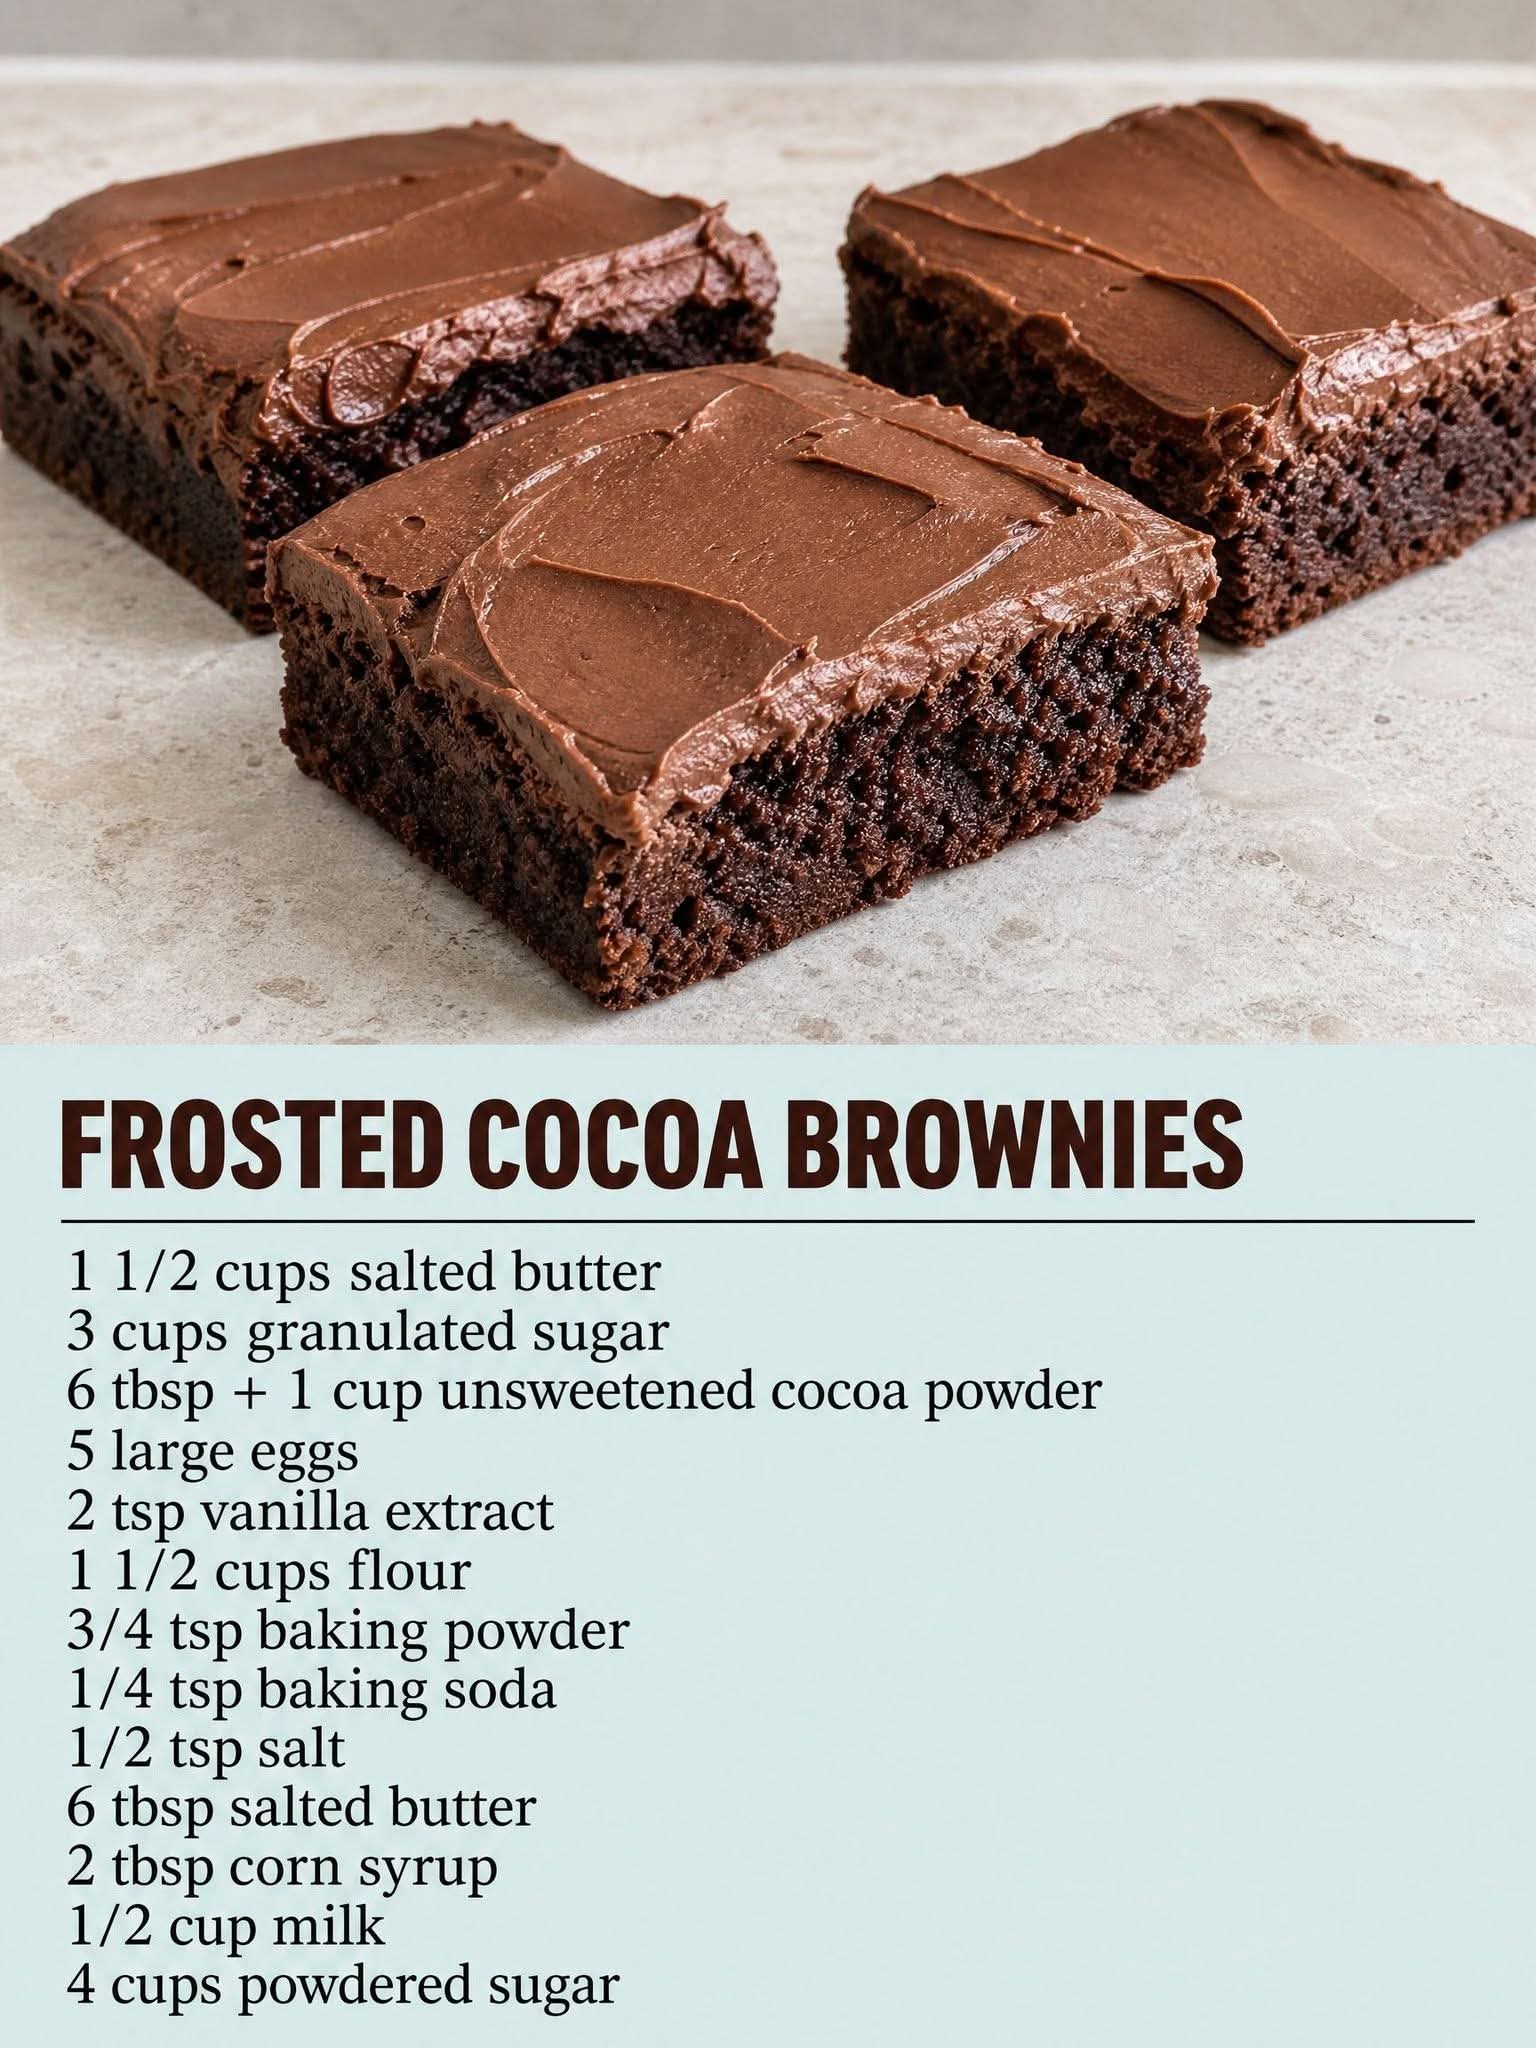
🍫🤎 FROSTED COCOA BROWNIES
Rich, Fudgy, Chocolatey Brownies with a Silky Cocoa Frosting
❤️ Introduction
There are few homemade desserts as comforting and irresistible as a pan of freshly baked chocolate brownies. These Frosted Cocoa Brownies take that classic chocolate treat to another level with a rich, buttery brownie base and a smooth, creamy cocoa frosting spread generously over the top.
The brownie itself is deeply chocolatey without needing melted chocolate—the unsweetened cocoa powder provides plenty of rich cocoa flavor. The generous amount of butter keeps the brownies tender, while the combination of sugar and eggs creates that wonderful chewy, soft texture.
Then comes the frosting. It is smooth, sweet, chocolaty, and beautifully spreadable. Once it settles over the cooled brownies, every bite delivers two layers of chocolate goodness.
These brownies are perfect for family gatherings, bake sales, holidays, afternoon treats, lunchbox desserts, birthdays, or simply whenever a serious chocolate craving appears. 🍫✨
🍫 Recipe at a Glance
Recipe: Frosted Cocoa Brownies
Cuisine: American-inspired baking
Category: Dessert / Brownies
Preparation time: About 20 minutes
Baking time: About 25–35 minutes
Cooling time: About 1 hour
Difficulty: Easy to moderate
Yield: Approximately 24 brownies, depending on how they are cut
🧈 INGREDIENTS
🍫 For the Brownie Mixture
- 1½ cups salted butter, melted
- 3 cups granulated sugar
- 6 tablespoons unsweetened cocoa powder
- 5 large eggs
- 2 teaspoons vanilla extract
- 1½ cups all-purpose flour
- ¾ teaspoon baking powder
- ¼ teaspoon baking soda
- ½ teaspoon salt
🍫 For the Chocolate Frosting
- 6 tablespoons salted butter
- 1 cup unsweetened cocoa powder
- 2 tablespoons corn syrup
- ½ cup milk
- 4 cups powdered sugar
🥣 EQUIPMENT
You will need:
- Large mixing bowl
- Medium saucepan
- Whisk
- Wooden spoon or rubber spatula
- Measuring cups and spoons
- 9×13-inch baking pan
- Parchment paper, optional
- Wire cooling rack
- Small saucepan for frosting
- Offset spatula or regular spatula
- Sharp knife for cutting
🔥 STEP 1: PREPARE THE OVEN AND PAN
Preheat your oven to 350°F (175°C).
Grease a 9×13-inch baking pan thoroughly with butter or nonstick cooking spray.
For easier removal, you can also line the pan with parchment paper, leaving a little paper hanging over two sides. This creates handles that make it easier to lift the cooled brownies from the pan.
Set the prepared pan aside.
🍫 STEP 2: MELT THE BUTTER
Place the 1½ cups salted butter in a saucepan and melt it gently over low to medium heat.
You do not need to boil the butter. Simply melt it until completely liquid.
Remove the saucepan from the heat.
Allow the butter to cool for a few minutes so it is warm rather than extremely hot.
💡 Why this matters
Very hot butter can partially cook the eggs when they are added later. Letting it cool slightly helps create a smooth brownie batter.
🍬 STEP 3: ADD THE SUGAR AND COCOA
Pour the melted butter into a large mixing bowl.
Add:
- 3 cups granulated sugar
- 6 tablespoons unsweetened cocoa powder
Whisk everything together until the butter, sugar, and cocoa are well combined.
The mixture may look thick and glossy. That’s exactly what you want.
The cocoa should be evenly distributed without large dry pockets remaining.
🥚 STEP 4: ADD THE EGGS AND VANILLA
Add the 5 large eggs, one at a time.
Whisk or beat well after each addition.
Then add:
2 teaspoons vanilla extract.
Mix until the batter becomes smooth, glossy, and well incorporated.
❤️ The secret to good brownies
Don’t rush this stage. Properly incorporating the eggs helps create brownies that are rich and cohesive rather than crumbly.
🌾 STEP 5: PREPARE THE DRY INGREDIENTS
In a separate bowl, combine:
- 1½ cups all-purpose flour
- ¾ teaspoon baking powder
- ¼ teaspoon baking soda
- ½ teaspoon salt
Whisk the dry ingredients together.
This distributes the baking powder, baking soda, and salt evenly throughout the flour.
🥄 STEP 6: COMBINE THE BATTERS
Gradually add the dry ingredients to the chocolate mixture.
Using a rubber spatula or wooden spoon, gently fold everything together.
Mix only until you no longer see streaks of dry flour.
⚠️ Do not overmix!
Overmixing can develop too much gluten in the flour and make the brownies more cake-like or tough.
For soft, tender brownies, stop mixing as soon as the flour disappears.
🍫 STEP 7: FORM THE BROWNIE BATTER IN THE PAN
Pour the finished brownie batter into your prepared 9×13-inch baking pan.
Use a spatula to spread the batter evenly into the corners.
Gently smooth the surface.
If necessary, lightly tap the pan on the countertop once or twice to remove large air pockets.
🔥 STEP 8: BAKE
Place the pan in the preheated 350°F (175°C) oven.
Bake until the center is set and the brownies look cooked around the edges.
A typical baking time is approximately 25–35 minutes, but ovens vary.
Begin checking toward the earlier end of the baking range.
How to tell when they’re ready:
- The edges should look set.
- The center should no longer look liquid.
- The top should appear slightly glossy or crackled.
- A toothpick inserted near the center should come out with a few moist crumbs rather than completely wet batter.
🍫 Important:
Do not wait until the toothpick comes out completely clean if you want soft brownies. A completely clean toothpick can mean the brownies have been overbaked.
❄️ STEP 9: COOL COMPLETELY
Remove the brownies from the oven.
Place the pan on a cooling rack.
Allow the brownies to cool completely before frosting.
This is an important step.
If you spread frosting over hot brownies, the buttercream-style cocoa frosting can melt and become thin or greasy.
For beautifully layered brownies, patience is your friend. ❤️
🍫 CHOCOLATE FROSTING
While the brownies cool, prepare the chocolate frosting.
STEP 10: MELT THE BUTTER
Place 6 tablespoons salted butter in a saucepan.
Melt gently over low heat.
Once melted, remove from the heat.
🍫 STEP 11: ADD THE COCOA
Add:
1 cup unsweetened cocoa powder.
Stir until the cocoa is completely incorporated into the melted butter.
The mixture should become thick, dark, and intensely chocolatey.
🌽 STEP 12: ADD CORN SYRUP AND MILK
Stir in:
- 2 tablespoons corn syrup
- ½ cup milk
Mix until smooth.
The corn syrup helps give the frosting a glossy, smooth consistency and helps keep it spreadable.
🍬 STEP 13: ADD THE POWDERED SUGAR
Gradually add the 4 cups powdered sugar.
Add it a little at a time rather than dumping everything in at once.
Stir or beat continuously as you add the sugar.
Continue mixing until the frosting becomes smooth, creamy, and spreadable.
Adjusting the consistency
If the frosting is:
Too thick:
Add a small splash of milk, about 1 teaspoon at a time.
Too thin:
Add a little more powdered sugar.
The goal is a frosting that spreads easily without running off the brownies.
🎂 STEP 14: FROST THE BROWNIES
Make absolutely sure the brownies are completely cool.
Pour or spoon the chocolate frosting over the brownie surface.
Using an offset spatula, gently spread the frosting from the center toward the edges.
Create a smooth finish, or make decorative swirls with the back of the spatula.
For an extra beautiful presentation, allow the frosting to sit for several minutes before cutting.
🔪 STEP 15: CUT INTO SQUARES
For cleaner brownie squares, allow the frosting to set slightly.
Use a sharp knife.
For bakery-style cuts:
- Wipe the knife clean.
- Cut straight down.
- Wipe the knife again.
- Repeat for every cut.
You can cut the pan into 24 smaller squares for parties or bake sales, or into 12 larger brownies for generous dessert portions.
🍫 THE FORMATION OF THE PERFECT BROWNIE
The beauty of these brownies comes from the way each ingredient contributes to the final texture.
🧈 Butter
Provides richness, tenderness, and a luxurious mouthfeel.
🍬 Sugar
Adds sweetness while helping create a moist and chewy texture.
🍫 Cocoa powder
Provides the deep chocolate flavor and dark color.
🥚 Eggs
Bind the ingredients together and help create structure and richness.
🌾 Flour
Provides the structure needed for the brownies to hold their shape.
🧁 Baking powder and baking soda
Give the brownies a little lift, keeping them from becoming overly dense.
❤️ Vanilla
Enhances the chocolate flavor and adds warmth and aroma.
🍬 Powdered sugar
Creates the smooth, sweet structure of the frosting.
🌽 Corn syrup
Helps make the frosting smooth, glossy, and easy to spread.
📜 A LITTLE HISTORY OF BROWNIES
Brownies are one of America’s most beloved chocolate desserts.
The exact origin of the brownie is debated, but chocolate brownie recipes began appearing in American cookbooks around the end of the 19th century and became increasingly popular during the early 20th century.
Unlike traditional chocolate cake, brownies are generally baked in a shallow pan and cut into squares or rectangles. Their texture can range from dense and fudgy to light and cakey.
The addition of cocoa powder became a popular way to create rich chocolate flavor without using melted chocolate.
Frosted brownies eventually became another beloved variation, adding a second layer of chocolate sweetness and creating a dessert that looks just as indulgent as it tastes.
Today, brownies are enjoyed around the world, with countless variations including nuts, caramel, chocolate chips, peanut butter, cream cheese, marshmallows, and different frostings.
❤️ TIPS FOR THE BEST FROSTED COCOA BROWNIES
1. Use good-quality cocoa powder
Since cocoa is the main chocolate flavor, a good unsweetened cocoa powder makes a noticeable difference.
2. Don’t overbake
This is one of the most important rules for delicious brownies.
3. Let them cool
Cooling allows the interior to finish setting and makes cutting much easier.
4. Don’t frost warm brownies
Warm brownies can melt the frosting.
5. Mix the flour gently
Stop mixing once the dry ingredients disappear.
6. Make the frosting while the brownies cool
This saves time, but allow the frosting to cool slightly if it becomes too warm or runny.
7. Chill for cleaner cuts
For especially neat squares, place the frosted brownies in the refrigerator for 20–30 minutes before slicing.
🌰 OPTIONAL DELICIOUS ADDITIONS
If you want to make these brownies even more special, consider adding:
- 1 cup chopped walnuts
- 1 cup chopped pecans
- 1 cup semi-sweet chocolate chips
- ½ cup mini chocolate chips
- A pinch of espresso powder
- A drizzle of melted chocolate
- Toasted nuts on top
- Chocolate shavings
- A light dusting of cocoa powder
For a celebration version, you can add colorful sprinkles immediately after frosting.
🍓 SERVING IDEAS
These brownies are delicious on their own, but they become an incredible dessert when served with:
🍦 Brownie Sundae
Serve a warm brownie with a scoop of vanilla ice cream and chocolate sauce.
🍓 Strawberry Chocolate Brownie
Add fresh sliced strawberries and whipped cream.
🍌 Banana Brownie Dessert
Serve with banana slices, whipped cream, and chocolate syrup.
☕ Coffee & Brownie
Pair a square with coffee, espresso, cappuccino, or tea.
🎉 Party Brownies
Cut into small bite-sized squares and arrange them on a dessert platter.
💕 FOR THE LOVERS OF CHOCOLATE
If you are a true chocolate lover, this recipe is made for you.
Imagine biting through the smooth chocolate frosting and reaching the soft, buttery cocoa brownie underneath. The frosting adds sweetness and richness while the brownie provides that deep cocoa flavor that keeps you reaching for another piece.
For the ultimate chocolate experience, serve a brownie slightly warm with vanilla ice cream.
The contrast between the warm brownie, cool ice cream, and creamy chocolate frosting is absolutely irresistible. 🍫🍦❤️
🧁 STORAGE
Store the frosted brownies in an airtight container.
They can be kept at room temperature for a short period if your kitchen is cool, or refrigerated for longer storage.
For the best texture, allow refrigerated brownies to sit at room temperature for a little while before serving.
You can also freeze the brownies.
For freezing, cut them into individual squares, wrap them well, and place them in a freezer-safe container. Thaw before serving.
🎀 BEAUTIFUL PRESENTATION
For a bakery-style presentation, arrange the brownies on a white or dark serving platter.
Decorate with:
- Chocolate curls
- Cocoa powder
- Chopped nuts
- Chocolate drizzle
- Fresh strawberries
- Powdered sugar
- Small chocolate candies
A simple square brownie can easily become an elegant dessert.
❤️ CONCLUSION
These Frosted Cocoa Brownies are everything a homemade chocolate dessert should be: rich, buttery, soft, chocolatey, sweet, and wonderfully satisfying.
The brownie layer provides a tender cocoa center, while the creamy chocolate frosting creates a luscious finish that makes every bite extra special.
Whether you’re baking for your family, preparing treats for a celebration, making something for a bake sale, or simply craving a homemade chocolate dessert, this recipe is a wonderful choice.
Bake a pan, let it cool, spread on that beautiful chocolate frosting, cut it into generous squares, and prepare to watch them disappear.
🍫❤️ One brownie is never enough!
Enjoy every chocolate-filled bite! 🤎🍫✨