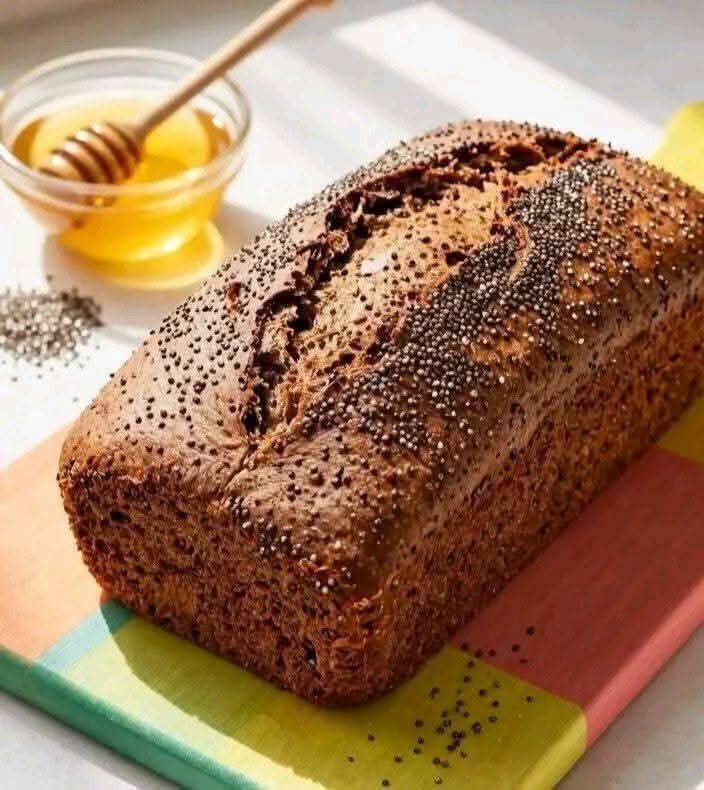
🍯🌾 Honey & Chia Seed Bread 🍞✨
A Wholesome, Soft & Delicious Homemade Loaf
🌟 Introduction
Honey & Chia Seed Bread is a beautiful homemade loaf that combines the hearty flavor of whole wheat flour with the gentle sweetness of honey and the pleasant texture of chia seeds. The result is a wholesome bread with a tender interior, lightly crisp crust, and tiny chia seeds throughout every slice.
This bread is wonderful for breakfast, sandwiches, toast, afternoon snacks, or simply enjoyed warm with butter. The honey gives the loaf a subtle natural sweetness while helping create a lovely golden crust. Chia seeds add a delicate crunch and make the bread especially attractive when sprinkled generously over the top.
There is something truly special about making bread at home. The aroma of yeast, warm flour, and honey filling the kitchen makes this recipe perfect for family baking days and cozy mornings. ❤️
🛒 Ingredients
For 1 Loaf
- 250 g whole wheat flour
- 100 g all-purpose flour
- 2 tablespoons honey
- 200 ml lukewarm water
- 1 packet active dry yeast
- 1 teaspoon salt
- 2 tablespoons chia seeds
- 1 tablespoon chia seeds, for topping
- A little water, for brushing the top
Optional Additions
For a slightly richer loaf, you can also add:
- 1 tablespoon olive oil or melted butter
- 1 tablespoon milk powder
- 1–2 tablespoons sunflower seeds
- 1–2 tablespoons sesame seeds
- A small handful of flaxseeds
These additions are optional, so the basic recipe remains simple and delicious.
📜 A Little History
Bread has been one of the world’s most important foods for thousands of years. Ancient civilizations learned to combine grains and water to create simple flatbreads, eventually discovering the wonderful effects of fermentation.
Honey has also been used in traditional breadmaking for centuries. Before refined sugar became widely available, honey was an important natural sweetener. It adds flavor and can contribute to a beautifully browned crust.
Chia seeds have a much older history as well. Chia was cultivated by ancient civilizations in Central America and was valued as a nutritious seed. Today, chia has become popular around the world and is frequently incorporated into breads, breakfast foods, puddings, and baked goods.
This loaf brings together these traditional ingredients in a simple modern homemade bread.
🥣 Method 1: Activate the Yeast
Begin by measuring 200 ml of lukewarm water.
The water should feel pleasantly warm rather than hot. Very hot water can damage the yeast, while water that is too cold may slow the fermentation process.
Pour the water into a small bowl.
Add:
- 2 tablespoons honey
- 1 packet active dry yeast
Stir gently until the honey is mostly dissolved.
Allow the mixture to rest for approximately 10 minutes.
You should begin to see a little foam or bubbling on the surface. This is a good indication that the yeast is active.
🌾 Method 2: Prepare the Dry Ingredients
While the yeast is resting, prepare the flour mixture.
Place the following ingredients into a large mixing bowl:
- 250 g whole wheat flour
- 100 g all-purpose flour
- 1 teaspoon salt
- 2 tablespoons chia seeds
Mix everything thoroughly.
Distributing the salt and chia seeds through the flour before adding the liquid helps ensure that the ingredients are evenly incorporated into the dough.
🍯 Method 3: Make the Dough
Pour the honey-and-yeast mixture into the bowl containing the flour.
Using a wooden spoon or sturdy spatula, begin mixing.
At first, the mixture will look rough and sticky. Continue mixing until the flour has absorbed most of the liquid.
Transfer the dough to a lightly floured work surface if necessary.
Now comes the most important part: kneading.
💪 Method 4: Kneading
Knead the dough for approximately 10 minutes.
Push the dough forward with the heel of your hand, fold it back toward yourself, turn it slightly, and repeat.
Continue this process until the dough becomes:
- Smooth
- Elastic
- Soft
- Slightly tacky but not excessively sticky
Whole wheat flour can make dough feel heavier than dough made entirely with white flour, so don’t worry if the dough feels somewhat substantial.
Important Tip
Avoid adding large amounts of extra flour during kneading. Too much flour can produce a dense or dry loaf.
If the dough is extremely sticky, add a tiny amount of flour at a time.
If it feels unusually dry, add a teaspoon of water at a time until the dough becomes workable.
🌱 Method 5: First Rise
Shape the kneaded dough into a ball.
Place it in a lightly greased bowl.
Cover the bowl with plastic wrap, a clean kitchen towel, or a reusable cover.
Place it somewhere warm and draft-free.
Allow the dough to rise for approximately 1 hour.
The dough should become noticeably larger and ideally close to doubled in volume.
Why Does the Dough Rise?
The yeast consumes available sugars and produces carbon dioxide gas. Those tiny gas bubbles become trapped within the developing gluten structure, causing the dough to expand.
This fermentation stage is what helps transform a compact dough into a light, airy loaf.
👊 Method 6: Deflate and Shape
Once the dough has risen, gently press it down to release some of the accumulated gas.
Turn it onto your work surface.
Don’t aggressively knead it again. A gentle deflation is enough.
Shape the dough into a rectangle approximately the length of your loaf pan.
Roll it tightly into a loaf, sealing the seam underneath.
Place the shaped dough into a greased loaf pan with the seam facing down.
✨ Method 7: Add the Chia Seed Topping
Lightly brush the top of the loaf with water.
Sprinkle 1 tablespoon of chia seeds evenly over the surface.
For an especially beautiful finish, you can gently press the seeds onto the dough so they stay in place during baking.
You can also make one or two shallow decorative cuts across the top with a sharp knife.
🌤️ Method 8: Second Rise
Cover the loaf again.
Let it rest in a warm place for approximately 30 minutes.
During this second rise, the dough should become visibly puffier.
Don’t let it rise excessively, because an over-proofed loaf may collapse during baking.
While the dough is completing its second rise, preheat your oven to:
🔥 200°C / 390°F
Allow the oven to fully preheat before placing the bread inside.
🔥 Method 9: Bake
Place the loaf in the preheated oven.
Bake for approximately 35 minutes at 200°C (390°F).
The bread should develop a beautiful golden-brown crust.
Your kitchen will begin filling with the wonderful aroma of warm honey and freshly baked wheat bread. 🍯🍞
How to Check for Doneness
The loaf should:
- Have a golden-brown crust
- Feel firm on the outside
- Sound hollow when tapped on the bottom
If the top is browning too quickly before the center is fully baked, loosely cover it with aluminum foil for the remainder of the baking time.
❄️ Method 10: Cooling
This step is very important.
Remove the loaf from the oven and allow it to sit in the pan for several minutes.
Then carefully remove it from the pan and transfer it to a wire rack.
Allow it to cool completely before slicing.
Although it may be tempting to cut into the bread immediately, cooling allows the interior crumb to finish setting.
Cutting the loaf while it is extremely hot can make the center appear gummy or compressed.
🍞 Formation & Texture
A beautifully finished Honey & Chia Seed Bread should have:
Outside
A golden-brown crust with a generous sprinkling of chia seeds.
Inside
A soft, slightly chewy crumb with visible chia seeds distributed throughout.
Flavor
A gentle sweetness from honey balanced by the earthy flavor of whole wheat.
Aroma
Warm, nutty, lightly sweet, and wonderfully fragrant.
❤️ Tips for Bread Lovers
1. Use fresh yeast
Fresh, active yeast will give you a much better rise.
2. Don’t use hot water
Lukewarm water is ideal. Water that is too hot can prevent the yeast from working properly.
3. Don’t overload the dough with flour
A slightly soft dough generally produces a more pleasant loaf than a very stiff dough.
4. Give the dough enough time
Fermentation is essential for flavor and texture. If your kitchen is cool, the dough may need a little longer than the stated rising time.
5. Cool before slicing
Allowing the bread to cool completely gives you cleaner slices and a better crumb.
6. Store it properly
Once completely cool, store the bread in an airtight container or bread bag at room temperature for a few days.
For longer storage, slice the loaf and freeze the slices in a sealed freezer bag. Individual slices can then be thawed or toasted whenever you want fresh-tasting bread.
🥪 Serving Ideas
This bread is incredibly versatile.
🍯 Sweet Breakfast
Toast a slice and spread it with:
- Butter and honey
- Peanut butter
- Almond butter
- Cream cheese
- Strawberry jam
- Apricot preserves
🥑 Healthy-Style Toast
Top toasted slices with:
- Mashed avocado
- Tomato
- A pinch of salt
- Black pepper
- A drizzle of olive oil
🥪 Sandwiches
Use it for:
- Turkey sandwiches
- Chicken sandwiches
- Cheese and tomato sandwiches
- Egg sandwiches
- Grilled cheese
- Tuna sandwiches
☕ Afternoon Treat
Serve warm slices with butter alongside tea, coffee, or hot chocolate.
🌟 Variations
🍊 Honey Orange Chia Bread
Add a little finely grated orange zest to the dough for a bright citrus aroma.
🌻 Seed Lover’s Bread
Add sunflower seeds, pumpkin seeds, sesame seeds, and flaxseeds along with the chia.
🍎 Cinnamon Honey Bread
Add 1 teaspoon cinnamon and a small handful of finely chopped dried apples for a naturally sweet variation.
🧄 Savory Chia Bread
Reduce the honey slightly and add dried herbs such as rosemary, thyme, or oregano.
🧀 Cheesy Toast Bread
Add grated cheese to toasted slices and place them under the grill until melted and bubbling.
⏰ Approximate Timeline
Mixing: 15 minutes
Kneading: 10 minutes
First rise: 1 hour
Shaping: 10 minutes
Second rise: 30 minutes
Baking: 35 minutes
Cooling: 1 hour or until completely cool
Total time:
Approximately 3½–4 hours, including rising and cooling.
🍞 The Perfect Homemade Loaf
There is something deeply satisfying about taking a handful of simple ingredients—flour, water, yeast, honey, salt, and chia seeds—and transforming them into a beautiful loaf of bread.
The process is simple, but the result feels special.
The honey brings warmth and sweetness. The whole wheat flour provides a hearty character. The chia seeds give the loaf its distinctive appearance and delicate texture. Together, they create a bread that feels rustic, homemade, nourishing, and comforting.
❤️ For Bread Lovers
For anyone who loves the smell of freshly baked bread, this recipe is a wonderful one to keep in your kitchen collection.
It is the kind of loaf that makes breakfast feel special, turns an ordinary sandwich into something delicious, and makes a simple piece of toast feel homemade and comforting.
Serve it warm with butter and honey, toast it until golden and crisp, or use it to create your favorite sandwich.
Every slice is a little reminder that homemade bread doesn’t need to be complicated to be wonderful. 🍯🌾🍞❤️
📝 Final Recipe at a Glance
Honey & Chia Seed Bread
Yield: 1 loaf
Ingredients:
- 250 g whole wheat flour
- 100 g all-purpose flour
- 2 tablespoons honey
- 200 ml lukewarm water
- 1 packet active dry yeast
- 1 teaspoon salt
- 2 tablespoons chia seeds
- 1 tablespoon chia seeds for topping
Method:
- Mix lukewarm water, honey, and yeast; rest for 10 minutes.
- Combine flours, salt, and chia seeds.
- Add the yeast mixture.
- Knead for approximately 10 minutes.
- Cover and let rise for 1 hour.
- Deflate gently and shape into a loaf.
- Place in a loaf pan.
- Brush with water and sprinkle with chia seeds.
- Let rise for 30 minutes.
- Bake at 200°C / 390°F for approximately 35 minutes.
- Cool completely on a wire rack.
- Slice, serve, and enjoy! 🍞✨