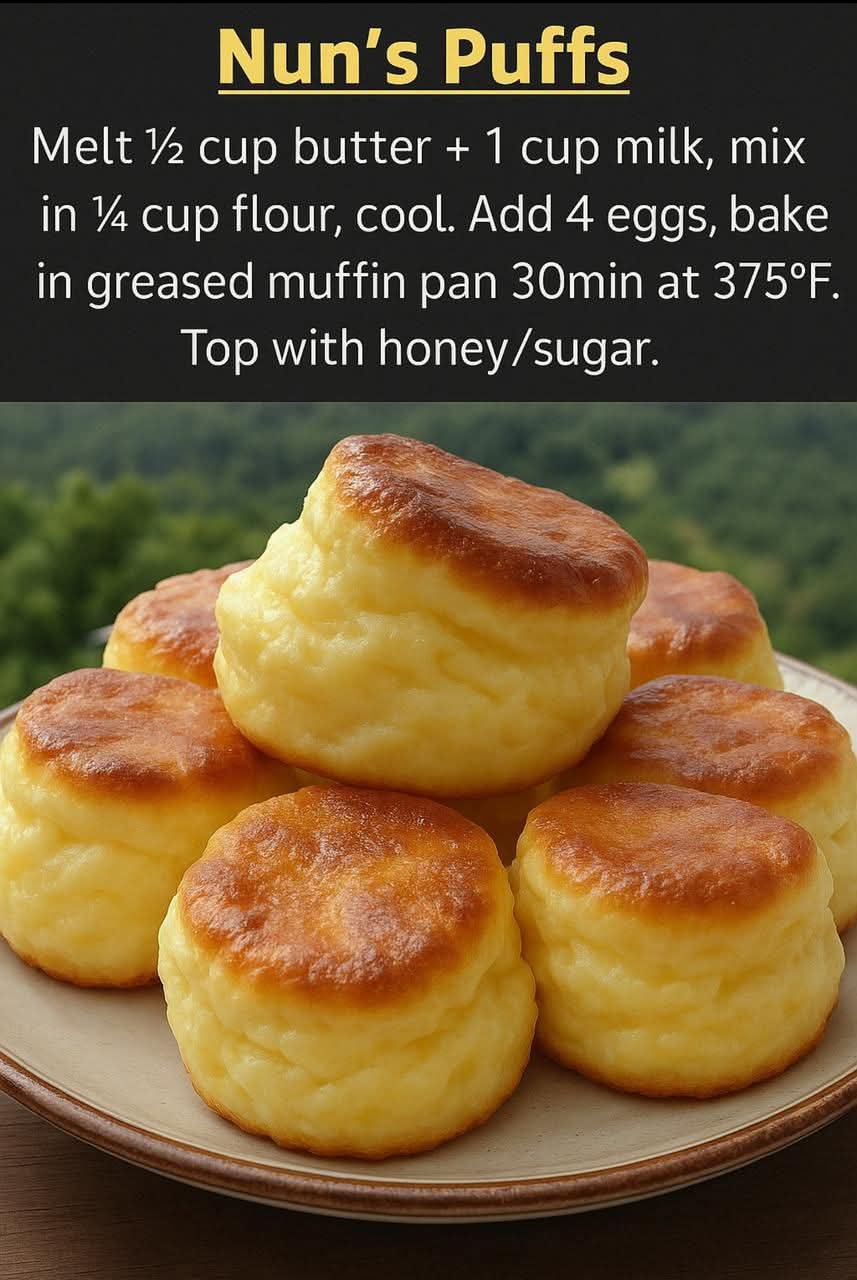
Nun’s Puffs: Light, Golden, and Delightfully Simple
Introduction
Nun’s Puffs are a charming old-fashioned pastry made from a simple choux-style dough. They are crisp and golden on the outside, airy and hollow inside, and wonderfully light despite being made with only a handful of everyday ingredients. The dough puffs dramatically in the oven, creating delicate little pastries that can be enjoyed warm with a dusting of sugar.
This recipe is especially appealing because it does not require yeast, baking powder, or complicated equipment. The secret is in the cooking of the flour mixture and the gradual addition of the eggs. Once baked, the little puffs become beautifully golden and tender, making them perfect for breakfast, afternoon tea, brunch, or a simple homemade dessert.
Ingredients
For the Nun’s Puffs
- 1/2 cup unsalted butter, approximately 115 g
- 1 cup whole milk, approximately 240 ml
- 3/4 cup all-purpose flour, approximately 95 g
- 4 large eggs, preferably at room temperature
- 1/2 to 1 tablespoon granulated sugar, optional
- A small pinch of salt, especially if using unsalted butter
For Finishing
- Granulated sugar for sprinkling
- Powdered sugar, optional
- Honey, optional, for serving
- Fresh berries or sliced fruit, optional
- Whipped cream, optional
Preparation
Before beginning, preheat the oven to 375°F (190°C). Grease a muffin pan generously with butter. You can also use a nonstick muffin pan, but lightly greasing it will make removing the puffs much easier.
Measure all of your ingredients before starting. Once the butter and milk are heated, the recipe moves fairly quickly, so having everything ready is important.
Instructions
Step 1: Heat the Butter and Milk
Place the butter and milk in a medium saucepan over medium heat.
Heat gently until the butter has completely melted and the milk is hot. Bring the mixture just to a gentle simmer. Do not allow it to boil aggressively.
If you are using sugar in the dough, add it to the warm milk mixture and stir until dissolved.
Step 2: Add the Flour
Remove the saucepan from the heat.
Add all of the flour at once. Using a wooden spoon or sturdy spatula, stir vigorously until the flour is completely incorporated.
The mixture will quickly become thick and dough-like.
Step 3: Cook the Dough
Return the saucepan to low or medium-low heat.
Continue stirring the dough for approximately 1 to 2 minutes. The dough should pull away from the sides of the pan and form a smooth ball.
This step is important because cooking the flour helps remove some of its moisture and prepares the dough to absorb the eggs.
Once the dough has formed a smooth ball, remove the pan from the heat.
Step 4: Cool Slightly
Allow the dough to cool for several minutes.
It should remain warm, but it should not be extremely hot. If the dough is too hot when the eggs are added, the eggs may begin to cook and create unwanted lumps.
Step 5: Add the Eggs
Add the eggs one at a time.
After adding each egg, beat the dough vigorously until the egg is completely incorporated before adding the next one.
At first, the mixture may look separated or slippery. Continue stirring and it will eventually become smooth and glossy.
Repeat with all four eggs.
The finished dough should be thick, smooth, shiny, and soft enough to scoop.
Step 6: Fill the Muffin Pan
Divide the dough evenly among the prepared muffin cups.
Fill each cup approximately halfway to two-thirds full. Avoid filling them completely because the dough needs room to expand.
The puffs will rise significantly during baking.
Step 7: Bake
Place the muffin pan in the preheated oven.
Bake for approximately 30 to 35 minutes, or until the Nun’s Puffs are beautifully golden brown and noticeably puffed.
Avoid opening the oven during the first 20 to 25 minutes. A sudden drop in temperature can cause delicate pastries to collapse.
When they are deeply golden and firm on the outside, they are ready.
Step 8: Finish With Sugar
Remove the pan from the oven and allow the puffs to rest for a few minutes.
Sprinkle them generously with granulated sugar while they are still warm.
For a more elegant finish, you can use powdered sugar instead.
For an especially delicious dessert, serve them warm with a drizzle of honey, fresh berries, or a spoonful of whipped cream.
The Method Behind the Recipe
The technique used for Nun’s Puffs is closely related to the preparation of choux pastry.
Unlike yeast breads, these pastries receive their lift primarily from steam. The high moisture content of the dough creates steam inside the pastry as it bakes. That steam expands and pushes the dough upward, creating the characteristic hollow and airy interior.
Cooking the flour with the butter and milk is another important part of the process. This creates a smooth dough that can hold the eggs without becoming too thin.
The eggs provide structure, richness, color, and additional moisture. Adding them gradually makes it easier to achieve the correct consistency.
The result is a pastry that is crisp and golden on the outside while remaining soft and airy inside.
A Little History
Nun’s Puffs belong to the family of old-fashioned baked pastries that rely on simple ingredients and traditional techniques rather than yeast or commercial leaveners.
The name is particularly charming and has inspired several stories about the pastries being associated with convent kitchens and the delicate appearance of the finished puffs. The exact origin of the name is not firmly established, however, so it is best viewed as part of the folklore surrounding this traditional-style pastry.
Recipes resembling Nun’s Puffs have appeared in American home cooking collections and community cookbooks, where inexpensive ingredients such as milk, butter, flour, and eggs were transformed into something special.
Like many traditional recipes, the exact proportions and finishing methods can vary from kitchen to kitchen.
Formation and Texture
The formation of Nun’s Puffs is one of the most fascinating parts of the recipe.
The dough begins as a thick mixture of milk, butter, and flour. After the eggs are incorporated, it becomes glossy and flexible.
Inside the hot oven, the water contained in the milk and eggs turns into steam. As the steam expands, it pushes against the dough and creates the puffed shape.
The outside becomes golden and lightly crisp, while the center remains delicate and airy.
For the best formation, remember three important principles:
- Cook the flour mixture properly.
- Add the eggs gradually.
- Keep the oven closed during the early part of baking.
These small details make a significant difference.
Serving Ideas
Nun’s Puffs can be served in many different ways.
For a simple breakfast, serve them warm with butter and a little sugar.
For brunch, place them on a serving platter with fresh strawberries, blueberries, raspberries, and a bowl of whipped cream.
For dessert, drizzle warm honey over the puffs and add a light dusting of powdered sugar.
You can also serve them with fruit preserves, lemon curd, chocolate sauce, caramel sauce, or vanilla cream.
For a more traditional presentation, simply serve them warm with granulated sugar. Their buttery flavor and delicate texture are delicious even without elaborate toppings.
Tips for Perfect Nun’s Puffs
Use room-temperature eggs when possible. They incorporate more easily into the warm dough.
Do not rush the flour-cooking stage. The dough should pull away from the sides of the saucepan before you proceed.
Allow the dough to cool slightly before adding the eggs.
Add the eggs one at a time and mix thoroughly after each addition.
Do not overfill the muffin cups.
Keep the oven door closed during baking.
Bake until the puffs are thoroughly golden. If they are removed too early, they may collapse.
For the crispest exterior, serve them soon after baking.
Make-Ahead and Storage
Nun’s Puffs are best enjoyed fresh and warm.
If you have leftovers, allow them to cool completely before storing them in an airtight container at room temperature for up to one day.
To restore some of their crispness, reheat them in a 350°F (175°C) oven for several minutes.
They can also be frozen once completely cooled. Place them in a freezer-safe container and separate layers with parchment paper. Reheat them directly from frozen in a moderate oven until warmed through.
Conclusion
Nun’s Puffs are a wonderful example of how basic ingredients can become something remarkably beautiful. Butter, milk, flour, eggs, and a little sugar transform into golden, airy pastries with a crisp exterior and delicate center.
They are simple enough for an ordinary morning but special enough for a family gathering or afternoon tea. The real beauty of the recipe is not only in the finished pastry but also in the traditional technique behind it.
Once you understand how the cooked flour, eggs, moisture, and heat work together, Nun’s Puffs become an easy and rewarding recipe to make again and again.
For the Lovers of Old-Fashioned Baking
For lovers of traditional homemade baking, Nun’s Puffs are the kind of recipe worth keeping. They require no complicated ingredients and no fancy equipment. They simply reward patience, careful preparation, and good timing.
Serve them warm, sprinkle them with sugar, add a little honey if desired, and enjoy them with coffee, tea, or a glass of cold milk.
These little golden puffs are proof that some of the most memorable recipes are also some of the simplest.