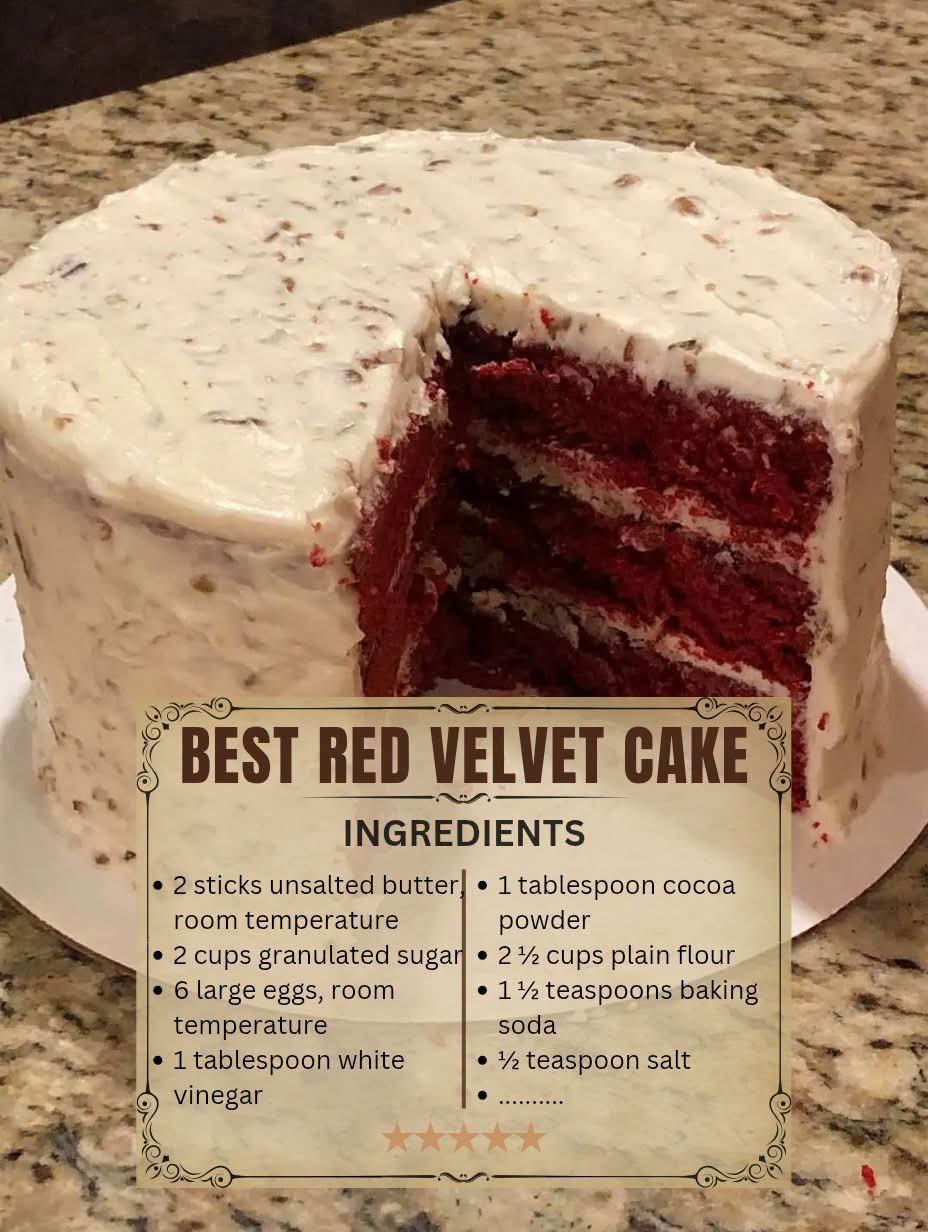
The Best Ever Homemade Red Velvet Cake
Introduction
Homemade Red Velvet Cake is a classic dessert known for its beautiful deep-red color, delicate cocoa flavor, soft crumb, and rich, creamy frosting. Unlike an ordinary chocolate cake, red velvet has a subtle chocolate taste balanced by tangy buttermilk or vinegar and a tender texture created by careful mixing.
This recipe begins with a buttery cake batter enriched with eggs, a touch of cocoa powder, and vinegar. The finished layers are traditionally paired with a smooth cream cheese frosting, creating the perfect combination of rich cake and tangy sweetness.
Ingredients
For the Red Velvet Cake
- 2 sticks (1 cup) unsalted butter, softened to room temperature
- 2 cups granulated sugar
- 6 large eggs, room temperature
- 1 tablespoon white vinegar
- 1 tablespoon unsweetened cocoa powder
- 2 1/2 cups all-purpose flour
- 1 teaspoon baking soda
- 1/2 teaspoon salt
- 1 cup buttermilk, room temperature
- 1 tablespoon vanilla extract
- 1 to 2 tablespoons red food coloring, or enough to achieve the desired red color
For the Cream Cheese Frosting
- 16 ounces cream cheese, softened
- 1 cup unsalted butter, softened
- 4 to 5 cups powdered sugar, sifted
- 2 teaspoons vanilla extract
- 2 to 4 tablespoons heavy cream or milk, if needed
- Pinch of salt
For Decorating
- Red velvet cake crumbs
- Optional finely chopped pecans or walnuts
- Additional frosting for piping, if desired
Instructions
Step 1: Prepare the Pans
Preheat the oven to 350°F (175°C).
Grease three 8-inch round cake pans or two 9-inch round cake pans. Line the bottoms with parchment paper and lightly flour the sides.
Proper preparation prevents the cake from sticking and makes it much easier to remove the layers without breaking them.
Step 2: Combine the Dry Ingredients
In a medium bowl, whisk together the flour, cocoa powder, baking soda, and salt.
Set the mixture aside.
The cocoa powder should be used sparingly. Red velvet is traditionally a lightly chocolate-flavored cake rather than a strongly chocolate cake.
Step 3: Cream the Butter and Sugar
Place the softened butter in a large mixing bowl. Beat until smooth and creamy.
Gradually add the granulated sugar and continue beating for approximately 4 to 5 minutes, until the mixture becomes light and fluffy.
This step is important because properly creamed butter incorporates air into the batter, helping create a lighter cake.
Step 4: Add the Eggs
Add the eggs one at a time, mixing well after each addition.
Scrape down the sides of the bowl as necessary. Adding the eggs gradually helps keep the batter smooth and properly emulsified.
Step 5: Add the Flavor and Color
Mix in the vanilla extract, white vinegar, and red food coloring.
The vinegar adds a subtle tang and contributes to the traditional flavor profile of red velvet cake.
Step 6: Combine the Wet and Dry Ingredients
Add approximately one-third of the flour mixture to the batter and mix gently.
Add half of the buttermilk and mix until just combined.
Continue alternating the dry ingredients and buttermilk, finishing with the dry ingredients.
Do not overmix the batter. Mix only until the ingredients are incorporated.
Overmixing can develop too much gluten and result in a tougher cake.
Step 7: Divide the Batter
Divide the batter evenly between the prepared cake pans.
Smooth the tops gently with a spatula.
Tap the pans lightly against the counter once or twice to remove any large air pockets.
Step 8: Bake
Bake for approximately 25 to 30 minutes for 8-inch layers, or until a toothpick inserted into the center comes out clean or with a few moist crumbs.
Avoid overbaking because red velvet cake is best when it remains soft and moist.
Allow the cakes to cool in their pans for approximately 10 minutes. Carefully remove them and place them on a wire rack to cool completely.
Preparing the Cream Cheese Frosting
Place the softened cream cheese and butter in a large bowl.
Beat until completely smooth and creamy.
Gradually add the sifted powdered sugar, one cup at a time, mixing on low speed initially to prevent the sugar from flying out of the bowl.
Add the vanilla extract and a pinch of salt.
Beat until fluffy.
If the frosting is too thick, add heavy cream or milk one tablespoon at a time. If it is too soft, add a little more powdered sugar.
For the cleanest cake layers, refrigerate the frosting for 15 to 30 minutes before assembling the cake.
Assembling the Cake
Place the first completely cooled cake layer on a serving plate or cake board.
Spread an even layer of cream cheese frosting over the top.
Place the second cake layer on top and gently press it into position.
Add another layer of frosting.
Place the final cake layer on top with the flat side facing upward.
Apply a thin layer of frosting around the entire cake. This is called a crumb coat and helps trap loose cake crumbs.
Refrigerate the cake for approximately 20 to 30 minutes.
Apply the remaining frosting generously around the cake and smooth the sides and top.
For a traditional appearance, decorate the top with a few red velvet cake crumbs.
Method for the Perfect Red Velvet Texture
The secret to an excellent red velvet cake is balance.
Use room-temperature butter, eggs, and buttermilk so the ingredients blend properly. Cream the butter and sugar thoroughly, but once the flour is added, mix gently.
Do not add excessive cocoa powder. Red velvet should have a delicate cocoa flavor rather than taste like a standard chocolate cake.
Buttermilk provides acidity and tenderness, while vinegar adds the characteristic slight tang associated with classic red velvet.
Allow the cake to cool completely before frosting. A warm cake will soften the cream cheese frosting and can cause the layers to slide.
History of Red Velvet Cake
Red velvet cake has a long and somewhat debated history in American baking. Versions of velvet cakes appeared in the United States during the late nineteenth and early twentieth centuries, with the word “velvet” describing their unusually soft and fine texture.
The cake became particularly associated with the American South and gained widespread popularity during the twentieth century. The distinctive red color became even more pronounced as food coloring became commonly available.
Traditional recipes sometimes relied on the natural reaction between cocoa, acidic ingredients, and other components of the batter to produce a reddish-brown color. Modern versions commonly use red food coloring to create the dramatic red appearance associated with the dessert today.
Cream cheese frosting eventually became one of the most recognizable partners for red velvet cake, although older recipes used other types of frosting as well.
Formation and Structure
A successful red velvet cake is built from several important components.
The butter and sugar provide richness and help incorporate air.
The eggs provide structure, moisture, and richness.
The flour forms the framework of the cake.
The small amount of cocoa powder contributes the characteristic mild chocolate flavor.
Buttermilk and vinegar provide acidity and help create the cake’s distinctive tenderness and flavor.
The baking soda reacts with the acidic ingredients to help the cake rise.
Finally, cream cheese frosting provides a rich, tangy contrast to the sweet, delicate cake.
Tips for the Best Homemade Red Velvet Cake
- Bring refrigerated ingredients to room temperature before beginning.
- Measure flour carefully. Too much flour can make the cake dry.
- Do not overmix after adding the flour.
- Use good-quality cocoa powder for a deeper flavor.
- Do not overbake the cake layers.
- Let every layer cool completely before frosting.
- Chill the assembled cake before slicing for cleaner portions.
- For an especially moist cake, store it covered in the refrigerator and allow it to sit at room temperature for about 20 to 30 minutes before serving.
- Sift the powdered sugar before preparing the frosting for a smoother finish.
- Save a small amount of cake trimming to create traditional red velvet crumbs for decoration.
Serving Suggestions
Red velvet cake is especially delicious served slightly chilled or at cool room temperature.
For a special presentation, cut the cake into generous slices and garnish each serving with a small swirl of cream cheese frosting or a sprinkling of red velvet crumbs.
It is wonderful for birthdays, holidays, family gatherings, celebrations, afternoon desserts, and Sunday dinners.
Why Red Velvet Lovers Love This Cake
Red velvet lovers appreciate the combination of flavors and textures. It is rich without being overwhelmingly chocolatey, sweet without losing its tang, and soft enough to practically melt in the mouth.
The contrast between the deep-red cake and pale cream cheese frosting also makes it one of the most recognizable celebration cakes.
Conclusion
The best homemade red velvet cake is all about achieving the right balance of tenderness, cocoa flavor, acidity, sweetness, and creamy frosting. When the ingredients are measured carefully and the batter is handled gently, the result is a beautiful cake with soft layers and a luxurious texture.
This recipe makes a memorable homemade dessert that looks impressive on a celebration table while still delivering the comforting flavor of a traditional family-style cake.
For anyone who loves classic cakes, this homemade red velvet is a recipe worth keeping, making, sharing, and returning to again and again.