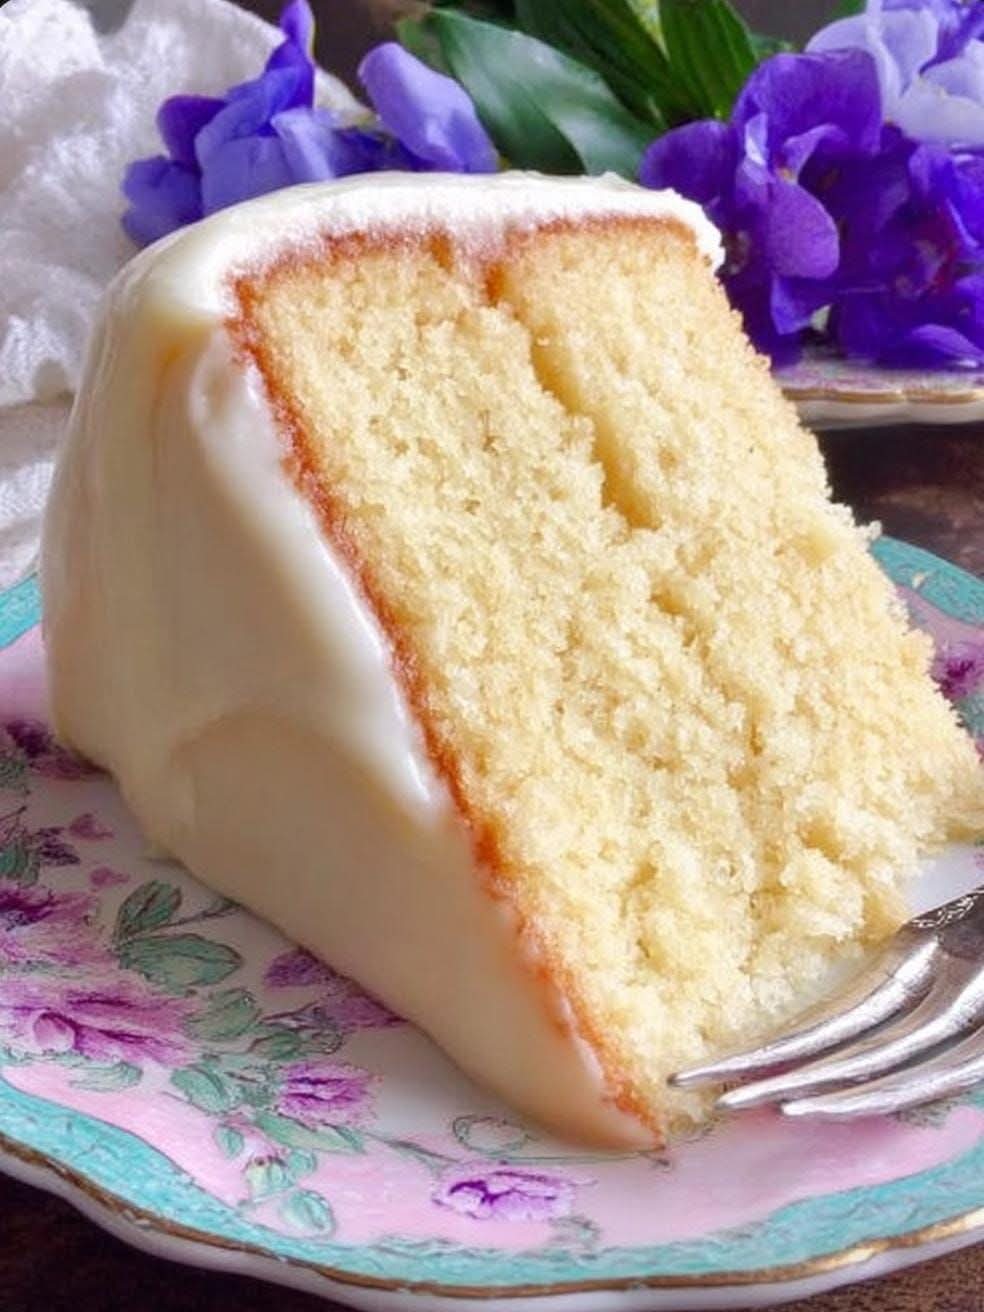
Homemade Costco-Style Celebration Cake
Introduction
There is something wonderfully nostalgic about a soft, bakery-style celebration cake covered in smooth frosting. This homemade Costco-style cake is inspired by the classic large sheet and round celebration cakes many families love: tender vanilla cake, a creamy filling, and a generous layer of sweet buttercream.
It is the kind of cake that can make someone ask, “You made this from scratch?” The secret is that you can make every part at home while keeping the process practical and approachable. The cake is soft without being fragile, the filling adds richness and moisture, and the frosting creates that familiar bakery-style finish.
This recipe makes a generous celebration cake that is perfect for birthdays, anniversaries, family gatherings, holidays, graduations, or whenever you want a bakery-style dessert made in your own kitchen.
Ingredients
For the Vanilla Cake
- 3 cups all-purpose flour
- 2 1/2 teaspoons baking powder
- 1/2 teaspoon baking soda
- 3/4 teaspoon salt
- 1 cup unsalted butter, softened
- 2 cups granulated sugar
- 4 large eggs, room temperature
- 2 teaspoons pure vanilla extract
- 1 cup whole milk, room temperature
- 1/2 cup sour cream, room temperature
For the Creamy Filling
- 8 ounces cream cheese, softened
- 1/2 cup powdered sugar
- 1 teaspoon vanilla extract
- 1 cup heavy whipping cream, cold
- 2 tablespoons powdered sugar
- 1/2 teaspoon vanilla extract
For the Vanilla Buttercream
- 1 1/2 cups unsalted butter, softened
- 6 cups powdered sugar, sifted
- 2 teaspoons vanilla extract
- 1/2 teaspoon salt
- 5 to 7 tablespoons heavy cream or whole milk
- 1 to 2 tablespoons additional cream, if necessary
For Decoration
- White or colored sprinkles, optional
- Fresh berries, optional
- Small amount of frosting for piping
- Additional vanilla filling, if desired
Equipment
- Two 9-inch round cake pans or one large rectangular baking pan
- Mixing bowls
- Electric mixer
- Rubber spatula
- Measuring cups and spoons
- Cake leveler or serrated knife
- Offset spatula
- Piping bag and decorative tip
- Cooling rack
Preparation
Preheat the oven to 350°F (175°C).
Grease two 9-inch round cake pans thoroughly. Line the bottoms with parchment paper, then lightly grease the parchment as well.
If making a rectangular celebration cake, a large rimmed baking pan can be used instead. Adjust the baking time according to the thickness of the batter.
Allow the butter, eggs, milk, and sour cream to come to room temperature before beginning. Room-temperature ingredients generally combine more smoothly and help produce a more evenly textured cake.
Method for Making the Cake
Step 1: Prepare the Dry Ingredients
In a medium bowl, whisk together the flour, baking powder, baking soda, and salt.
Set the mixture aside.
Step 2: Cream the Butter and Sugar
Place the softened butter in a large mixing bowl.
Beat the butter on medium speed until smooth and creamy, approximately 1 to 2 minutes.
Gradually add the granulated sugar and continue beating for about 3 to 4 minutes.
The mixture should become noticeably lighter and fluffy.
This step is important because properly creamed butter helps create a lighter cake texture.
Step 3: Add the Eggs
Add the eggs one at a time, beating well after each addition.
Add the vanilla extract and mix until incorporated.
Scrape down the sides of the bowl with a rubber spatula as needed.
Step 4: Add the Dry and Wet Ingredients
Add approximately one-third of the flour mixture to the butter mixture and mix on low speed.
Add half of the milk and sour cream mixture.
Continue alternating the dry ingredients and wet ingredients, finishing with the remaining flour mixture.
Mix only until the batter is smooth and combined.
Do not overmix.
Step 5: Fill the Pans
Divide the batter evenly between the prepared cake pans.
Smooth the tops with an offset spatula.
Gently tap the pans on the counter once or twice to remove large air pockets.
Step 6: Bake
Place the pans in the center of the preheated oven.
Bake for approximately 25 to 32 minutes, depending on your oven and pan size.
The cakes are ready when the tops spring back lightly when touched and a toothpick inserted into the center comes out clean or with a few moist crumbs.
Do not overbake the cake, as this can reduce its moisture.
Step 7: Cool
Allow the cakes to cool in their pans for approximately 10 minutes.
Carefully remove them from the pans and transfer them to a cooling rack.
Allow them to cool completely before filling and frosting.
For an especially clean cake assembly, wrap the cooled cake layers and refrigerate them for several hours or overnight before decorating.
Method for Making the Creamy Filling
Place the softened cream cheese in a mixing bowl.
Beat until smooth and creamy.
Add 1/2 cup powdered sugar and 1 teaspoon vanilla extract. Beat until completely incorporated.
In a separate cold bowl, whip the heavy cream with 2 tablespoons powdered sugar and 1/2 teaspoon vanilla until medium-stiff peaks form.
Gently fold the whipped cream into the cream cheese mixture.
The finished filling should be creamy, light, and thick enough to spread between the cake layers.
Keep the filling refrigerated until you are ready to assemble the cake.
Method for Making the Buttercream
Place the softened butter in a large mixing bowl.
Beat on medium speed for approximately 3 to 4 minutes until smooth and fluffy.
Gradually add the powdered sugar, approximately 1 cup at a time, mixing on low speed at first to prevent the sugar from scattering.
Add the vanilla extract and salt.
Gradually add 5 tablespoons of heavy cream or milk.
Increase the mixer speed to medium-high and beat for another 3 to 5 minutes.
The frosting should become light, fluffy, and creamy.
If it is too thick, add another tablespoon of cream at a time.
If it is too soft, add a little additional powdered sugar.
Formation and Assembly
Place the first completely cooled cake layer on a cake board or serving plate.
If necessary, use a serrated knife to level the top.
Spread the creamy filling evenly over the first layer, leaving a small border around the edge.
Place the second cake layer on top.
Press very gently so that the layers settle without forcing the filling out of the sides.
Crumb Coat
Apply a thin layer of buttercream around the entire cake.
This first layer is called a crumb coat. Its purpose is to trap loose crumbs and create a smooth foundation for the final frosting.
Refrigerate the cake for approximately 20 to 30 minutes.
Final Frosting
Apply a generous layer of buttercream over the chilled cake.
Use an offset spatula or cake scraper to smooth the sides.
Smooth the top carefully, or leave the frosting with gentle decorative swirls for a homemade bakery appearance.
Pipe small decorative borders around the top and bottom edges if desired.
Finish with sprinkles or your preferred decorations.
How to Achieve the Classic Bakery-Style Texture
The secret to a good celebration cake is moisture and balance.
Do not overbake the cake.
Use full-fat dairy products when possible.
Make sure the butter is softened but not melted.
Measure flour carefully. Too much flour can make the cake dense and dry.
Allow the finished cake to rest for several hours before serving. This gives the filling time to settle and allows the flavors to blend.
For an especially soft texture, assemble the cake the day before serving and refrigerate it overnight.
Remove it from the refrigerator approximately 30 to 60 minutes before serving.
History and Inspiration
Large bakery-style celebration cakes have become a familiar part of American celebrations, particularly at birthdays and family gatherings. Warehouse-club bakeries helped popularize generously sized cakes designed to serve large groups while remaining affordable and convenient.
The appeal of these cakes comes from their simplicity: a soft vanilla cake, creamy filling, sweet frosting, and straightforward decoration.
The homemade version takes inspiration from that familiar style while allowing the baker to control the ingredients, sweetness, filling, and decoration.
Instead of purchasing a ready-made celebration cake, you can recreate the experience at home with fresh ingredients and a little patience.
Variations
Chocolate Version
Replace approximately 1/2 cup of the flour with 1/2 cup unsweetened cocoa powder and add an additional tablespoon or two of milk if the batter becomes too thick.
Strawberry Filling
Fold finely chopped strawberries into the cream filling just before assembling the cake.
Lemon Version
Add 2 teaspoons of finely grated lemon zest to the cake batter and replace part of the vanilla extract with fresh lemon juice.
Birthday Cake Version
Add colorful sprinkles to the cake batter and decorate the finished cake with additional sprinkles.
Chocolate Frosting
Replace approximately 3/4 cup of powdered sugar with unsweetened cocoa powder and adjust the cream until the frosting reaches the desired consistency.
Storage
Because the cake contains a cream-based filling, it should be refrigerated.
Store the finished cake in an airtight cake container or cover it carefully with plastic wrap.
It is best enjoyed within 3 to 4 days.
For the best texture, allow individual slices to sit at room temperature for approximately 20 to 30 minutes before serving.
Serving Suggestions
Serve generous slices on their own or with fresh berries.
A scoop of vanilla ice cream makes the cake even more indulgent.
For a birthday celebration, serve it with coffee, tea, milk, or a cold glass of your favorite beverage.
The cake is particularly good when served slightly softened rather than directly from the refrigerator.
Conclusion
This homemade Costco-style celebration cake brings the familiar bakery experience into your own kitchen. It has soft vanilla cake layers, a creamy center, and a generous coating of fluffy buttercream that makes every slice feel like a special occasion.
Although it takes a little more time than buying a ready-made cake, the result is worth the effort. You get a beautiful homemade dessert with fresh flavor, a tender crumb, and a creamy filling that can be customized to suit your family.
And perhaps the greatest compliment is when someone takes the first bite, looks at you, and asks, “You really made this from scratch?”
You can simply smile and say, “Well… kind of. It is our homemade Costco cake now.”