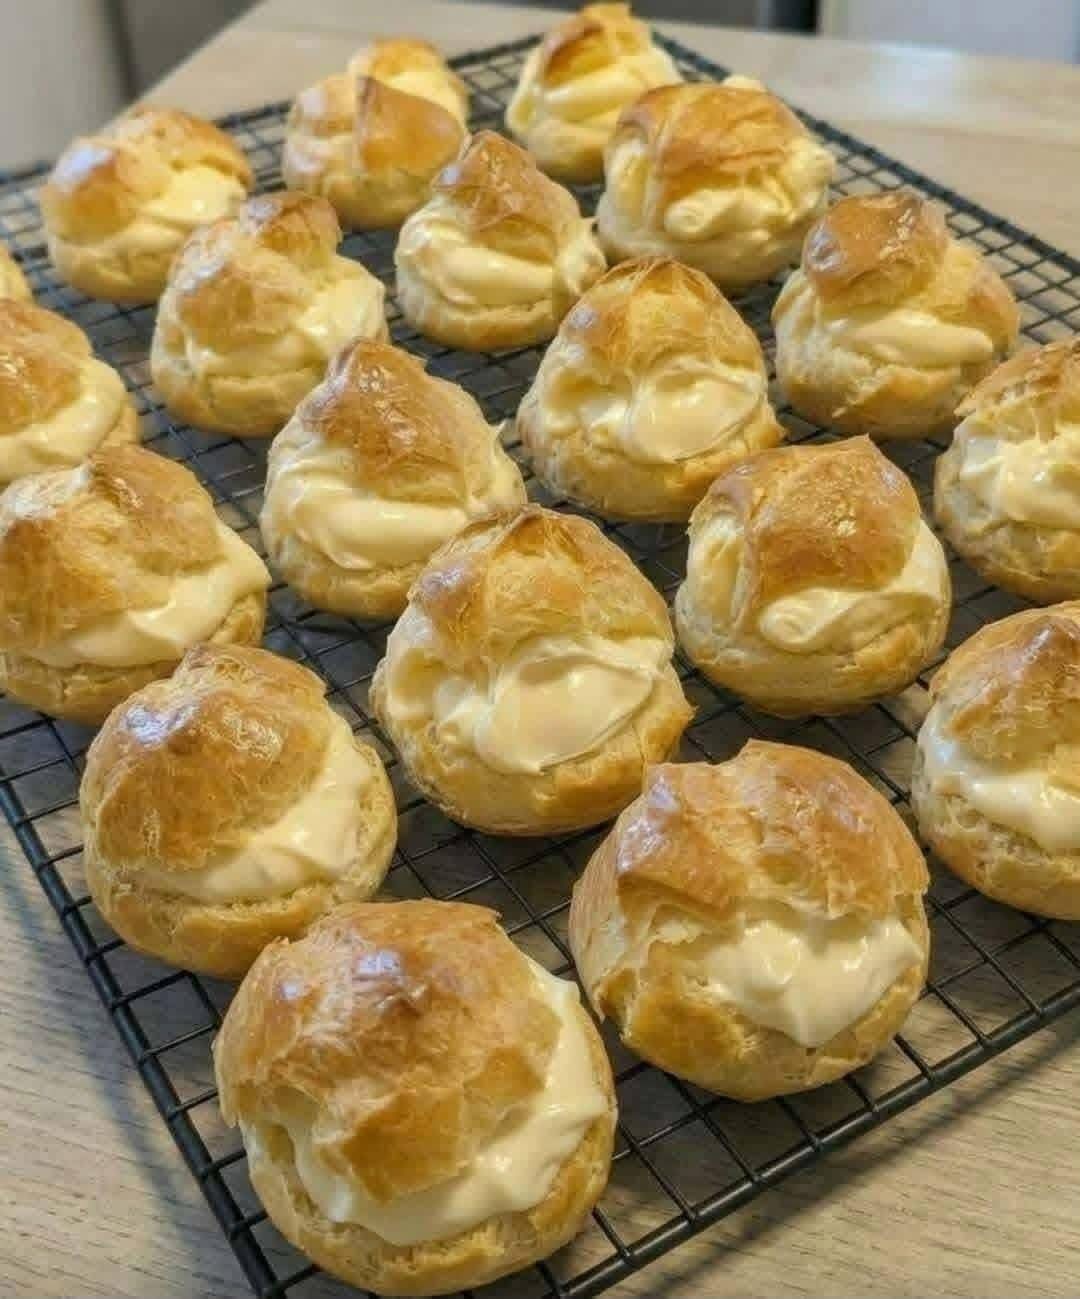
Grandma’s Classic Choux Pastry Treats
Introduction
There is something especially comforting about rediscovering a recipe that carries the taste of childhood. These delicate choux pastry treats are light, airy, golden, and wonderfully tender inside, making them perfect for holiday parties, family celebrations, afternoon gatherings, or simply enjoying with a cup of coffee.
The beauty of choux pastry is that it uses a handful of simple ingredients, yet the finished pastries feel elegant and special. The dough is cooked on the stovetop before the eggs are incorporated, creating a pastry that puffs beautifully in the oven and develops a hollow center that can be filled with cream, custard, chocolate, or another favorite filling.
This is the kind of recipe that can easily become a family tradition. One bite can bring back memories of a grandmother’s kitchen, crowded holiday tables, and sneaking an extra pastry when nobody was looking.
Ingredients
For the Choux Pastry
- 1 cup (240 ml) water
- 1/2 cup (115 g) unsalted butter
- 1 tablespoon granulated sugar
- 1/4 teaspoon salt
- 1 cup (125 g) all-purpose flour
- 4 large eggs, preferably at room temperature
- 1 teaspoon vanilla extract
Optional Filling
- 2 cups heavy whipping cream
- 1/3 cup powdered sugar
- 1 teaspoon vanilla extract
Optional Finishing
- Powdered sugar for dusting
- Melted chocolate for drizzling
- Chocolate ganache
- Vanilla pastry cream
- Caramel sauce
- Fresh berries
History of Choux Pastry
Choux pastry, known in French as pâte à choux, is one of the classic foundations of French pastry making. Unlike many traditional pastries, it does not rely on baking powder or yeast to rise.
Instead, the pastry depends largely on steam. The dough is first cooked with water, butter, flour, and salt. Eggs are then incorporated into the warm dough. When the pastry enters a hot oven, the moisture inside turns into steam, causing the dough to expand and puff.
Choux pastry became the foundation for many beloved pastries, including cream puffs, profiteroles, éclairs, and other filled desserts. Its versatility is one reason it has remained popular for generations.
Many families have their own version, adapting the pastry with different fillings, toppings, and serving styles.
Formation of the Dough
The most important part of this recipe is understanding how the dough forms.
The water and butter are heated together until the butter melts and the mixture reaches a simmer. Flour is then added all at once. Instead of simply stirring the ingredients together, the mixture is cooked over the heat until it forms a smooth dough and pulls away from the sides of the saucepan.
This step removes some of the moisture and prepares the dough to absorb the eggs.
Once the dough has cooled slightly, the eggs are added gradually. At first, the mixture may look separated or slippery, but continued mixing brings everything together into a smooth, glossy dough.
The finished dough should be thick enough to hold its shape when piped but soft enough to spread slightly.
Instructions
Step 1: Prepare the Oven
Preheat your oven to 425°F (220°C).
Line a large baking sheet with parchment paper.
Make sure the oven is fully preheated before baking. The initial high heat helps create the steam necessary for the pastries to puff.
Step 2: Heat the Butter Mixture
Place the water, butter, sugar, and salt into a medium saucepan.
Heat over medium heat, stirring occasionally, until the butter has completely melted and the mixture comes to a gentle boil.
Do not rush this stage. The butter should be fully incorporated before the flour is added.
Step 3: Add the Flour
Remove the saucepan from the heat and immediately add all of the flour at once.
Using a wooden spoon or sturdy spatula, stir vigorously until the flour is completely incorporated.
Return the saucepan to medium-low heat and continue stirring for approximately 1 to 2 minutes.
The dough should become smooth and pull away from the sides of the pan. A thin film may begin to form on the bottom of the saucepan.
This cooking stage is important because it helps prepare the dough for the eggs.
Step 4: Cool the Dough Slightly
Transfer the dough to a mixing bowl.
Allow it to cool for several minutes, stirring occasionally.
The dough should remain warm but should not be extremely hot. If the dough is too hot, the eggs can begin to cook when added.
Step 5: Add the Eggs
Add the eggs one at a time, mixing thoroughly after each addition.
Add the vanilla extract with the final egg.
At first, the dough may appear uneven or separated. Continue mixing until it becomes smooth and glossy before adding the next egg.
The final dough should be thick, smooth, and slightly elastic.
Step 6: Pipe the Pastries
Transfer the choux dough into a piping bag fitted with a large round tip.
Pipe small mounds onto the prepared baking sheet, leaving approximately 2 inches between each pastry.
If you do not have a piping bag, you can use two spoons to shape small portions of dough.
For a polished appearance, lightly smooth any pointed tips with a damp fingertip.
Step 7: Bake
Place the baking sheet in the preheated oven.
Bake at 425°F (220°C) for approximately 10 minutes.
Then reduce the temperature to 375°F (190°C) and continue baking for another 20 to 25 minutes, or until the pastries are deeply golden and firm.
Avoid opening the oven door during the early part of baking. A sudden loss of heat can cause the pastries to collapse.
Step 8: Dry the Pastries
Once the pastries are beautifully golden and puffed, turn off the oven.
Leave the pastries inside for approximately 5 to 10 minutes with the oven door slightly open.
This allows excess moisture to escape and helps the pastries maintain their structure.
Transfer them to a wire rack and allow them to cool completely.
Method for the Cream Filling
If you want to turn these into classic cream-filled pastries, prepare the filling while the choux pastries cool.
Place the heavy whipping cream, powdered sugar, and vanilla extract into a chilled mixing bowl.
Beat with an electric mixer until the cream becomes thick and holds soft to medium peaks.
Do not overbeat, or the cream can become grainy.
Transfer the whipped cream into a piping bag.
Once the pastries are completely cool, make a small hole in the bottom or side of each pastry and pipe the cream inside.
For a more traditional pastry-shop presentation, you can also slice the pastries horizontally and spoon or pipe the filling inside.
Finishing the Pastries
There are many wonderful ways to finish these pastries.
For a simple presentation, dust them lightly with powdered sugar.
For a richer dessert, drizzle them with melted chocolate.
For a holiday table, fill them with vanilla pastry cream and finish with a thin layer of chocolate ganache.
You can also add fresh berries, caramel, toasted nuts, or a combination of chocolate and cream.
Important Baking Methods and Tips
Use Room-Temperature Eggs
Room-temperature eggs incorporate more easily into the cooked dough and help create a smooth mixture.
Add Eggs Gradually
The amount of egg needed can vary slightly depending on the flour and the size of the eggs. Add the eggs gradually rather than automatically adding everything at once.
Watch the Dough Consistency
The finished dough should be glossy and smooth. When lifted with a spatula, it should fall slowly and form a thick ribbon.
If the dough becomes extremely thin, it may spread too much during baking.
Do Not Underbake
Choux pastry can look beautifully puffed before it is fully baked. If removed too early, the centers may still contain too much moisture and collapse as they cool.
Look for a deep golden-brown exterior and a firm shell.
Let Them Dry
A short period in the switched-off oven helps remove excess moisture and produces a lighter, more stable pastry.
Do Not Fill Too Early
Always allow the pastry shells to cool completely before filling them. Warm pastry can melt whipped cream and create a soggy interior.
Serving Suggestions
These pastries are especially lovely served on a dessert platter during holidays and family celebrations.
Arrange them in a pyramid and dust lightly with powdered sugar for a simple presentation.
For an elegant dessert, fill each pastry with vanilla cream and drizzle with chocolate.
For afternoon tea, serve smaller versions alongside coffee or tea.
For a family gathering, prepare several fillings and allow everyone to choose their favorite.
Why Lovers of This Recipe Keep Coming Back
People love this recipe because it combines simplicity with an impressive finished result.
The pastry shells are delicate and crisp on the outside while remaining light and airy inside. Once filled with cream, they become rich without feeling excessively heavy.
More importantly, recipes like this often become connected with memories. A grandmother preparing them for Christmas, a child waiting for the tray to cool, or a family member quietly taking an extra one from the dessert table can turn a simple pastry into something meaningful.
That is what makes an old family recipe special. It is not only about the ingredients. It is about the people, occasions, traditions, and memories surrounding it.
Storage
Unfilled choux pastry shells can be stored in an airtight container for approximately 1 to 2 days.
For the best texture, reheat unfilled shells in a 300°F (150°C) oven for several minutes before cooling and filling.
Filled pastries are best enjoyed the same day because the filling gradually softens the pastry shell.
If preparing ahead, bake the shells in advance, cool them completely, and store them unfilled. Add the cream shortly before serving.
Make-Ahead Method
For holiday gatherings, prepare the pastry shells a day ahead.
Bake and cool them completely, then store them in an airtight container.
Prepare the filling separately and refrigerate it.
On the day of serving, pipe the filling into the pastry shells and finish them with powdered sugar, chocolate, or your preferred topping.
This method makes the recipe much easier to manage when preparing a large holiday meal.
Conclusion
These classic choux pastry treats are a beautiful reminder that some of the most treasured recipes do not need complicated ingredients.
With water, butter, flour, eggs, sugar, salt, and vanilla, you can create light and impressive pastries that are perfect for sharing. Whether filled with whipped cream, pastry cream, chocolate, or simply dusted with powdered sugar, they are sure to disappear quickly from the dessert table.
And perhaps the best part is the memory they create. A recipe passed from one generation to another can become more than something written on a card. It becomes part of family history.
So prepare a generous batch, fill them with your favorite cream, place them on the holiday table, and enjoy that wonderful first bite that brings back the feeling of Grandma’s kitchen.
A Little Note for Fellow Recipe Lovers
If this recipe brings back memories of someone special, keep it close and make it part of your own family tradition. Recipes like these are meant to be shared, remembered, and passed along.
And if you would happily sneak one from the dessert table before anyone noticed, this is definitely a recipe worth making.