Diabetic Super Soft Homemade Dinner Rolls
A Heartwarming Old-Fashioned Recipe Passed Down from Grandma’s Kitchen
There’s something magical about homemade dinner rolls fresh from the oven. The warm aroma filling the kitchen, the soft buttery texture, and the comforting taste can instantly bring back memories of family dinners and holiday gatherings. This special diabetic-friendly dinner roll recipe was lovingly passed down from grandmother to grandchild — a practical, wholesome, and incredibly tasty recipe that proves healthy food can still feel comforting and satisfying.
These rolls are made with healthier ingredients to help reduce sugar while still creating fluffy, soft bread that everyone at the table will love. Whether served with soup, salad, roasted meats, or simply enjoyed warm with a little butter, these dinner rolls are perfect for everyday meals and special occasions alike.
If you love old-fashioned homemade recipes like this, don’t forget to leave a sweet comment, a “YUM,” or a heart to keep these treasured family recipes coming. Thank you for your support and kindness!
Why You’ll Love These Dinner Rolls
- Super soft and fluffy texture
- Lower sugar and diabetic-friendly
- Easy and practical recipe for beginners
- Perfect for family dinners and meal prep
- Freezer-friendly and reheats beautifully
- Comfort food with homemade goodness
Ingredients
For the Dough
- 3 ½ cups whole wheat flour or white whole wheat flour
- 1 packet active dry yeast (2 ¼ teaspoons)
- 1 cup warm low-fat milk
- 2 tablespoons olive oil or melted light butter
- 1 tablespoon sugar substitute suitable for baking
- 1 large egg
- 1 teaspoon salt
- ½ cup plain Greek yogurt
- Optional: 1 tablespoon flaxseed meal for extra fiber
For Brushing
- 1 tablespoon melted butter or olive oil
- Optional sprinkle of oats or sesame seeds
Kitchen Equipment Needed
- Large mixing bowl
- Measuring cups and spoons
- Wooden spoon or dough hook
- Baking dish or sheet pan
- Clean kitchen towel
- Pastry brush
Step-by-Step Instructions
Step 1: Activate the Yeast
In a small bowl, combine warm milk with the sugar substitute and yeast. Let it sit for 5–10 minutes until foamy and bubbly. This step helps ensure your rolls rise properly.
Step 2: Prepare the Dough
In a large mixing bowl, combine flour and salt. Add the egg, yogurt, olive oil, and activated yeast mixture.
Mix until a soft dough forms.
Step 3: Knead the Dough
Transfer dough to a lightly floured surface. Knead for about 8–10 minutes until smooth and elastic.
If the dough feels sticky, add a little flour gradually — but avoid adding too much to keep the rolls soft.
Step 4: First Rise
Place dough into a lightly greased bowl and cover with a towel.
Let rise in a warm place for about 1 hour or until doubled in size.
Step 5: Shape the Rolls
Punch down the dough gently and divide into 12 equal portions.
Roll each piece into smooth balls and place them into a greased baking pan close together.
Step 6: Second Rise
Cover the shaped rolls and allow them to rise again for 30–40 minutes until puffy.
This second rise gives the rolls their beautiful soft texture.
Step 7: Bake
Preheat oven to 375°F (190°C).
Brush tops lightly with melted butter or olive oil.
Bake for 18–22 minutes or until golden brown on top.
Step 8: Serve Warm
Remove from oven and let cool slightly before serving.
Enjoy warm with soup, salad, grilled chicken, or your favorite healthy dinner.
Traditional Homemade Methods
Hand-Kneading Method
Grandmothers traditionally kneaded dough by hand, feeling the texture carefully until perfectly smooth and stretchy. This method creates extra-soft rolls and adds love to every bite.
Overnight Refrigerator Method
For deeper flavor, refrigerate the dough overnight after the first rise. The slow fermentation creates richer taste and softer texture.
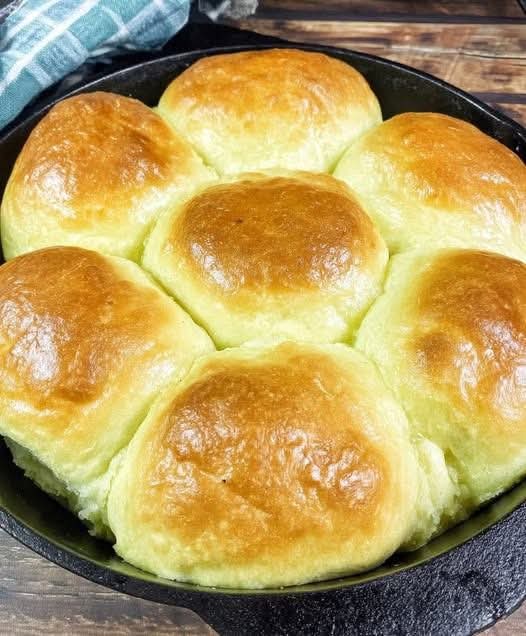
Cast Iron Baking Method
Some families baked rolls in cast iron pans for crisp golden bottoms and fluffy centers.
The History of Homemade Dinner Rolls
Dinner rolls have been a staple in family kitchens for generations. During difficult times, homemade bread represented comfort, nourishment, and togetherness. Families often created healthier variations using whole grains, less sugar, and practical pantry ingredients.
As awareness about diabetes and healthy eating grew, many home bakers adapted classic recipes to include more fiber, lower sugar, and healthier fats without losing the comforting homemade taste.
This recipe continues that loving tradition — blending old-fashioned baking wisdom with modern healthy choices.
Formation and Texture Secrets
The secret to “super soft” rolls comes from:
- Greek yogurt for moisture
- Proper kneading for gluten development
- Two rising periods for fluffy texture
- Brushing tops with butter after baking
- Avoiding too much flour during kneading
The result is pillowy, tender rolls that stay soft for hours.
Helpful Baking Tips
- Always use warm milk, not hot
- Let yeast foam fully before mixing
- Cover dough while rising to prevent drying
- Bake until lightly golden, not dark brown
- Store leftovers in airtight container
What to Serve with Dinner Rolls
These soft rolls pair wonderfully with:
- Homemade soups
- Grilled chicken
- Turkey dinners
- Beef stew
- Fresh salads
- Breakfast eggs
- Healthy sandwiches
Why Homemade Bread Lovers Adore This Recipe
Bread lovers appreciate this recipe because it combines:
- Traditional homemade flavor
- Health-conscious ingredients
- Soft bakery-style texture
- Easy preparation
- Family warmth and nostalgia
Nothing compares to the joy of pulling warm homemade rolls from the oven and sharing them with loved ones.
Conclusion
These Diabetic Super Soft Homemade Dinner Rolls are more than just bread — they are a beautiful reminder of family traditions, practical home cooking, and the love passed down through generations. Soft, fluffy, wholesome, and comforting, they prove that healthier recipes can still taste absolutely delicious.
Whether you bake them for Sunday dinner, holidays, or everyday meals, these rolls are sure to become a treasured favorite in your home just like they were in Grandma’s kitchen.
And remember — if you enjoyed this recipe, leave a little love, a kind comment, or a simple “YUM” to keep these homemade family recipes coming. Thank you so much!