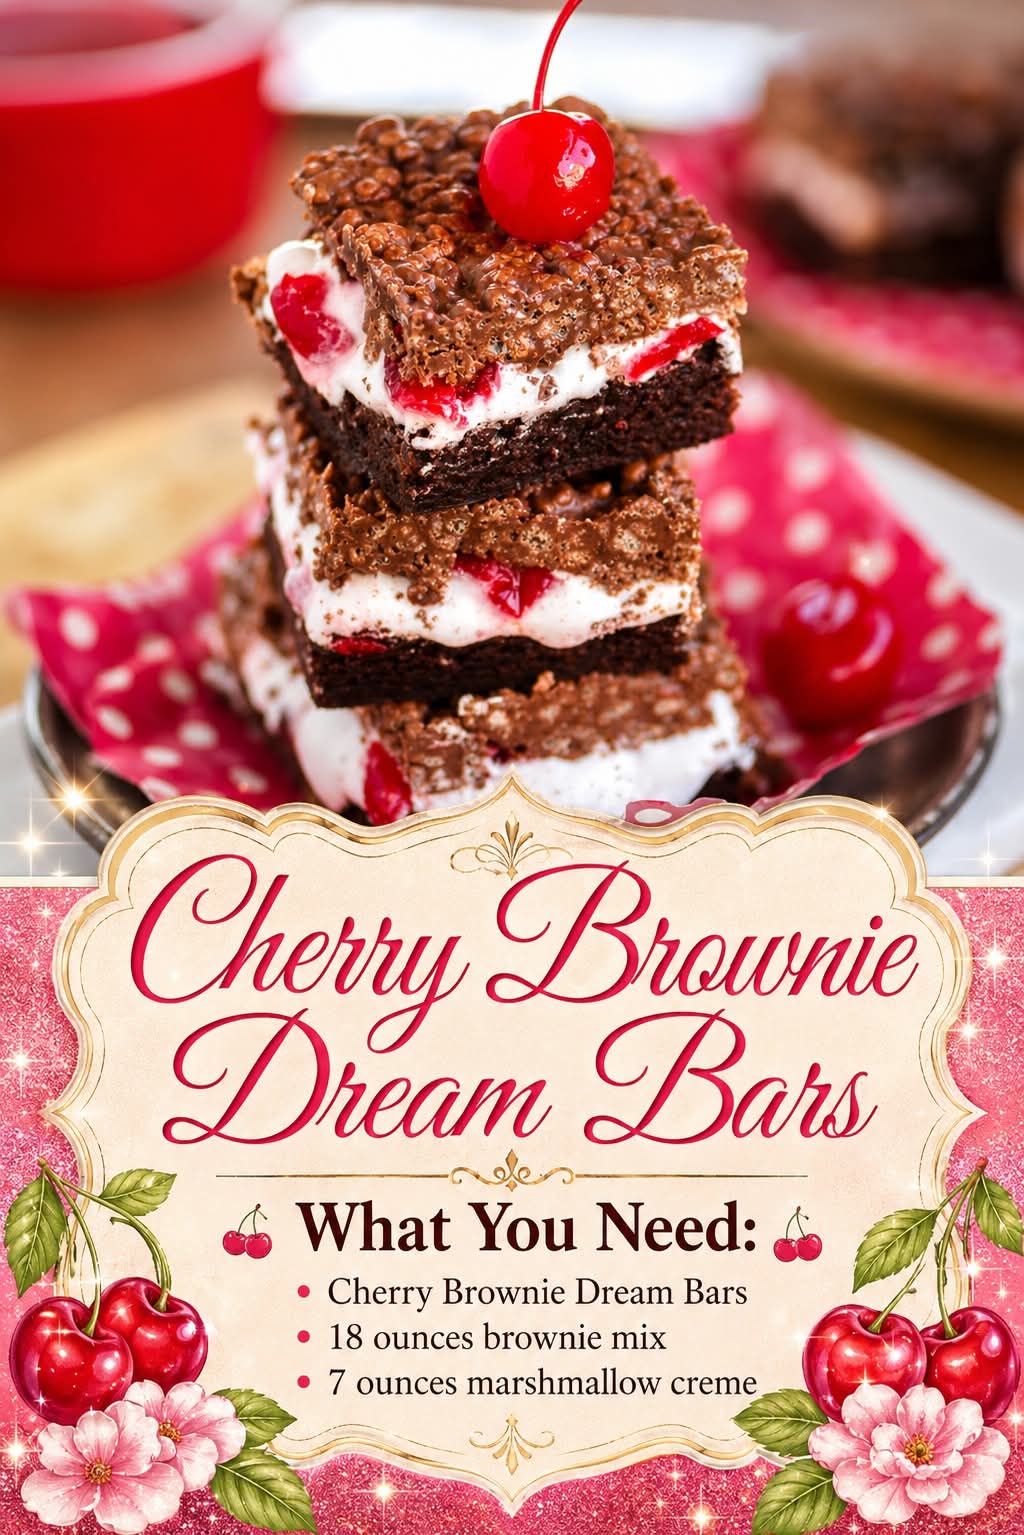
Cherry Brownie Dream Bars 🍒🍫
Few desserts feel as comforting and indulgent as rich chocolate brownies layered with sweet cherries and fluffy marshmallow cream. Cherry Brownie Dream Bars combine the deep fudgy flavor of brownies with the bright sweetness of maraschino cherries, creating a dessert that tastes like a cross between a brownie sundae and a nostalgic bakery treat. Every bite is soft, chewy, creamy, and bursting with chocolate-cherry goodness.
These bars are perfect for birthdays, holiday dessert tables, bake sales, family gatherings, or late-night sweet cravings. The contrast between dense brownie layers and silky marshmallow filling makes them irresistible to chocolate lovers everywhere.
The Sweet History of Chocolate and Cherries 🍒
Chocolate and cherries have been paired together for generations. European desserts like Black Forest Cake helped make the flavor combination famous around the world. The tart brightness of cherries balances rich cocoa beautifully, while creamy fillings add a luxurious texture.
Brownie bars became especially popular in American home baking during the 20th century because they were easy to prepare, easy to serve, and endlessly customizable. Recipes like Cherry Brownie Dream Bars were born from creative bakers layering favorite sweets together into one decadent dessert.
Today, cherry brownies remain beloved because they feel both elegant and nostalgic at the same time.
Ingredients
For the Brownie Base
- 18 ounces brownie mix
- Ingredients required on brownie mix box
(usually eggs, oil, and water)
For the Cherry Filling
- 10 ounces maraschino cherries, drained
- 7 ounces marshmallow creme
Optional Chocolate Topping
- 1 cup semi-sweet chocolate chips
- 1/2 cup heavy cream
- 1 tablespoon butter
Optional Decorations
- Extra cherries
- Chocolate shavings
- Powdered sugar
- Mini chocolate chips
Kitchen Equipment Needed
- 9×13-inch baking pan
- Mixing bowls
- Electric mixer or whisk
- Rubber spatula
- Saucepan (optional for topping)
- Cooling rack
- Sharp knife for slicing
Preparation Method
Step 1: Prepare the Pan
Preheat your oven according to the brownie mix instructions, usually around 350°F (175°C).
Grease a 9×13-inch baking pan lightly or line it with parchment paper for easy removal.
Step 2: Make the Brownie Batter
Prepare the brownie mix following the package directions.
Mix until smooth and glossy but avoid overmixing because this can make brownies tough instead of fudgy.
Step 3: Bake the Brownie Layer
Pour the brownie batter into the prepared pan and spread evenly.
Bake according to package instructions until the center is just set.
The brownies should remain slightly soft because they will continue setting as they cool.
Allow brownies to cool completely before adding the topping layers.
Step 4: Prepare the Cherry Mixture
Drain the maraschino cherries very well and pat them dry using paper towels.
Chop the cherries into small pieces.
In a mixing bowl, gently fold the chopped cherries into the marshmallow creme until evenly combined.
This creates a fluffy, sweet cherry cloud filling.
Step 5: Add the Dream Layer
Spread the cherry marshmallow mixture evenly over the cooled brownies.
Use a spatula lightly greased with butter or cooking spray to prevent sticking.
Step 6: Prepare the Chocolate Topping (Optional)
Heat heavy cream in a saucepan until warm but not boiling.
Pour over chocolate chips and let sit for 2 minutes.
Stir until smooth and glossy.
Add butter for extra shine.
Pour the ganache over the marshmallow layer and spread evenly.
Step 7: Chill and Set
Refrigerate the bars for at least 1–2 hours before slicing.
This helps the layers firm up beautifully.
Cut into squares using a sharp knife cleaned between cuts.
Baking Methods and Tips 🍫
1. Fudgy Method
Bake brownies slightly under the recommended time for ultra-rich bars.
2. Cake-Like Method
Bake fully for a lighter brownie texture.
3. Extra Cherry Flavor
Add a tablespoon of cherry juice to the marshmallow creme.
4. Bakery-Style Finish
Drizzle melted white chocolate across the top for a professional appearance.
5. Crunch Variation
Add chopped walnuts or almonds for texture contrast.
Why People Love Cherry Brownie Dream Bars ❤️
Dessert lovers adore these bars because they combine multiple favorite treats into one dessert:
- Rich fudgy brownies
- Sweet cherry flavor
- Creamy marshmallow texture
- Smooth chocolate topping
- Beautiful layered presentation
Chocolate lovers appreciate the deep cocoa richness, while cherry fans enjoy the fruity sweetness that cuts through the richness perfectly.
These bars are especially popular during holidays like Christmas and Valentine’s Day because the red cherries create a festive appearance.
Serving Ideas 🍒
Serve Cherry Brownie Dream Bars with:
- Vanilla ice cream
- Fresh whipped cream
- Hot coffee
- Cold milk
- Cherry milkshakes
- Espresso drinks
They also make beautiful dessert tray additions for parties and celebrations.
Storage Tips
- Store covered in the refrigerator for up to 5 days.
- Freeze individual bars for up to 2 months.
- Allow frozen bars to thaw in the refrigerator before serving.
Fun Variations
Black Forest Style
Add whipped cream and dark chocolate curls.
Cheesecake Version
Swirl softened cream cheese into the brownie batter.
Triple Chocolate
Use dark, milk, and white chocolate toppings together.
Nut Lover’s Version
Add pecans or walnuts into the brownie batter.
Conclusion 🍫🍒
Cherry Brownie Dream Bars are the perfect dessert for anyone who loves rich chocolate treats with a fruity twist. Their fudgy brownie base, creamy cherry-marshmallow center, and silky chocolate topping create a layered dessert that feels luxurious yet comforting.
Whether served at celebrations, family dinners, or cozy evenings at home, these dreamy bars always disappear quickly. One bite delivers chocolate richness, sweet cherries, and fluffy creaminess all together in perfect harmony.
For brownie lovers and cherry dessert fans alike, this recipe truly lives up to its name — a dreamy dessert worth making again and again.