Here is a complete guide to Butter Biscuits, covering everything from their quirky history to a foolproof recipe for flaky, golden layers.
—
The Art of the Butter Biscuit
The butter biscuit is a culinary paradox: humble yet luxurious, crisp yet tender, simple yet sublime. Unlike the sweet, crunchy “cookie” (which much of the world calls a biscuit), the American-style butter biscuit is a savory, fluffy quickbread, perfect for sopping up gravy or dripping with honey . The secret lies in treating the fat—the butter—as an artist’s tool rather than just an ingredient.
—
The History of the Biscuit
The journey of the biscuit is a long one, though not quite as explosive as one legend suggests. The name comes from the Latin bis coctus, meaning “cooked twice” . This double-cooking method was used by the Romans and medieval armies to create a dry, hard, shelf-stable ration.
One amusing (and likely fictional) Scottish legend from the 17th century claims that the “Cadzow Butter Biscuit” was invented when the 7th Earl Cadzow repurposed stale biscuits as ammunition for a blunderbuss to quell rioting peasants. He noticed the rioters stopped fighting to eat them. Believing lard was “tasteless,” he demanded future batches be made with butter for the house of Cadzow .
The biscuit evolved from a hardtack ration into a fluffy delicacy in the 19th century, thanks to the invention of chemical leaveners like baking powder and baking soda . This innovation allowed bakers to create soft, risen breads quickly, and the “short” biscuit (using cold butter for flakiness) became a staple of American Southern cuisine.
—
Nutritional Information (Per Serving)
(Based on a standard recipe yielding 10 biscuits)
· Calories: ~350 kcal
· Fat: 18g (10g Saturated)
· Carbohydrates: 40g
· Protein: 6g
· Sodium: 600mg
Note: Buttermilk biscuits are an “empty calorie” source of quick energy. While delicious, they are high in saturated fat and sodium, best enjoyed as an occasional treat rather than a daily staple .
—
The “Don’t Lose This” Butter Biscuit Recipe
This recipe prioritizes flakiness and rise. For the best results, remember that cold ingredients are your best friend.
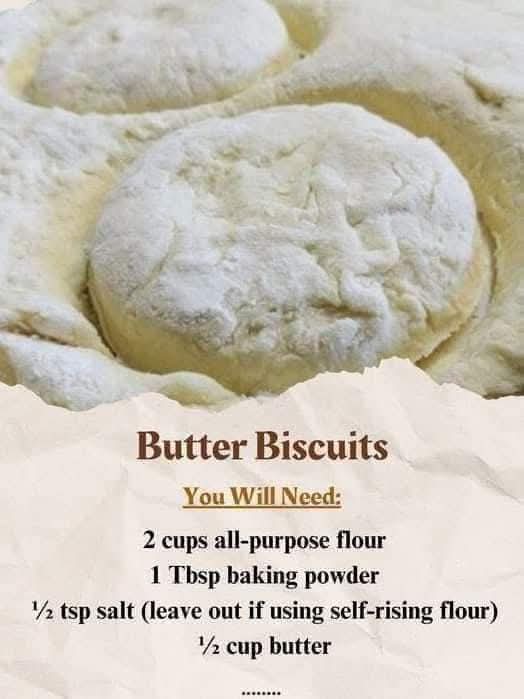
Ingredients
· 2 cups All-purpose Flour (spooned and leveled; if using self-rising flour, omit baking powder and salt)
· 1 Tbsp Baking Powder (fresh; check the expiration date)
· 1 tsp Salt
· 1/2 cup (1 stick) Unsalted Butter (Very cold, cut into 1/2-inch cubes)
· 3/4 cup Buttermilk (Cold)
Equipment
· Pastry cutter or fingertips
· Mixing bowl
· Rolling pin
· 2-inch round biscuit cutter
The Method: Step-by-Step
1. Preparation
Preheat your oven to 425°F (220°C) . The high heat is crucial for activating the baking powder immediately. Line a baking sheet with parchment paper.
2. The Dry Mix
In a large bowl, whisk together the flour, baking powder, and salt. Whisking ensures the leavening agents are evenly distributed so you don’t get a bitter clump of baking soda in one bite .
3. Cutting in the Butter (The Science of Flakiness)
Add the cold butter cubes to the flour. Using a pastry cutter (or your fingertips), work the butter into the flour until the mixture resembles coarse crumbs with pea-sized bits of butter remaining. This is critical: Those solid bits of fat melt in the oven, creating steam. That steam pushes the dough apart, creating the “layers” and “pockets” that define a flaky biscuit .
4. Adding the Liquid
Pour the cold buttermilk into the flour mixture. Stir with a fork or spatula just until the dough comes together into a shaggy mass. Do not overmix; if you develop the gluten too much, the biscuits will be tough instead of tender.
5. Lamination (Folding for Layers)
Turn the dough out onto a floured surface. Gently pat it into a rectangle. Fold the dough in half over itself (like a letter), then pat it out again. Repeat this 3 or 4 times. This creates distinct layers of butter and dough .
6. Cutting
Pat the dough to a uniform 1-inch thickness. Press the biscuit cutter straight down—do not twist the cutter! Twisting seals the edges, preventing the biscuits from rising properly . Place the rounds on the baking sheet, touching each other for soft sides or spaced apart for crispy edges.
7. Baking
Bake for 12–15 minutes, or until the tops are golden brown. The high heat gives the baking powder a “second act,” causing a rapid rise known as “oven spring” . Brush with melted butter immediately upon removing from the oven.
—
Benefits and Formation of the Perfect Biscuit
· The Benefit of Cold Fat: Using cold butter isn’t just a step; it’s the difference between a hockey puck and a cloud. When cold butter hits the hot oven, the water in the butter turns to steam before the dough sets, forcing the layers apart .
· The Role of Buttermilk: The acid in buttermilk reacts with the baking powder, adding extra lift. It also “shortens” the gluten strands, resulting in a more tender crumb and a subtle tangy flavor .
—
Conclusion
The butter biscuit is more than just a side dish; it is a testament to the magic of simple chemistry. With just flour, fat, and a hot oven, you transform a sticky mess into a soaring, golden sculpture. Whether you pair it with jam for breakfast or sausage gravy for dinner, this “Don’t Lose This” recipe is a keeper.
For the Lovers
Biscuit lovers are a specific breed. We are the ones who fight over the “middle” biscuit (the soft one in the center of the pan) and know that the best spoon for jam is actually a torn piece of warm, steaming dough. We are the ones who appreciate that a great biscuit doesn’t need a filling—it just needs respect and a pat of melting butter.