🔥🍫🍓 Campfire Cones — Gooey S’mores-Inspired Fire Treat
✨ Introduction
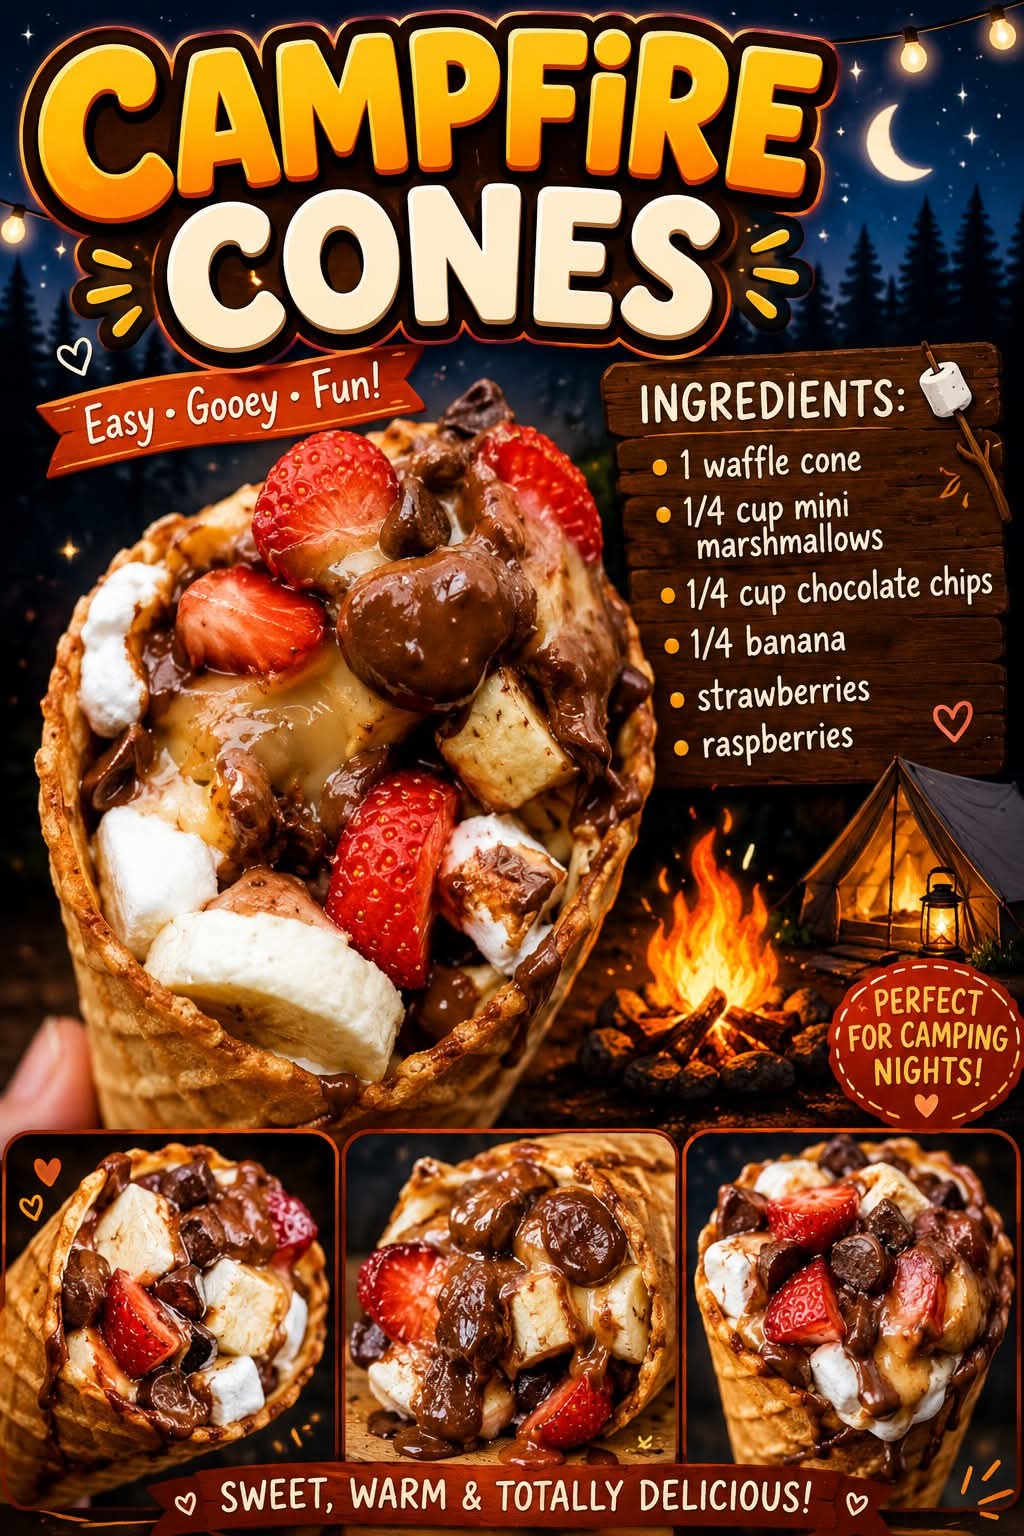
Campfire Cones are a fun, modern twist on classic campfire s’mores. Instead of stacking marshmallows and chocolate between graham crackers, everything gets layered inside a waffle cone and melted slowly over a fire or grill. The result is a warm, gooey, chocolate-melted dessert packed into a crispy cone that holds all the flavor in one hand.
They’re popular at camping trips, beach bonfires, and backyard fire pits because they’re easy to assemble, customizable, and almost impossible to mess up. Every bite feels like melted candy, fruit, and toasted marshmallow wrapped into one crunchy shell.
🧾 Ingredients
Base
- 1 waffle cone
Classic Filling
- Mini marshmallows
- Chocolate chips or chopped chocolate bars
- Crushed graham crackers
Fruity Sweet Add-Ins (optional but amazing)
- Strawberries (fresh or dried)
- Banana slices
- Pineapple bits
- Blueberries
Extra Fun Mix-ins
- Peanut butter chips
- Caramel bits
- Nutella or chocolate spread (small spoonful)
- Crushed cookies (Oreo, digestive biscuits, etc.)
- Chopped nuts (almonds, pecans, walnuts)
Optional Finish
- Melted chocolate drizzle
- Powdered sugar
- Sprinkles
🔥 Instructions
Step 1: Prepare the Cone
Hold your waffle cone upright and start layering ingredients inside. The trick is to alternate textures so everything melts evenly.
Start with:
- A few chocolate chips at the bottom (prevents marshmallows from burning directly)
Then layer:
- Marshmallows
- Fruit pieces
- More chocolate
- Crushed cookies or graham crackers
Repeat until the cone is filled but not overflowing.
Step 2: Wrap for Fire Cooking
Wrap the filled cone tightly in:
- Heavy-duty aluminum foil
Make sure it is fully sealed so nothing leaks while melting.
Step 3: Heat It Up (Campfire Method)
Place the foil-wrapped cone near hot coals or on a grill grate.
- Cook for 5–10 minutes
- Rotate occasionally for even melting
- Do NOT place directly into open flames (it will burn fast)
Step 4: Open Carefully
Remove from heat using tongs. Let it sit for 1–2 minutes.
Unwrap slowly — steam will come out!
Step 5: Enjoy
Eat directly from the cone with a spoon or bite into it like an edible dessert cup.
🧑🍳 Methods Explained
1. Layering Method
The layering technique ensures even melting. Chocolate at the bottom prevents marshmallows from scorching too quickly.
2. Foil Melting Method
Foil traps heat and steam, creating a mini-oven inside the cone. This is what melts everything into a gooey dessert.
3. Rotational Heating Method
Turning the cone while heating avoids burnt spots and ensures a consistent melt.
📜 History & Inspiration
Campfire Cones evolved from traditional American s’mores, which date back to early 20th-century camping culture. As campers became more experimental, they began replacing graham crackers with cones and adding fruit, spreads, and candy.
The idea grew popular through social camping culture and viral outdoor food trends. It combines:
- Ice cream cone structure (portable dessert)
- S’mores flavor tradition
- Campfire cooking technique
Today, it’s a staple in creative outdoor desserts and TikTok-style food hacks.
🧱 Formation (How It Comes Together)
The magic of a Campfire Cone happens in three transformations:
- Heat Activation — marshmallows puff and soften
- Chocolate Melt — turns into a rich, creamy sauce
- Fusion Stage — fruit juices mix with chocolate and marshmallow goo
The cone acts like a edible container that stays crisp on the outside while the inside becomes molten dessert lava.
❤️ “Lovers” Section (Why People Love It)
💕 Couples Love It Because:
- It’s shareable and fun at night fires
- It feels like a “build-your-own dessert date”
- Melty chocolate makes everything feel cozy and romantic
🔥 Kids Love It Because:
- It’s sweet, messy, and customizable
- Every cone is different
- It feels like a dessert surprise every time
🌙 Campfire Lovers Say:
- “It tastes like a s’more but upgraded”
- “It’s dessert and experience in one”
- “No plates needed = pure camping freedom”
🍫 Extra Creative Methods (Advanced Lovers Edition)
💖 Chocolate Lava Cone Method
Add a spoon of Nutella in the center before heating for a molten core effect.
🍓 Berry Burst Method
Use fresh strawberries + white chocolate for a fruity cheesecake-like melt.
🥜 Peanut Butter Fire Cone
Layer peanut butter chips and chocolate for a salty-sweet campfire candy flavor.
🌟 Conclusion
Campfire Cones are more than just a dessert — they’re a camping experience in edible form. They combine heat, creativity, and comfort food into one handheld treat. Whether you’re sitting under stars or grilling in your backyard, they bring people together through shared warmth and melted chocolate joy.
One cone never feels enough… because every version tastes a little different, and every bite disappears too fast.
If you want, I can also make: 🔥
🍌
🍪
🍫