Sugar-Free Condensed Milk (3 Ingredients)
Introduction
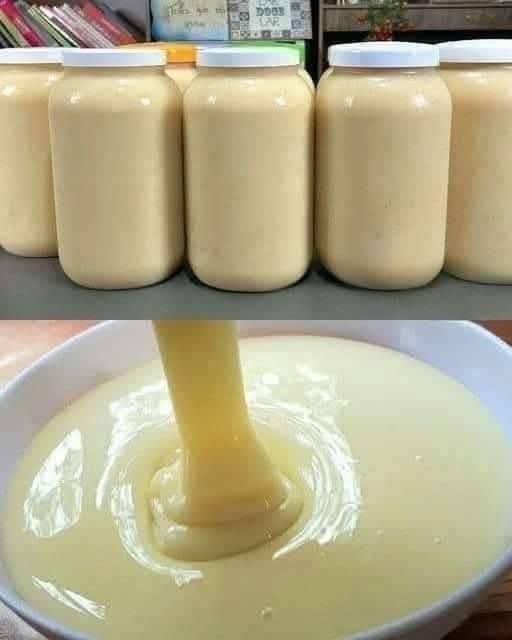
Sugar-free condensed milk is a creamy, rich, and delicious alternative to traditional sweetened condensed milk. It is perfect for people who want to reduce sugar intake while still enjoying desserts, coffee drinks, cakes, candies, and creamy recipes. This homemade version is easy to prepare with only three simple ingredients and costs much less than store-bought sugar-free products.
Traditional condensed milk has been used for generations in desserts because of its thick texture and sweet flavor. However, many commercial versions contain large amounts of refined sugar. This healthier recipe gives you the same smooth consistency without added sugar, making it suitable for low-carb lifestyles, diabetic-friendly desserts, and healthier family cooking.
This recipe is ideal for:
- Coffee lovers
- Keto dessert fans
- Home bakers
- Healthy eaters
- Families wanting economical recipes
The result is silky, creamy, sweet, and incredibly versatile.
History of Condensed Milk
Condensed milk was invented in the 19th century as a way to preserve milk for long periods without refrigeration. It became extremely popular because it was portable, affordable, and useful in baking and desserts.
Traditional sweetened condensed milk quickly became an essential ingredient in:
- Cakes
- Fudge
- Pies
- Ice cream
- Coffee drinks
- Caramel desserts
As healthier lifestyles became more popular, sugar-free versions appeared, helping people enjoy the same creamy richness without excessive sugar.
Today, homemade sugar-free condensed milk is loved by:
- Keto diet followers
- Diabetics
- Fitness enthusiasts
- Health-conscious bakers
Ingredients
Main Ingredients (3 Ingredients Only)
1. Heavy Cream – 2 cups
Heavy cream gives the condensed milk its rich and creamy texture.
2. Butter – 2 tablespoons
Butter adds smoothness and helps create the thick consistency.
3. Sugar-Free Sweetener – ½ cup
Use:
- Erythritol
- Monk fruit sweetener
- Stevia blend
- Allulose
Allulose works especially well because it dissolves smoothly and creates a glossy finish.
Optional Flavor Additions
These are optional but delicious:
- 1 teaspoon vanilla extract
- Pinch of salt
- Cinnamon
- Cocoa powder
- Coffee powder
Kitchen Equipment
You will need:
- Medium saucepan
- Wooden spoon or whisk
- Measuring cups
- Glass jar or container
- Stove
Step-by-Step Instructions
Step 1: Combine Ingredients
Place the heavy cream, butter, and sugar-free sweetener into a medium saucepan.
Stir gently until everything begins to blend together.
Step 2: Heat Slowly
Turn the stove to medium-low heat.
Do not boil aggressively.
Slow cooking helps the mixture thicken properly while preventing separation.
Step 3: Simmer
Allow the mixture to simmer gently for 25–35 minutes.
Stir frequently.
The liquid will slowly reduce and become thicker and creamier.
Step 4: Check Consistency
The condensed milk is ready when:
- It coats the spoon
- The volume reduces by almost half
- The texture becomes silky
Remember: It thickens more after cooling.
Step 5: Cool
Remove from heat.
Allow it to cool for 15–20 minutes.
Transfer into a clean glass jar.
Refrigerate before using.
Different Preparation Methods
1. Stovetop Method
The classic and best method for rich flavor.
2. Slow Cooker Method
Cook on low for 2–3 hours while stirring occasionally.
3. Microwave Method
Heat in short intervals while stirring often.
This method is faster but requires careful watching.
Texture and Formation
The formation of condensed milk happens through slow evaporation.
As heat removes water from the cream:
- The milk proteins concentrate
- The fats thicken
- The sweetener blends smoothly
- The mixture becomes creamy and dense
Butter helps stabilize the texture and adds luxurious richness.
Benefits of Sugar-Free Condensed Milk
1. Lower Sugar Intake
Helps reduce refined sugar consumption.
2. Keto Friendly
Perfect for low-carb diets.
3. Diabetic Friendly
A better option for blood sugar management.
4. Economical
Homemade versions cost much less than store products.
5. No Artificial Preservatives
Fresh and natural ingredients only.
6. Versatile
Can be used in:
- Cakes
- Coffee
- Ice cream
- Candy
- Cheesecake
- Smoothies
Nutrition Information (Approximate)
Per 2 tablespoons:
- Calories: 90–120
- Fat: 10g
- Protein: 1g
- Carbohydrates: 1–3g
- Sugar: 0g
- Fiber: 0g
Values vary depending on sweetener used.
Ways to Use Sugar-Free Condensed Milk
In Drinks
- Coffee
- Iced lattes
- Milk tea
- Hot chocolate
In Desserts
- Cheesecake
- Fudge
- Ice cream
- Pudding
- Truffles
In Baking
- Cookies
- Cakes
- Brownies
- Bars
Tips for Perfect Results
- Use low heat only
- Stir often to prevent burning
- Do not overcook
- Use full-fat cream for best texture
- Refrigerate to thicken further
Common Mistakes to Avoid
Boiling Too Fast
This may cause separation.
Using Low-Fat Milk
The texture will not become thick enough.
Not Stirring
The mixture can stick and burn.
Adding Too Much Sweetener
Can create crystallization.
Storage Instructions
Store in an airtight jar in the refrigerator for:
- Up to 1 week
You can also freeze it for:
- Up to 2 months
Stir after thawing.
Why People Love This Recipe
Dessert lovers enjoy this recipe because it:
- Tastes rich and creamy
- Requires only 3 ingredients
- Saves money
- Works in many desserts
- Is healthier than regular condensed milk
Coffee lovers especially enjoy adding it to iced coffee and homemade lattes because it creates a café-style creamy sweetness.
Conclusion
This homemade sugar-free condensed milk is simple, delicious, creamy, and incredibly practical. With only three ingredients, you can create a healthier version of a classic kitchen staple without sacrificing flavor or texture.
Whether you use it in coffee, desserts, cakes, or sweet snacks, this recipe delivers richness and sweetness in a healthier and more economical way. It is perfect for families, bakers, and anyone who wants a better alternative to traditional condensed milk.
Once you try this homemade version, it may become one of your favorite kitchen essentials forever.