🍞 Bread in a Bag (No-Mess Homemade Bread)
✨ Introduction
“Bread in a Bag” is one of those wonderfully simple recipes that feels almost like magic. No stand mixer, no messy countertop—just a plastic bag, your hands, and a few pantry staples. It’s perfect for beginners, busy days, or even baking with kids. The process is fun, a little hands-on, and incredibly satisfying when you pull a warm, golden loaf out of the oven.
🧾 Ingredients
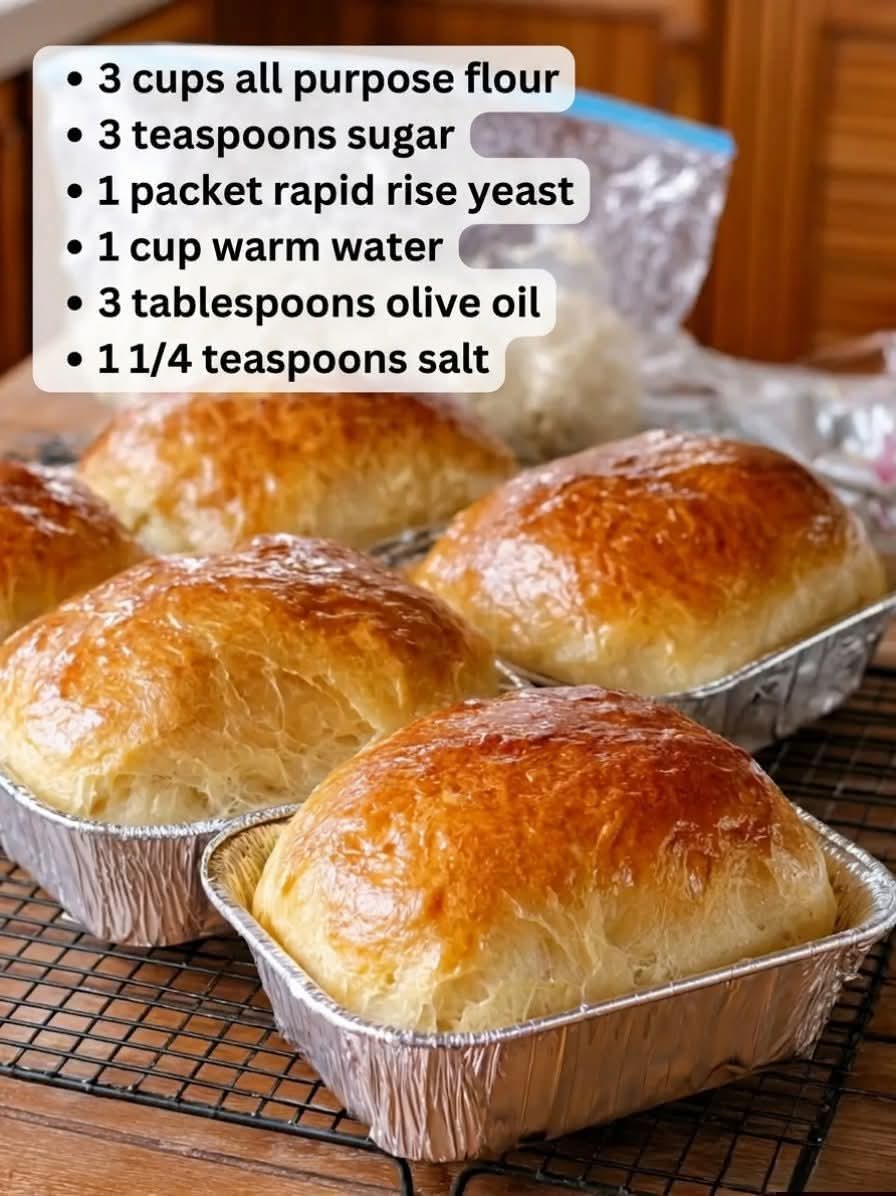
- 3 cups all-purpose flour (divided)
- 1 packet (2 ¼ tsp) active dry yeast
- 1 cup warm water (about 45°C)
- 3 tbsp sugar
- 1 tsp salt
- 3 tbsp vegetable oil
🥖 Instructions
Step 1: Mix in the Bag
- Take a large, sturdy zip-top bag.
- Add 1 cup flour, sugar, and yeast.
- Pour in the warm water.
- Seal the bag and squish it together until well mixed.
Step 2: First Rise
- Let the bag sit in a warm place for about 10–15 minutes until it gets bubbly and slightly puffy.
Step 3: Add More Ingredients
- Open the bag and add oil, salt, and another cup of flour.
- Seal again and squish until combined.
Step 4: Knead in the Bag
- Add the remaining flour (½ to 1 cup gradually).
- Knead by squeezing and pressing the dough inside the bag for about 5–7 minutes until smooth.
Step 5: Shape the Dough
- Remove the dough from the bag and shape it into a loaf or small rolls.
Step 6: Second Rise
- Place the dough on a greased baking pan, cover lightly, and let rise for 20–30 minutes until doubled in size.
Step 7: Bake
- Bake at 180°C (350°F) for 25–30 minutes until golden brown.
- Tap the top—it should sound hollow when done.
🔥 Methods & Tips
- No-Mess Method: All mixing and kneading happens inside the bag—minimal cleanup.
- Hand-Kneading Alternative: You can knead on a floured surface if you prefer more control.
- Flavor Boost: Add herbs, garlic powder, or shredded cheese for variety.
- Perfect Texture Tip: Don’t add too much flour—the dough should stay slightly soft and elastic.
📜 History & Background
Bread has been a staple for thousands of years, dating back to ancient civilizations like Egypt. The “Bread in a Bag” method, however, is a modern twist—popularized in classrooms and home kitchens to simplify traditional bread-making. It removes intimidation and makes baking accessible to everyone, even first-timers.
🧩 Formation (Understanding the Process)
- Yeast Activation: Warm water wakes up the yeast, creating bubbles (carbon dioxide).
- Gluten Development: Kneading strengthens gluten, giving bread structure.
- Rising: The dough expands as yeast feeds on sugar.
- Baking: Heat locks in the structure and creates that golden crust.
❤️ Lovers of This Recipe
- Beginners learning bread baking
- Busy families who want quick homemade bread
- Kids (it’s fun to squish the bag!)
- Anyone who hates cleaning up flour-covered counters
🏁 Conclusion
Bread in a Bag proves that homemade bread doesn’t need to be complicated. It’s simple, fun, and incredibly rewarding. With minimal effort and almost no mess, you get a soft, fresh loaf that tastes far better than store-bought. Once you try it, it might just become your go-to bread recipe whenever you want something warm, comforting, and homemade.
If you want, I can also give you , , or even .