Here’s a joyful, all-out long-form recipe for Strawberry Crunch Cheesecake Cones — packed with creamy filling, crunchy topping, and everything from origin story to true dessert love. Let’s dive into a sweet world where nostalgia and indulgence meet!
Strawberry Crunch Cheesecake Cones
“A No-Bake Delight of Summer Strawberries, Sweet Cream, and Crunchy Magic”
Introduction
Imagine the taste of your favorite strawberry shortcake ice cream bar — but reinvented as a portable, no-bake cheesecake cone. These Strawberry Crunch Cheesecake Cones are vibrant, creamy, and loaded with a strawberry-cookie crumble that makes every bite unforgettable. Served in crisp waffle cones, they’re ideal for birthdays, picnics, and hot summer afternoons.
Whether you’re whipping these up for a dessert table or a late-night snack, these cones are magic in every bite — no oven required.
History of the Strawberry Crunch Craze
Strawberry Crunch desserts trace their roots to the iconic Good Humor Strawberry Shortcake Bar, a childhood staple for many since the 1950s. That ice cream bar featured a creamy strawberry core and crunchy golden crumble coating — and it inspired dozens of recipes, including cakes, parfaits, and now cheesecake cones.
Combining that classic flavor with no-bake cheesecake and handheld cones is a modern twist born from TikTok trends and bakery creativity — a celebration of texture, nostalgia, and fun.
Ingredients
For the Cheesecake Filling
- 1 cup (240ml) heavy whipping cream, cold
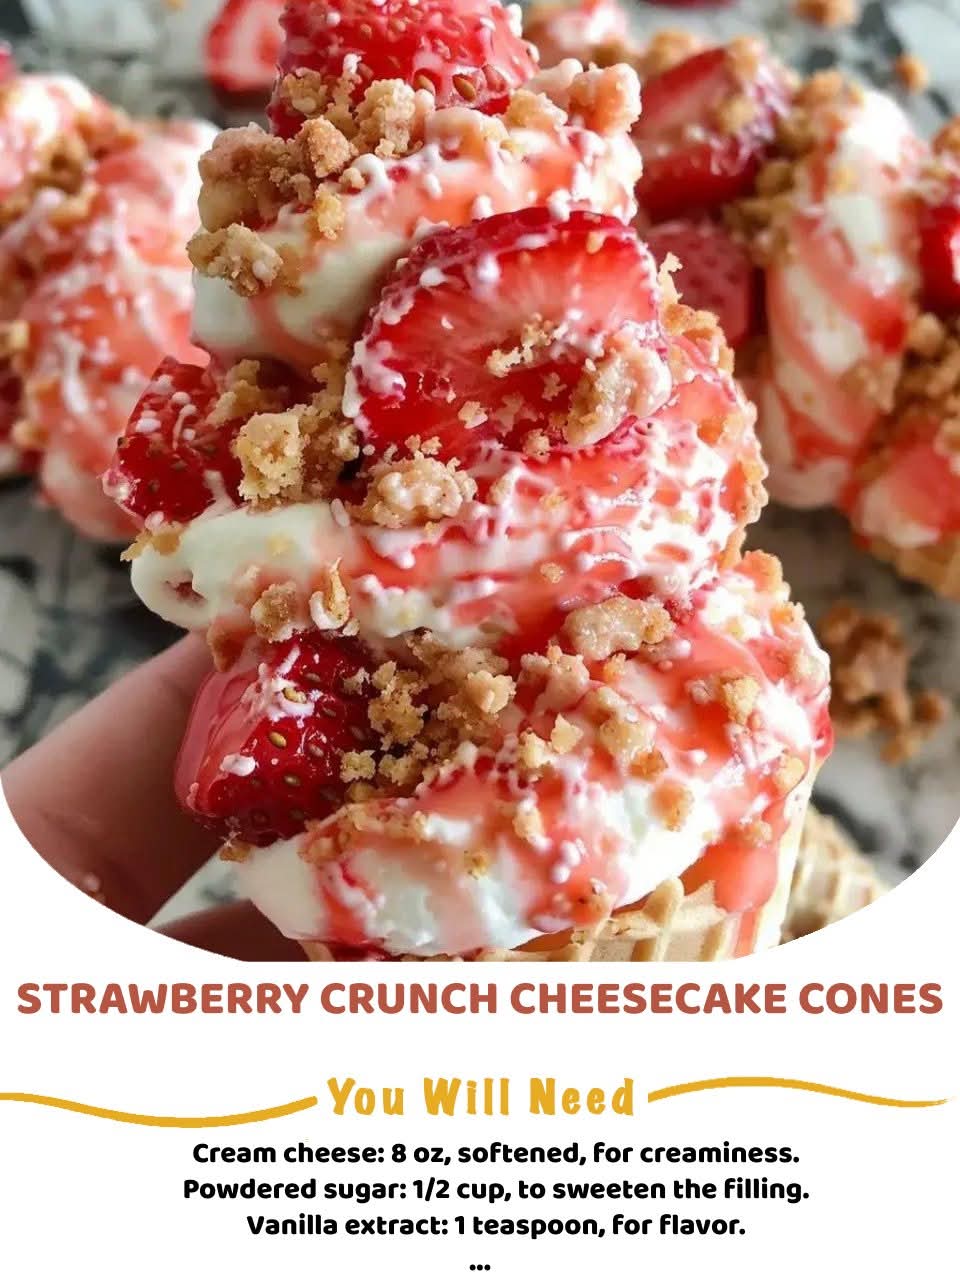
- 8 oz (226g) cream cheese, softened
- ½ cup (60g) powdered sugar
- 1 tsp vanilla extract
- ½ cup (125g) strawberry preserves or jam (plus more for drizzling, optional)
For the Strawberry Crunch Crumble
- 10 Golden Oreos
- 10 freeze-dried strawberries or 1 packet strawberry gelatin powder
- 2 tbsp unsalted butter, melted
For Assembly
- 6–8 waffle cones or sugar cones
- Extra whipped cream (optional)
- Fresh strawberries (sliced or diced)
- White chocolate drizzle or candy melts (optional, for decoration)
Instructions & Method
Step 1: Make the Strawberry Crunch Crumble
- Place Golden Oreos and freeze-dried strawberries (or gelatin powder) in a food processor.
- Pulse until coarse crumbs form.
- Pour in melted butter and pulse again until mixture resembles a crumbly sand.
- Set aside in a bowl — this will be your signature crunch topping.
Step 2: Prepare the Cheesecake Filling
- In a chilled mixing bowl, whip the heavy cream until stiff peaks form. Set aside.
- In another bowl, beat the cream cheese until smooth.
- Add powdered sugar, vanilla, and strawberry preserves. Mix until creamy and pink.
- Gently fold the whipped cream into the strawberry cream cheese mixture until light and fluffy.
Step 3: Assemble the Cones
- Dip the edges of the cones into melted white chocolate (optional) and roll in strawberry crunch for extra flair.
- Spoon or pipe the cheesecake filling into each cone.
- Top generously with the strawberry crunch crumble.
- Add sliced fresh strawberries or a dollop of whipped cream on top.
- Drizzle with strawberry jam or melted white chocolate if desired.
- Chill cones for 20–30 minutes before serving (optional, for a firmer set).
Formation of the Cheesecake Cones
Each cone is a layered masterpiece: crisp cone, cloud-like cheesecake filling, and that signature strawberry crunch. The creaminess melts into the sweetness of the jam, while the Oreo-strawberry crumble delivers a perfect pop of crunch. They’re easy to make, easy to eat, and impossible to forget.
Conclusion
These Strawberry Crunch Cheesecake Cones are fun-sized joy wrapped in a waffle cone. Perfect for summer barbecues, dessert bars, or sweet surprises, they deliver big flavor with zero baking. From the first crunch to the last lick of cream, they’re a tribute to childhood treats with an elegant twist.
For the Lovers of These Cones
This dessert is for:
- Strawberry dreamers who love that fruity-sweet combo
- No-bake bakers who want elegance without heat
- Ice cream truck nostalgics
- Birthday party planners and picnic perfectionists
- You, the flavor chaser who wants creamy, crunchy, and colorful in one bite
Would you like this recipe turned into a printable card or shared as a visual for social media or a dessert board?