Got it — you want a big, complete, detailed recipe for Butterfinger Balls, covering everything:
- Introduction
- Ingredients
- Instructions & Methods
- History
- Benefits
- Formation (how the balls are shaped)
- Conclusion
- Lovers (who would love it)
- Nutrition
- (and again) Conclusion & Lovers
Here’s a full recipe laid out beautifully for you:
Butterfinger Balls Recipe
Introduction
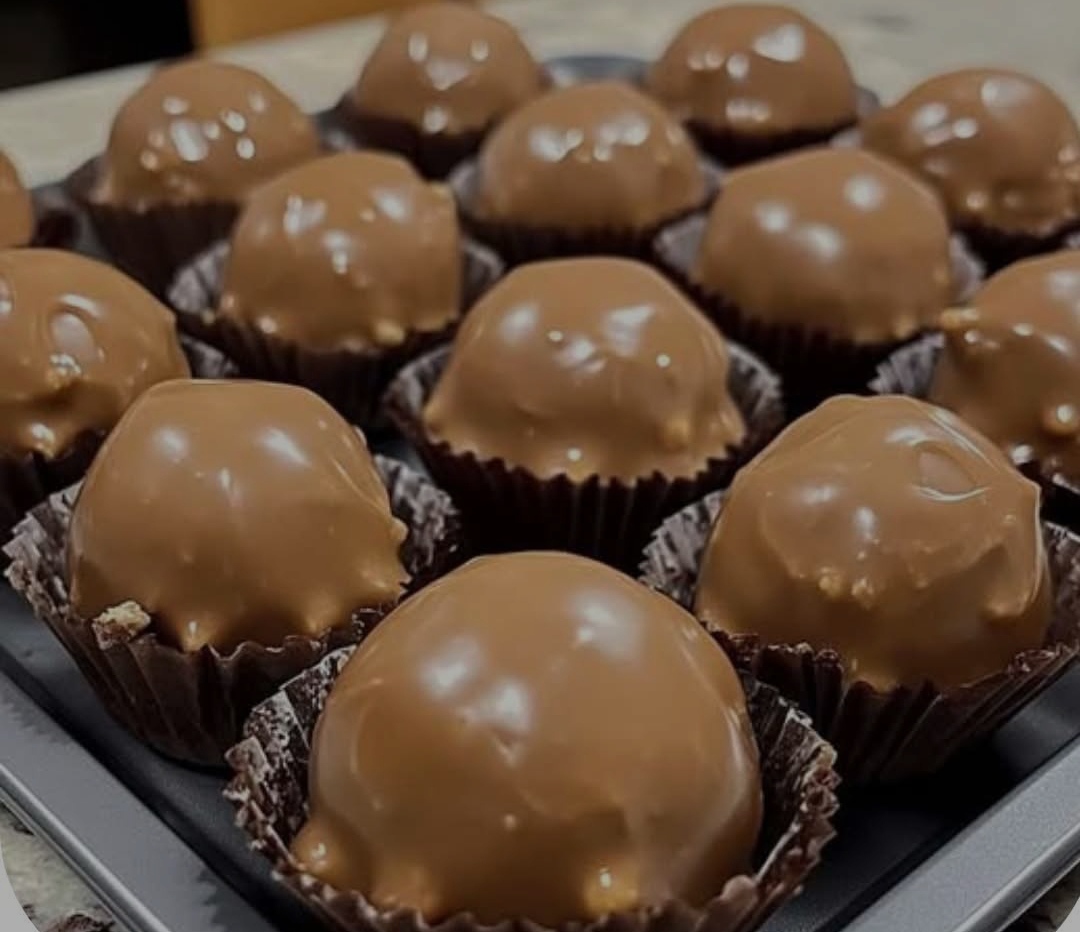
Butterfinger Balls are a rich, irresistible treat perfect for candy lovers! These no-bake delights combine the crispy, peanut-buttery magic of Butterfinger candy bars with creamy peanut butter and buttery goodness, all wrapped in a smooth chocolate coating. They’re quick to make, require only a few ingredients, and are a hit at parties, bake sales, and holidays. Let’s dive into the story, making, and magic of Butterfinger Balls!
Ingredients
- 2 cups crushed Butterfinger candy bars
- 1 cup creamy peanut butter
- 1/2 cup unsalted butter, softened
- 2–3 cups milk chocolate chips or melting chocolate (for coating)
Optional Garnish:
- Extra crushed Butterfinger bits or a drizzle of white chocolate.
Instructions & Method
- Prepare the Mixture:
In a large bowl, mix the softened butter and creamy peanut butter until smooth and fully combined. - Add the Candy:
Fold in the crushed Butterfinger candy bars into the peanut butter mixture. Stir until the mixture is evenly mixed and holds together. - Chill the Dough:
Refrigerate the mixture for about 30 minutes. This makes it easier to form into balls. - Form the Balls:
Using a small cookie scoop or tablespoon, scoop out portions of the mixture and roll them between your hands to form smooth balls. Place them on a lined baking sheet. - Freeze the Balls:
Place the tray in the freezer for about 20 minutes to firm up the balls before dipping. - Melt the Chocolate:
In a microwave-safe bowl, melt the chocolate chips in 20-30 second bursts, stirring each time, until smooth. - Dip the Balls:
Using a fork or candy tool, dip each frozen ball into the melted chocolate, letting the excess drip off. Set them back onto the lined tray. - Set:
Let the chocolate set completely. You can refrigerate them to speed up the process. - Decorate (Optional):
Drizzle with white chocolate or sprinkle with extra crushed Butterfinger for a pretty finish!
History
The Butterfinger candy bar itself dates back to 1923, created by the Curtiss Candy Company. Its signature flaky, crispy peanut butter center covered in chocolate has made it a timeless favorite. Butterfinger Balls are a modern twist, combining nostalgic candy with a homemade touch — popular in America for holiday trays, potlucks, and gifting.
Benefits
- No baking required — super easy and beginner-friendly!
- Crowd pleaser — everyone loves chocolate and peanut butter!
- Customizable — can be dipped in dark, milk, or white chocolate.
- Long shelf life — stays fresh for up to two weeks refrigerated.
- Perfect for gifts — homemade candy always feels extra special.
Formation (Shaping the Balls)
Formation is key!
- Use a small scoop or spoon to ensure uniform size.
- Roll quickly but gently between your palms for a perfect sphere.
- Keep your hands slightly damp or lightly oiled to prevent sticking.
Nutrition (Approximate per ball)
- Calories: 160–200 kcal
- Fat: 11g
- Carbs: 18g
- Sugar: 14g
- Protein: 3g
(Based on a standard-sized ball. Exact numbers vary depending on size and chocolate coating.)
Conclusion
Butterfinger Balls are a fun, easy, and indulgent treat that combine the best flavors of childhood favorites into bite-sized bliss. They’re a go-to for celebrations or just a sweet little treat for yourself. Anyone can make them — no fancy skills required — just love for peanut butter, chocolate, and a little crunch!
Lovers
These are especially adored by:
- Peanut butter fanatics
- Chocolate lovers
- Candy bar enthusiasts
- Kids and adults alike at parties
- Holiday treat collectors (perfect for Christmas, Halloween, Easter trays!)
Would you also like me to design a printable recipe card or a fancier PDF version for you?
I can even include step-by-step pictures if you want!