Cherry Pie Bars 🍒🍰
Introduction
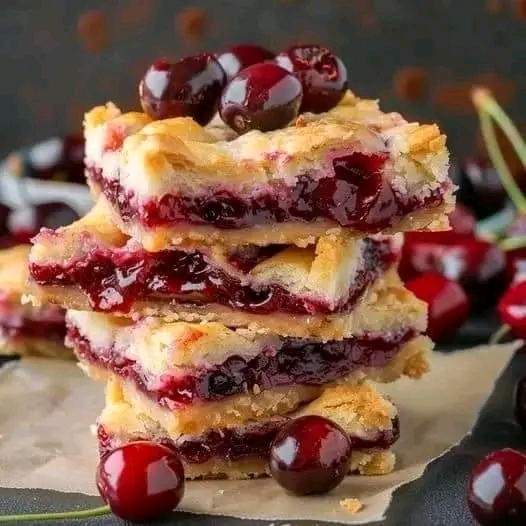
Cherry Pie Bars are an irresistible dessert that brings all the deliciousness of cherry pie in an easy-to-make bar form. These sweet, fruity bars have a buttery, soft crust topped with a rich cherry filling, making them the perfect treat for any occasion. They’re especially popular around holidays, family gatherings, or simply for a sweet, homemade snack. The combination of tangy cherries and a crumbly, buttery crust makes them a crowd-pleaser every time!
Many people look forward to these bars as part of their birthday celebrations, holidays, or any event where something indulgent and fruity is needed. The best part? They’re incredibly simple to prepare, so even beginner bakers can make them with ease. The cherry pie filling adds the perfect level of sweetness and tartness, while the crust provides a melt-in-your-mouth texture.
Now, let’s get started with the recipe to create these delightful Cherry Pie Bars!
Ingredients
For the Crust and Topping:
- 2 ½ cups all-purpose flour
- 1 ½ cups granulated sugar
- 1 teaspoon baking powder
- 1 pinch of salt
- 1 cup unsalted butter, softened
- 1 large egg
- 1 teaspoon vanilla extract
For the Cherry Filling:
- 1 can (21 oz) cherry pie filling
- 1 tablespoon cornstarch (optional, for thickening)
For the Glaze (Optional):
- 1 cup powdered sugar
- 2 tablespoons milk
- ½ teaspoon vanilla extract
Instructions
Step 1: Prepare the Crust
- Preheat your oven to 350°F (175°C). Grease a 9×13-inch baking dish or line it with parchment paper for easy removal.
- In a medium bowl, mix the flour, sugar, baking powder, and salt.
- Cut the softened butter into the dry ingredients until the mixture resembles coarse crumbs.
- Add the egg and vanilla extract to the crumb mixture, stirring until everything is well combined and forms a dough.
- Divide the dough into two parts: about 2/3 for the bottom crust and 1/3 for the topping.
- Press the larger portion of dough evenly into the bottom of the prepared baking dish, creating a solid base for your bars.
Step 2: Make the Cherry Filling
- Spoon the cherry pie filling over the crust, spreading it evenly across the surface.
- If you prefer a thicker filling, mix the cornstarch with a small amount of water and stir it into the cherry filling before spreading it on the crust.
Step 3: Add the Topping
- Crumble the remaining dough over the top of the cherry filling. The dough should cover most of the filling, but some of the cherries can still peek through for that pie-like look.
- Bake for 35-40 minutes, or until the crust is golden brown and the cherry filling is bubbling.
Step 4: Cool and Glaze
- Let the bars cool completely in the pan before cutting them into squares.
- For the glaze, mix the powdered sugar, milk, and vanilla extract in a small bowl until smooth. Drizzle over the cooled bars for an extra touch of sweetness.
Step 5: Serve and Enjoy!
- Serve the bars at room temperature or slightly chilled. They make a perfect dessert for gatherings, picnics, or any time you need a treat that’s sure to impress!
History of Cherry Pie Bars
Cherry pie has a long history in America, dating back to colonial times when cherries were widely cultivated in the Midwest. Over the years, the popularity of cherry pie grew, especially in summer when cherries are in season. The concept of turning traditional pies into bars came much later, as home bakers sought simpler ways to enjoy their favorite pie flavors without the hassle of making a full pie crust.
Cherry pie bars became popular as a more convenient, portable alternative to the classic pie, while still maintaining the same flavor profile. These bars were first introduced in the 1960s in cookbooks and quickly became a favorite at potlucks, bake sales, and family gatherings. The bars are a simpler, easier-to-serve version of the beloved cherry pie, with a crumbly crust and sweet filling in every bite.
Formation and Methods
Different Cooking Methods for Cherry Pie Bars:
- Traditional Oven Baking: This is the classic method that ensures a perfectly golden crust and a bubbling, thick filling. The oven allows the bars to bake evenly, resulting in a crispy bottom crust and a gooey, juicy cherry center.
- Refrigerator Method (No-Bake Option): While the traditional recipe requires baking, you can opt for a no-bake version by using a store-bought graham cracker crust. Instead of baking, let the bars set in the fridge for 4-6 hours to firm up the crust and filling.
- Air Fryer (Quick Version): If you’re short on time, air fryers can also be used to make cherry pie bars. Preheat the air fryer to 350°F (175°C), and bake for about 20 minutes or until the crust is golden and the filling is bubbling.
Lovers of Cherry Pie Bars
These cherry pie bars are loved by people of all ages and for many different reasons:
- Cherry Lovers: Anyone who enjoys cherries, whether fresh, canned, or cooked into pies, will adore these bars. The sweet-tart cherry filling is the star of the show, making every bite irresistible.
- Family Gatherings: These bars are a perfect treat for family gatherings, birthdays, or holidays. They’re easy to make in large batches and slice into serving-friendly squares.
- Bakers of All Skill Levels: Even novice bakers can successfully create these bars. The ingredients are simple, and the instructions are straightforward, making it a great recipe for children or beginning bakers to try out.
- Dessert Enthusiasts: If you’re someone who loves rich, fruity desserts with a buttery base, you’ll fall head over heels for these Cherry Pie Bars.
- Time-Saving Sweet Tooths: The recipe is faster to make than a traditional pie, but still offers that same delicious flavor combination of fruit and crust, making it the perfect choice for anyone needing a quick yet indulgent dessert.
Conclusion
Cherry Pie Bars are a fantastic dessert that combines the nostalgic flavor of cherry pie with the convenience of a bar. They’re simple to prepare, easy to serve, and absolutely delicious! Whether you’re making them for a special occasion or as a treat to enjoy at home, these bars are sure to be a hit.
Give these cherry pie bars a try, and you’ll see why they’re a crowd favorite every time! Their sweet, fruity filling paired with the buttery, crumbly crust makes them an unforgettable dessert.
Want to try a variation with a different fruit, like blueberry or strawberry? Let me know how you’d like to customize this classic recipe!