Easy Homemade Flaky Pie Crust
Introduction
There is something special about a homemade pie crust. A good crust should be tender, buttery, lightly crisp around the edges, and flaky enough to break apart gently with every bite. The best part is that you do not need complicated ingredients or special equipment to make one.
This easy pie crust uses only a few basic ingredients: all-purpose flour, frozen salted butter, cold water, and an optional touch of sugar. The secret is keeping the butter very cold and handling the dough as little as possible.
Grating frozen butter makes this recipe especially simple. Instead of cutting large cubes of butter into the flour, the fine shreds distribute throughout the dough quickly, creating little pockets of butter that melt during baking and produce a beautifully flaky crust.
This recipe makes one single pie crust. If your pie requires both a bottom and a top crust, simply double the recipe.
Ingredients
For One Pie Crust
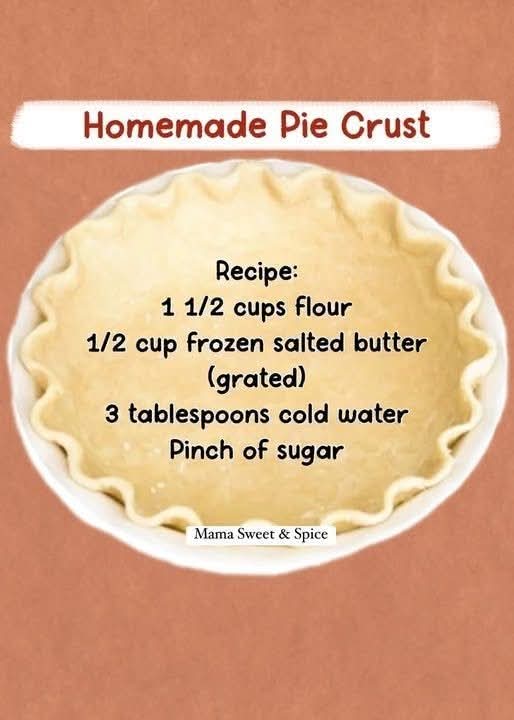
- 1½ cups all-purpose flour
- ½ cup salted butter, frozen solid
- 3 tablespoons ice-cold water
- 1 pinch granulated sugar, optional
For a Double-Crust Pie
- 3 cups all-purpose flour
- 1 cup salted butter, frozen solid
- 6 tablespoons ice-cold water
- 2 pinches granulated sugar, optional
Equipment
- Large mixing bowl
- Box grater
- Fork or pastry cutter
- Rolling pin
- 9-inch pie plate
- Plastic wrap or reusable food wrap
- Measuring cups and spoons
History of Homemade Pie Crust
Pie has been prepared in various forms for centuries. Early versions of pastry were not always intended to be eaten. In medieval European cooking, thick pastry shells were sometimes used as sturdy containers for meat, vegetables, and other fillings.
As pastry-making techniques developed, cooks began creating lighter and more enjoyable crusts. Butter became an especially valued ingredient because it could create tenderness and layers when incorporated properly into flour.
Traditional pie-making was often based on a simple principle: flour, fat, and liquid. The proportions and techniques varied from household to household, and many treasured family recipes were passed down without exact measurements.
Modern pie crust recipes have retained this basic foundation while making the process easier and more reliable. The frozen-butter technique is particularly useful for home bakers because grating the butter allows it to be incorporated quickly while keeping the pieces cold.
Preparing the Dough
Begin by placing the butter in the freezer until it is completely firm. For best results, freeze it for at least 30 minutes, although longer is perfectly fine.
Prepare your cold water by adding ice to a small glass of water and allowing it to become very cold. Measure only the amount of water required for the recipe, making sure you do not accidentally add ice to the dough.
Place the flour in a large mixing bowl. Add the optional sugar if you are preparing a slightly sweet crust for a fruit pie, custard pie, or dessert pie.
Remove the frozen butter from the freezer and grate it using the large holes of a box grater.
Work relatively quickly at this stage. The goal is to keep the butter cold.
Add the grated butter to the flour. Toss gently with a fork or your fingertips until the butter is coated with flour.
Do not knead the mixture.
Adding the Water
Begin by adding 2 tablespoons of the ice-cold water.
Gently mix with a fork. The mixture will initially look crumbly and uneven.
Add the remaining tablespoon of water gradually, mixing just until the dough begins to come together.
You may not need every drop of water, depending on the flour, humidity, and temperature of your kitchen.
The finished dough should hold together when gently pressed between your fingers. It should not be wet, sticky, or overly soft.
If the dough still seems very dry and refuses to hold together, add another teaspoon of cold water at a time until it reaches the correct consistency.
Forming the Dough
Turn the mixture onto a lightly floured work surface.
Gently gather the crumbs together with your hands and press them into a rough mound.
Shape the dough into a round disk rather than a tall ball. A disk will be much easier to roll out later.
Avoid kneading the dough like bread.
The visible pieces of butter are a good thing. They will create flaky layers during baking.
Wrap the dough tightly in plastic wrap or reusable food wrap.
Place it in the refrigerator and chill for at least 30 minutes.
For an even more relaxed dough and better flavor, you can refrigerate it for several hours or overnight.
Rolling Out the Crust
When you are ready to use the dough, remove it from the refrigerator and let it sit at room temperature for approximately 5 to 10 minutes.
The dough should be firm but flexible enough to roll without cracking excessively.
Lightly flour your work surface and rolling pin.
Place the dough in the center and begin rolling from the middle outward.
Rotate the dough a quarter turn after several rolls. Continue rotating and rolling until you have a roughly circular piece of dough about ⅛ inch thick.
Try not to use excessive flour because too much flour can make the crust dry and tough.
If the edges begin to crack, gently press them back together with your fingers.
Forming the Pie Crust
Carefully lift the rolled dough and place it into a 9-inch pie plate.
Do not stretch the dough to make it fit. Stretching can cause the crust to shrink during baking.
Instead, gently lift the edges and allow the dough to settle naturally into the bottom and sides of the pie plate.
Press the dough lightly into the corners.
Trim any excess dough around the edge, leaving approximately ½ inch beyond the rim.
Fold the excess underneath itself to create a thicker edge.
Crimp the edges using your fingers or press them gently with a fork.
At this point, the crust is ready to be filled according to the pie recipe you are preparing.
Method for Blind Baking
Some pies require the crust to be partially or completely baked before the filling is added.
For blind baking, first prick the bottom of the crust several times with a fork. This helps prevent large air bubbles from forming.
Place parchment paper over the crust and fill it with pie weights, dried beans, or uncooked rice.
Bake according to the temperature and timing required by your specific pie recipe.
Once the crust has set, carefully remove the parchment and weights.
Return the crust to the oven if a fully baked crust is required.
Allow it to cool before adding a filling that does not require further baking.
Method for a Filled Pie
If your pie filling is designed to bake together with the crust, there is usually no need to blind bake the crust first.
Simply prepare the crust, add the filling, and bake according to the pie recipe.
For a double-crust pie, prepare two portions of dough.
Roll out the first portion and place it into the pie plate.
Add your prepared filling.
Roll out the second portion and gently place it over the filling.
Trim the edges, seal the top and bottom crusts together, and crimp the edges.
Cut several small vents into the top crust. These openings allow steam to escape while the pie bakes.
For a golden finish, you can brush the top lightly with an egg wash made from one beaten egg mixed with a tablespoon of water.
The Secret to a Flaky Crust
The most important principle in making flaky pastry is temperature.
Cold butter is essential.
When the cold butter hits the heat of the oven, the water contained in the butter turns into steam. That steam pushes apart layers of dough, helping create the characteristic flaky texture.
This is why the butter should be frozen or extremely cold when you begin.
Cold water is equally important. Warm water can soften the butter prematurely and make the dough greasy or difficult to work with.
Another important rule is to avoid overworking the dough.
The more you mix and knead pastry dough, the more gluten can develop. Too much gluten can produce a tough crust instead of a tender one.
The dough should be mixed only until it comes together.
Troubleshooting
If the dough is too dry
Add cold water one teaspoon at a time. Mix gently after each addition until the dough begins to hold together.
Do not pour in a large amount of water at once.
If the dough is too sticky
Lightly dust the work surface and rolling pin with flour.
Avoid adding excessive flour directly to the dough because this can make the finished crust tough.
If the dough cracks while rolling
Allow it to sit at room temperature for a few minutes. If it is extremely cold, it may crack more easily.
You can also gently press the cracks together with your fingertips.
If the crust shrinks during baking
The dough may have been stretched when placed into the pie plate, or it may not have been chilled sufficiently.
Chilling the shaped crust before baking can help reduce shrinkage.
If the crust is tough
The most common causes are overmixing, overworking the dough, or adding too much flour.
Handle the dough gently and stop mixing as soon as it comes together.
If the crust does not become flaky
The butter may have become too warm before baking. Make sure the butter remains cold throughout preparation.
It is also important to leave small pieces of butter visible in the dough rather than completely blending the butter into the flour.
Flavor Variations
Sweet Pie Crust
For fruit pies, cream pies, and other desserts, add the optional pinch of sugar.
You can increase the sugar slightly if you prefer a noticeably sweeter pastry.
Cinnamon Pie Crust
Add a small amount of ground cinnamon to the flour for apple, peach, or other warm-spiced pies.
Vanilla Pie Crust
For dessert pies, a small amount of vanilla extract can add a subtle aroma. If adding liquid flavoring, slightly reduce the water so the dough does not become too wet.
Savory Pie Crust
For chicken pot pie, vegetable pie, or other savory dishes, simply omit the sugar.
You can add a pinch of black pepper, dried herbs, or another seasoning that complements the filling.
Storage
The unbaked dough can be refrigerated for several days when wrapped tightly.
For longer storage, wrap the dough securely and freeze it.
When you are ready to use frozen dough, transfer it to the refrigerator and allow it to thaw gradually.
You can also freeze a shaped, unbaked pie crust. Wrap it carefully to prevent freezer odors and freezer burn.
Serving Suggestions
This crust works beautifully with many different pies, including:
- Apple pie
- Peach pie
- Cherry pie
- Blueberry pie
- Pumpkin pie
- Pecan pie
- Chocolate cream pie
- Coconut cream pie
- Lemon pie
- Strawberry pie
- Chicken pot pie
- Vegetable pot pie
- Quiche
- Savory meat pies
Its neutral buttery flavor makes it versatile enough for both sweet and savory recipes.
Make-Ahead Method
One of the best features of homemade pie dough is that it can be prepared ahead of time.
Prepare the dough as directed, form it into a disk, wrap it tightly, and refrigerate it.
When you are ready to make your pie, allow the dough to soften slightly before rolling.
For busy holidays and family gatherings, preparing the crust a day ahead can make pie-making much easier.
Conclusion
This easy homemade pie crust proves that excellent pastry does not require a long list of ingredients or complicated techniques.
With flour, frozen butter, cold water, and a little patience, you can create a tender and flaky crust that is suitable for countless pies.
The most important lessons are simple: keep the butter cold, use ice-cold water, avoid overworking the dough, and give the pastry enough time to chill.
Once you become comfortable with this basic method, you can use it as the foundation for dozens of homemade pies. Whether you are preparing a classic fruit pie for a family dinner, a creamy dessert for a holiday gathering, or a comforting savory pie on a cold evening, this crust provides a dependable homemade foundation.
Final Baker’s Method
Freeze the butter thoroughly.
Grate the frozen butter.
Combine the flour, optional sugar, and grated butter.
Add ice-cold water gradually.
Mix only until the dough comes together.
Shape it into a disk.
Wrap and refrigerate for at least 30 minutes.
Roll the chilled dough on a lightly floured surface.
Transfer it carefully to the pie plate.
Fill, top, crimp, and bake according to your chosen pie recipe.
Allow the finished pie to cool appropriately before slicing.
The result should be a beautiful homemade crust with a delicate, buttery flavor and flaky layers that make every slice feel special.