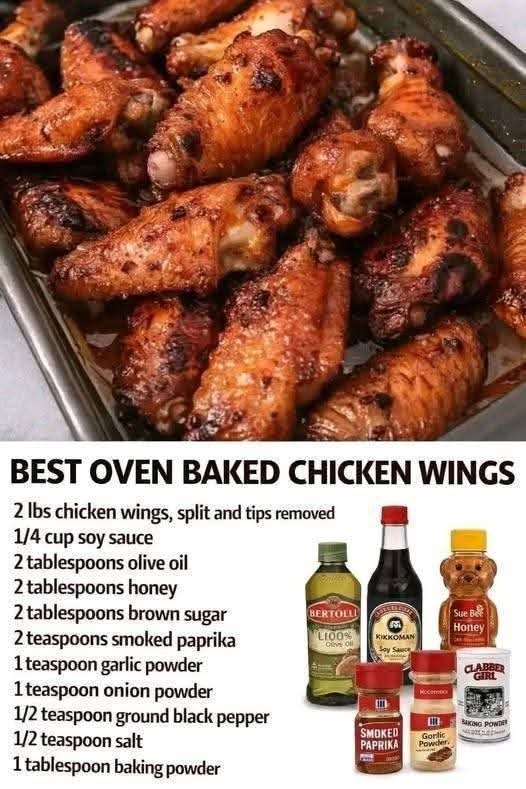
Oven-Fried Chicken Wings
Introduction
Oven-Fried Chicken Wings are a wonderful way to enjoy the crisp, golden texture of fried chicken without having to stand over a pan of hot oil. The wings are coated in a flavorful seasoned flour mixture, then baked at a high temperature until the exterior becomes beautifully crisp while the meat remains juicy and tender.
This recipe is simple enough for a weeknight dinner but delicious enough for game days, family gatherings, parties, picnics, or weekend meals. The combination of paprika, garlic, onion, black pepper, and salt creates a classic savory coating with plenty of flavor.
The secret to successful oven-fried wings is proper preparation. Drying the wings thoroughly, seasoning the flour generously, arranging the pieces correctly on the baking pan, and giving them enough space to circulate heat all contribute to a crispier finish.
Ingredients
For the Chicken
- 2 pounds chicken wings
- 2 cups all-purpose flour
- 2 teaspoons salt
- 2 teaspoons freshly ground black pepper
- 2 teaspoons paprika
- 1 teaspoon garlic powder
- 1 teaspoon onion powder
Optional Seasonings
For additional flavor, you can also add:
- 1 teaspoon dried Italian seasoning
- 1/2 teaspoon cayenne pepper
- 1/2 teaspoon smoked paprika
- 1/2 teaspoon dried thyme
- 1/2 teaspoon celery salt
For the Baking Pan
- 2 to 3 tablespoons vegetable oil, canola oil, or melted butter
- Nonstick cooking spray, if needed
Optional Serving Sauces
- Buffalo sauce
- Barbecue sauce
- Honey mustard
- Ranch dressing
- Garlic butter sauce
- Sweet chili sauce
Equipment
- Large mixing bowl
- Large resealable bag or shallow dish
- Baking sheet
- Wire rack
- Tongs
- Paper towels
- Measuring spoons
Preparation
Begin by preparing the chicken wings. If the wings are whole, separate them at the joints into drumettes and wingettes. Remove and discard the wing tips or save them for making stock.
Pat the chicken pieces very thoroughly with paper towels. Removing excess moisture is important because wet chicken can make the flour coating soft instead of crisp.
Allow the wings to sit for a few minutes while you prepare the seasoning mixture.
Preparing the Seasoned Flour
Place the all-purpose flour in a large bowl, shallow dish, or large resealable bag.
Add the salt, black pepper, paprika, garlic powder, and onion powder. If you want more flavor, add any of the optional seasonings.
Mix everything thoroughly until the spices are evenly distributed throughout the flour.
Taste a tiny pinch of the flour mixture before coating the chicken. Adjust the seasoning if necessary.
Coating the Chicken
Place several chicken wings into the seasoned flour.
Toss them thoroughly until every piece is completely covered. Press the flour gently onto the surface of the chicken so that it forms a substantial coating.
Shake off excess flour and place the coated wings on a clean plate or baking sheet.
Continue until all of the chicken wings have been coated.
For an even thicker crust, allow the coated wings to rest for approximately 10 to 15 minutes before baking. This gives the flour time to absorb some of the moisture from the chicken and helps the coating adhere.
Preparing the Oven
Preheat the oven to 425°F (220°C).
Place a wire rack over a large baking sheet. Lightly grease the rack with cooking spray or brush it with a small amount of oil.
The wire rack is useful because it elevates the chicken above the baking sheet. Hot air can circulate around the wings, allowing the bottom to become crisp instead of sitting directly in accumulated juices.
If you do not have a wire rack, you can place the wings directly on a lightly greased baking sheet, but turn them carefully during cooking for more even browning.
Forming the Wings for Baking
Arrange the coated chicken wings on the prepared rack.
Do not overcrowd the pan. Leave a little space between each piece. Crowding causes steam to become trapped and can prevent the flour coating from becoming crisp.
Lightly drizzle or spray the wings with oil. You do not need to use a large amount of oil. A small amount helps the flour coating brown and develop a fried-like texture.
Baking Method
Place the baking sheet in the preheated oven.
Bake the wings for approximately 25 minutes.
Carefully remove the pan from the oven and turn each wing using tongs.
Return the pan to the oven and continue baking for another 20 to 25 minutes, or until the wings are deeply golden, crisp, and completely cooked.
The exact cooking time will depend on the size of the wings and your oven.
For food safety, the thickest part of the chicken should reach an internal temperature of at least 165°F (74°C).
If you prefer an especially crisp exterior, you can bake the wings for several additional minutes, watching carefully so the coating does not burn.
The Crisping Method
For the crispiest possible wings, keep the oven temperature high and avoid opening the oven repeatedly.
The wire rack allows heat to reach the chicken from underneath, while the dry flour coating absorbs a small amount of oil and browns during baking.
Another useful technique is to make sure the wings are completely dry before flouring them. Excess moisture is one of the biggest enemies of a crisp coating.
Do not cover the chicken while it is baking or immediately after removing it from the oven. Trapped steam will soften the crust.
Resting the Chicken
When the wings are finished, remove them from the oven and allow them to rest for approximately 5 minutes.
Do not stack them immediately. Keep them separated so the hot steam can escape and the coating remains crisp.
Serving Method
Serve the oven-fried chicken wings while they are hot and crispy.
They can be served plain because the seasoned coating already contains plenty of flavor. Alternatively, place your favorite sauce on the side for dipping.
For sauced wings, transfer the cooked wings to a large bowl and add a small amount of sauce. Toss gently until coated.
If you want to preserve maximum crispness, serve the sauce separately and dip each wing as you eat.
Suggested Side Dishes
These wings pair beautifully with many classic sides, including:
- Creamy coleslaw
- Potato wedges
- French fries
- Macaroni and cheese
- Corn on the cob
- Green salad
- Baked potatoes
- Potato salad
- Biscuits
- Roasted vegetables
- Fresh cucumber salad
History and Background
Fried chicken has a long and fascinating history, particularly in the culinary traditions of the American South. Different cultures and communities contributed techniques, seasonings, and methods that helped shape the fried chicken enjoyed today.
Traditional fried chicken is generally cooked by immersing seasoned chicken in hot oil. Oven-fried chicken developed as a practical alternative, using a seasoned flour coating and a hot oven to reproduce some of the crisp texture associated with deep-frying.
Chicken wings later became especially popular as a party and restaurant food. Their small size, flavorful skin, and convenient finger-food format made them ideal for gatherings and casual meals.
Oven-fried wings combine these traditions with a more convenient home-baking method. Instead of requiring a large amount of hot oil, the chicken gets its golden exterior from high oven heat and a small amount of oil.
Why This Recipe Works
The flour creates the foundation of the crispy crust.
Paprika contributes color and a mild earthy flavor.
Black pepper provides warmth and a classic peppery taste.
Garlic powder adds savory depth.
Onion powder contributes sweetness and additional savory flavor.
Salt brings all of the ingredients together and enhances the natural flavor of the chicken.
The high oven temperature helps the coating brown while the chicken cooks through.
The wire rack is particularly helpful because it prevents the chicken from sitting directly in its juices.
Tips for Perfect Oven-Fried Wings
Dry the Chicken Thoroughly
Use paper towels to remove as much surface moisture as possible before coating the wings.
Season Every Layer
The flour coating should be properly seasoned. Bland flour produces bland chicken even if the exterior becomes crispy.
Avoid Overcrowding
Give each wing enough room for hot air to circulate.
Use a Wire Rack
A rack promotes even cooking and helps prevent the bottoms from becoming soggy.
Turn the Wings
Turning them halfway through baking encourages even browning on both sides.
Watch the Final Minutes
The wings can change from beautifully golden to overly dark fairly quickly toward the end of cooking.
Let Them Rest Briefly
A short rest allows the crust to settle without allowing too much steam to soften it.
Variations
Spicy Oven-Fried Wings
Add cayenne pepper and smoked paprika to the flour mixture. Serve with a spicy dipping sauce.
Garlic Herb Wings
Add dried parsley, oregano, thyme, and additional garlic powder to the coating.
Smoky Wings
Use smoked paprika instead of some or all of the regular paprika for a deeper smoky flavor.
Barbecue Wings
Bake the wings until crisp, then toss them lightly with barbecue sauce before serving.
Buffalo Wings
Bake until golden and crisp, then toss with warmed Buffalo-style hot sauce and melted butter.
Lemon Pepper Wings
Add additional black pepper and lemon zest to the seasoning mixture. After baking, finish the wings with fresh lemon juice and additional pepper.
Storage
Allow leftover wings to cool before placing them in an airtight container.
Refrigerate them promptly and use them within 3 to 4 days.
For the best texture, reheat the wings in a preheated oven or air fryer rather than a microwave. This helps restore some of the crispness of the coating.
Reheating Method
Preheat the oven to approximately 400°F (200°C).
Arrange the refrigerated wings on a baking sheet or wire rack in a single layer.
Heat until the chicken is hot throughout and the coating has become crisp again, usually around 10 to 15 minutes depending on the size of the wings.
Avoid covering the wings while reheating because trapped steam can soften the crust.
Formation of the Finished Dish
A successful batch should have a golden-brown, textured exterior with a savory seasoned crust.
When you bite into a properly baked wing, the coating should provide a satisfying crispness while the meat underneath remains tender and juicy.
The finished wings should look rustic and homemade rather than perfectly uniform. The small ridges and uneven areas in the flour coating are what give oven-fried chicken much of its appealing texture.
Conclusion
Oven-Fried Chicken Wings are a simple and satisfying alternative to traditional deep-fried wings. With only a handful of basic ingredients, you can create flavorful chicken with a crisp, golden coating and tender meat.
The most important details are to dry the wings well, season the flour generously, avoid overcrowding the pan, use a hot oven, and allow sufficient cooking time.
Whether served as a family dinner, party appetizer, game-day snack, or weekend comfort food, these wings are easy to customize with different seasonings and sauces.
For chicken-wing lovers, this recipe offers the familiar pleasure of crispy seasoned chicken while keeping the cooking process straightforward and oven-based. It is the kind of recipe that can become a dependable favorite in any home kitchen.