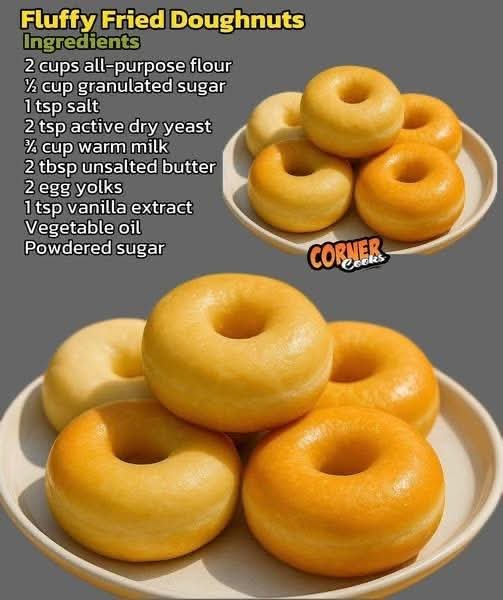
Fluffy Fried Doughnuts Recipe
Introduction
There is something wonderfully comforting about a freshly fried doughnut. These homemade fluffy fried doughnuts are soft, light, slightly sweet, and beautifully golden on the outside. The dough is enriched with milk, butter, egg yolks, and vanilla, giving the finished doughnuts a tender texture and delicious aroma.
This recipe is simple enough for a weekend breakfast but special enough for birthdays, family gatherings, afternoon tea, bake sales, and celebrations. Once fried, the doughnuts can be finished with powdered sugar, cinnamon sugar, chocolate glaze, vanilla glaze, or any topping you love.
The secret to achieving that irresistible fluffy texture is patience: allow the yeast dough enough time to rise, avoid adding too much flour, and maintain the frying oil at the correct temperature.
Ingredients
For the Dough
- 2 cups all-purpose flour
- 1/2 cup granulated sugar
- 1 teaspoon salt
- 2 teaspoons active dry yeast
- 3/4 cup warm milk
- 2 tablespoons unsalted butter, softened
- 2 egg yolks
- 1 teaspoon vanilla extract
For Frying
- Vegetable oil, enough for deep frying
For Finishing
- Powdered sugar, for dusting
- Optional glaze of your choice
- Optional cinnamon sugar
- Optional melted chocolate
Instructions
1. Activate the Yeast
Pour the warm milk into a small bowl. The milk should be warm but not hot.
Add 1 tablespoon of the sugar and the active dry yeast. Stir gently and leave the mixture undisturbed for approximately 5–10 minutes.
When the yeast becomes foamy on the surface, it is ready to use. If there is no noticeable foaming, the yeast may not be active and should be replaced.
2. Combine the Dry Ingredients
In a large mixing bowl, combine the all-purpose flour, remaining granulated sugar, and salt.
Mix everything together so the sugar and salt are evenly distributed throughout the flour.
3. Add the Wet Ingredients
Make a well in the center of the flour mixture.
Add the egg yolks, softened butter, vanilla extract, and activated yeast mixture.
Begin mixing with a wooden spoon or your hands until the ingredients come together into a soft, slightly sticky dough.
Do not immediately add extra flour simply because the dough feels sticky. A slightly soft dough is important for producing fluffy doughnuts.
4. Knead the Dough
Transfer the dough to a lightly floured work surface.
Knead for approximately 6–8 minutes until the dough becomes smooth, soft, and elastic.
You can also knead the dough using a stand mixer fitted with a dough hook.
The finished dough should feel soft and supple rather than stiff or dry.
5. First Rise
Place the dough in a lightly greased bowl.
Cover the bowl with plastic wrap, a clean kitchen towel, or a suitable lid.
Leave it in a warm, draft-free place for approximately 1 hour, or until the dough has doubled in size.
The rising time can vary depending on the temperature of your kitchen. A cooler room may require additional time.
6. Roll Out the Dough
Once the dough has doubled in size, gently press it down to release some of the excess air.
Transfer it to a lightly floured work surface.
Roll the dough to approximately 1/2 inch thick.
Try to maintain an even thickness so all the doughnuts cook at approximately the same rate.
7. Cut the Doughnuts
Use a doughnut cutter or two round cutters to cut out the doughnuts.
If you prefer filled doughnuts, simply cut the dough into rounds without making a hole in the center.
Place the shaped doughnuts onto a lightly floured or parchment-lined tray, leaving enough space between them.
Gather the scraps, gently bring them together, allow them to rest for a few minutes, and roll them again to cut additional doughnuts.
Avoid repeatedly kneading the scraps because excessive handling can make the doughnuts tougher.
8. Second Rise
Cover the shaped doughnuts loosely with a clean kitchen towel.
Allow them to rise for another 20–30 minutes.
They should become noticeably puffy and light.
This second rise is important because it helps create the airy, tender texture associated with fluffy yeast doughnuts.
9. Heat the Oil
Pour vegetable oil into a deep, heavy-bottomed pan.
Heat the oil to approximately 165–175°C (330–350°F).
Use a kitchen thermometer if possible.
Maintaining the correct temperature is essential. If the oil is too cool, the doughnuts can absorb excessive oil and become greasy. If it is too hot, the outside can brown quickly while the inside remains undercooked.
10. Fry the Doughnuts
Carefully place a few doughnuts into the hot oil.
Do not overcrowd the pan because adding too many at once can significantly lower the oil temperature.
Fry for approximately 1–2 minutes per side, turning them carefully once the underside becomes golden brown.
The doughnuts should puff as they fry and develop an even golden color.
Remove them from the oil using a slotted spoon or spider strainer.
11. Drain
Place the freshly fried doughnuts on a wire rack or a plate lined with paper towels.
Allow excess oil to drain for a few minutes.
Do not stack the doughnuts while they are very hot, as trapped steam can soften the crispy exterior.
12. Finish the Doughnuts
Once the doughnuts have cooled slightly, dust them generously with powdered sugar.
For another variation, dip them into a simple glaze made from powdered sugar, a little milk, and vanilla.
You can also coat them with cinnamon sugar or dip them in melted chocolate.
Method for a Simple Vanilla Glaze
For a smooth and creamy glaze, combine:
- 1 cup powdered sugar
- 1–2 tablespoons milk
- 1/2 teaspoon vanilla extract
Whisk until smooth.
If the glaze is too thick, add a few drops of milk. If it is too thin, add a little more powdered sugar.
Dip the top of each doughnut into the glaze and place it on a wire rack until the glaze sets.
History of Fried Doughnuts
Doughnuts belong to a broad family of fried dough foods that have been prepared in different forms around the world for centuries. Fried dough has appeared in many culinary traditions because it requires relatively simple ingredients and produces a satisfying combination of a browned exterior and tender interior.
The modern ring-shaped doughnut became particularly associated with American baking culture, while yeast-raised doughnuts developed into one of the most recognizable styles. Other versions include cake doughnuts, filled doughnuts, twisted doughnuts, and various regional fried pastries.
The basic principle remains remarkably simple: prepare an enriched dough, allow the yeast to develop, shape it, let it rise again, and fry it until golden.
Formation of the Doughnuts
The formation process is important because it determines the final appearance and texture.
After the first rise, the dough becomes lighter and more elastic. Rolling it evenly creates doughnuts with consistent thickness.
When the cutter passes through the dough, avoid twisting it excessively. A clean cut helps the dough maintain its structure.
The second rise allows the shaped doughnuts to become airy before they enter the oil. During frying, the moisture inside the dough turns into steam while the yeast-raised structure expands, creating the characteristic fluffy interior.
The hot oil then quickly cooks and browns the exterior, creating the golden crust.
Tips for Extra-Fluffy Doughnuts
Use the Right Amount of Flour
Adding too much flour is one of the easiest ways to make homemade doughnuts dense. The dough should be soft and slightly tacky while still being manageable.
Do Not Overheat the Milk
Very hot milk can damage the yeast. The milk should feel comfortably warm rather than scalding.
Give the Dough Enough Time to Rise
Do not rely only on the clock. The dough should visibly increase in volume. If your kitchen is cool, the first rise may take longer than one hour.
Do Not Skip the Second Rise
The second rise contributes significantly to the light and fluffy texture.
Maintain the Oil Temperature
Aim for approximately 165–175°C (330–350°F). Frying at a consistent temperature gives you evenly browned doughnuts without excessive oil absorption.
Avoid Overcrowding
Fry only a few doughnuts at a time. This allows them to move freely and helps maintain a stable oil temperature.
Drain Properly
A wire rack is particularly useful because it allows excess oil to drip away while preventing the bottom of the doughnuts from becoming soggy.
Variations
Cinnamon Sugar Doughnuts
While the doughnuts are still warm, brush them lightly with melted butter and roll them in a mixture of granulated sugar and ground cinnamon.
Chocolate Doughnuts
Dip the cooled doughnuts into melted chocolate and allow the chocolate to set.
Filled Doughnuts
Prepare round doughnuts without holes. Once fried and cooled, fill them with custard, chocolate cream, jam, strawberry filling, or vanilla pastry cream.
Honey Glazed Doughnuts
Prepare a simple powdered-sugar glaze and add a small amount of honey for extra sweetness and flavor.
Powdered Sugar Doughnuts
For the easiest finish, simply dust the warm doughnuts generously with powdered sugar immediately before serving.
Serving Suggestions
These fluffy fried doughnuts are best served fresh while they are still soft and tender.
They are wonderful alongside coffee, tea, hot chocolate, or a glass of cold milk. For breakfast, serve them with fresh fruit and yogurt. For dessert, arrange them on a platter with several dipping sauces.
For parties, you can prepare different toppings and allow everyone to decorate their own doughnut.
Storage
Homemade yeast doughnuts are best enjoyed on the day they are prepared.
If you have leftovers, store them in an airtight container at room temperature for up to a couple of days. They can be gently reheated to soften them again.
Avoid refrigerating plain doughnuts unless necessary because refrigeration can make yeast-based baked and fried dough products become firm more quickly.
Conclusion
These Fluffy Fried Doughnuts are a wonderful homemade treat made from simple ingredients. The combination of soft yeast dough, rich egg yolks, butter, milk, and vanilla produces a tender interior, while frying creates a beautifully golden exterior.
The most important parts of the recipe are allowing the dough to rise properly, handling it gently, shaping the doughnuts evenly, and maintaining the oil at the correct temperature.
Finish them with powdered sugar, glaze, cinnamon sugar, chocolate, or your favorite topping. Whether served for breakfast, afternoon tea, dessert, or a family celebration, these homemade doughnuts are sure to bring a warm, comforting bakery-style experience straight to your kitchen.