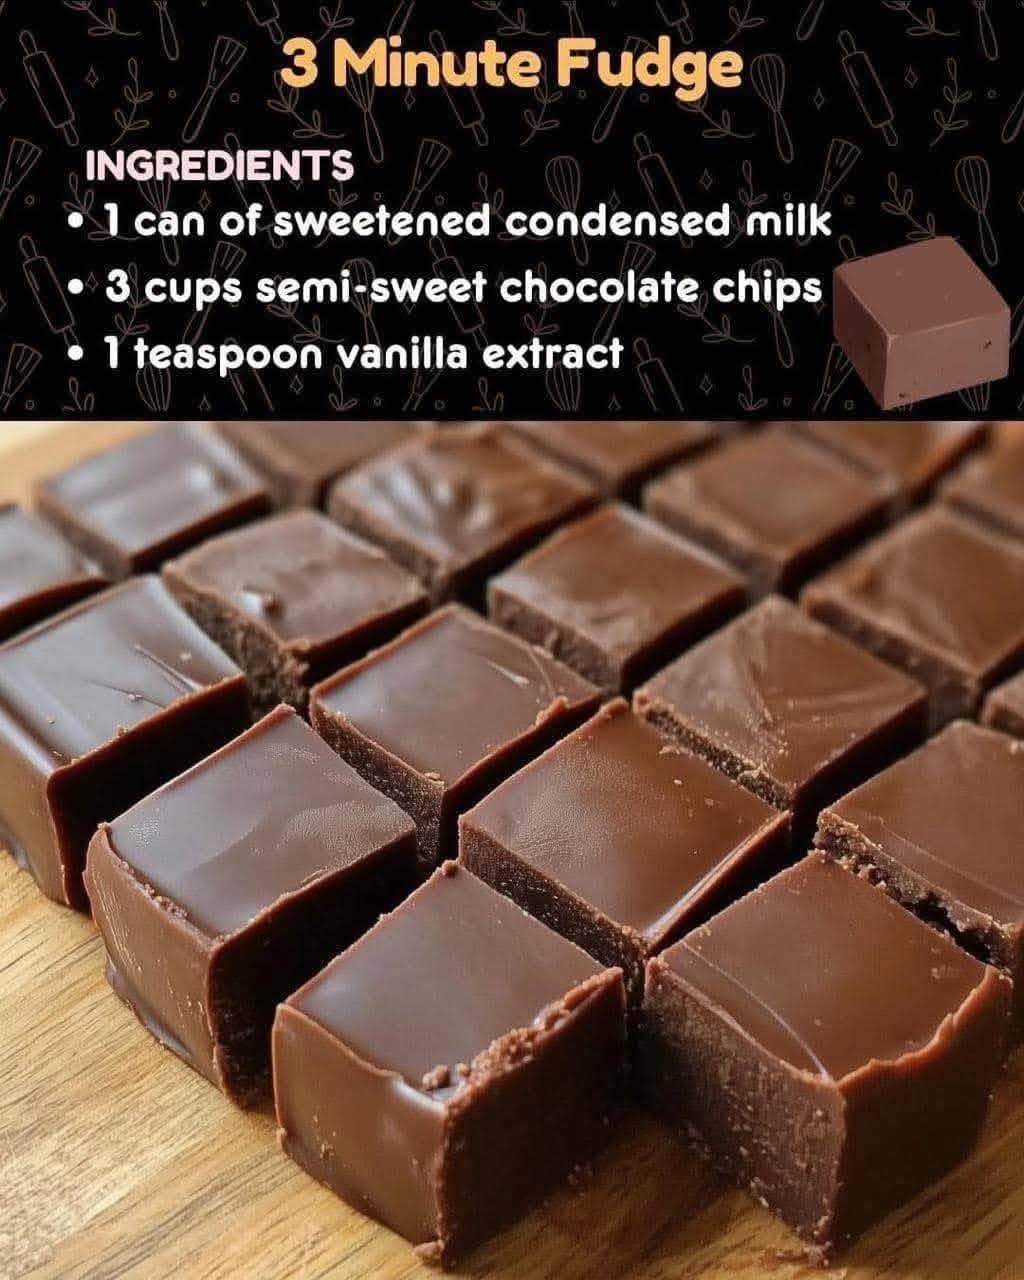
3-Minute Chocolate Fudge
Introduction
There is something wonderfully comforting about homemade fudge. Rich, creamy, chocolatey, and wonderfully smooth, fudge is one of those classic treats that feels special while actually being incredibly simple to prepare.
This 3-Minute Chocolate Fudge is designed for busy days when you want a delicious homemade dessert without spending hours in the kitchen. With only three main ingredients, a saucepan or microwave-safe bowl, and a little patience, you can create a batch of chocolate fudge that is perfect for family gatherings, holidays, parties, bake sales, or an everyday sweet treat.
The combination of sweetened condensed milk and semi-sweet chocolate chips creates a beautifully rich texture, while vanilla extract adds warmth and rounds out the chocolate flavor.
Ingredients
- 1 can sweetened condensed milk, approximately 14 ounces or 397 grams
- 3 cups semi-sweet chocolate chips
- 1 teaspoon vanilla extract
- A small pinch of salt, optional
- Butter or parchment paper for preparing the pan
Equipment
- Medium saucepan or microwave-safe bowl
- Wooden spoon or heat-resistant spatula
- 8-inch square baking pan
- Parchment paper
- Measuring cups and spoons
- Sharp knife for cutting
Instructions
Step 1: Prepare the Pan
Line an 8-inch square baking pan with parchment paper, leaving a little extra paper hanging over the sides. This will make it much easier to lift the finished fudge from the pan.
Lightly grease the parchment paper with a small amount of butter if desired.
Step 2: Combine the Chocolate and Condensed Milk
Place the semi-sweet chocolate chips and sweetened condensed milk into a medium saucepan.
Heat the mixture over low heat, stirring continuously. The goal is to melt the chocolate gently without overheating it.
Continue stirring until the chocolate chips are almost completely melted and the mixture becomes thick, glossy, and smooth.
Step 3: Add the Vanilla
Remove the saucepan from the heat.
Immediately stir in the vanilla extract. If using a pinch of salt, add it at this stage as well.
Mix thoroughly until everything is completely incorporated.
Step 4: Form the Fudge
Quickly transfer the warm fudge mixture into the prepared pan.
Use a spatula to spread it evenly from corner to corner. Smooth the surface as much as possible.
Because the mixture begins to set as it cools, work fairly quickly during this step.
Step 5: Chill
Place the pan in the refrigerator for approximately 1 to 2 hours, or until the fudge is firm.
For an especially firm texture, you can leave it refrigerated for several hours or overnight.
Step 6: Cut and Serve
Once completely set, lift the fudge from the pan using the parchment-paper edges.
Place it on a cutting board and cut it into small squares with a sharp knife.
For cleaner cuts, allow the fudge to sit at room temperature for a few minutes before slicing.
Quick Microwave Method
For an even faster preparation, place the chocolate chips and sweetened condensed milk in a microwave-safe bowl.
Microwave for about 30 seconds, then stir thoroughly.
Continue heating in short 15- to 20-second intervals, stirring well after each interval, until the chocolate is melted and the mixture is smooth.
Stir in the vanilla extract, transfer the mixture to the prepared pan, smooth the top, and refrigerate until firm.
The exact microwave time will vary depending on the power of your microwave, so short heating intervals are important.
The Method Behind Perfect Fudge
The key to this recipe is gentle melting.
Chocolate can become grainy or scorched if it is exposed to excessive heat. Low and steady heat, combined with frequent stirring, helps create the smooth texture that makes fudge so enjoyable.
The sweetened condensed milk provides sweetness, moisture, and structure. Once combined with the melted chocolate and cooled, it produces the dense, creamy consistency associated with classic fudge.
The vanilla extract may seem like a small addition, but it helps enhance the chocolate flavor and gives the finished fudge a more rounded taste.
Formation and Texture
As the warm mixture cools, the chocolate gradually becomes firm. This is why the fudge should be spread into the pan while it is still warm and easy to work with.
For softer fudge, avoid overcooking the mixture and allow it to come to room temperature before serving.
For firmer fudge, refrigerate it for several hours.
The finished texture should be rich and dense but still pleasantly tender when you bite into it.
A Brief History of Fudge
Fudge is a traditional confection that became popular in the United States during the late nineteenth century. Its exact origins are debated, but it became especially associated with American colleges and confectionery shops.
Early fudge recipes generally involved cooking sugar, milk, butter, and chocolate to a specific temperature before cooling and beating the mixture to create its characteristic texture.
Modern condensed-milk fudge became popular because it simplified the process considerably. Instead of carefully controlling a sugar syrup temperature, cooks could combine sweetened condensed milk with chocolate and produce a reliable homemade confection with much less effort.
That convenience is part of what has made this style of fudge so popular for generations.
Variations
Chocolate Walnut Fudge
Stir in about 1 cup of chopped walnuts or pecans before transferring the fudge to the pan.
Peanut Butter Chocolate Fudge
Swirl 1/2 cup of smooth peanut butter over the top of the freshly spread fudge. Use a knife to create gentle swirls.
Chocolate Mint Fudge
Add 1/2 teaspoon of peppermint extract along with the vanilla for a refreshing chocolate-mint flavor.
White Chocolate Fudge
Replace the semi-sweet chocolate chips with white chocolate chips. Because white chocolate melts differently, use gentle heat and stir frequently.
Chocolate Coconut Fudge
Add approximately 1 cup of unsweetened or sweetened shredded coconut to the mixture before spreading it into the pan.
Tips for Success
Use good-quality chocolate chips because chocolate is the main flavor in this recipe.
Do not allow the chocolate mixture to boil.
Stir continuously when using the stovetop method.
Prepare the pan before melting the chocolate so that the fudge can be transferred immediately.
Let the fudge cool completely before cutting.
For neat squares, use a sharp knife and wipe the blade clean between cuts.
Store the finished fudge in an airtight container.
Storage
Keep the fudge in an airtight container at room temperature for several days, provided the room is cool.
For longer storage, refrigerate it in a tightly sealed container. Place parchment paper between layers if stacking the pieces.
The fudge can also be frozen in an airtight, freezer-safe container. Allow it to thaw in the refrigerator before serving for the best texture.
Serving Ideas
This fudge makes a lovely addition to a dessert platter and is especially suitable for holiday celebrations, family gatherings, parties, and homemade gifts.
Place individual pieces into small paper candy cups for an attractive presentation.
You can also serve the fudge alongside cookies, brownies, cakes, fresh berries, or a scoop of vanilla ice cream.
Conclusion
3-Minute Chocolate Fudge proves that a delicious homemade dessert does not have to involve complicated ingredients or a long preparation process.
With sweetened condensed milk, semi-sweet chocolate chips, and vanilla extract, you can create a rich and creamy chocolate treat with minimal effort. The most important things are gentle heating, thorough stirring, and allowing enough time for the fudge to set properly.
Whether you are preparing it for your family, sharing it with friends, making a holiday dessert platter, or simply satisfying a chocolate craving, this simple fudge recipe is one worth keeping.
For the Fudge Lovers
If you love rich chocolate desserts, this is the kind of recipe that deserves a permanent place in your recipe collection. It is quick enough for an ordinary afternoon but delicious enough to serve on special occasions.
The best part is that the recipe is easy to customize. Add nuts, coconut, peanut butter, mint, or another favorite ingredient to create your own signature version.
And if someone asks how you made such delicious homemade fudge so quickly, you can simply tell them that sometimes the easiest recipes are the ones people remember most.