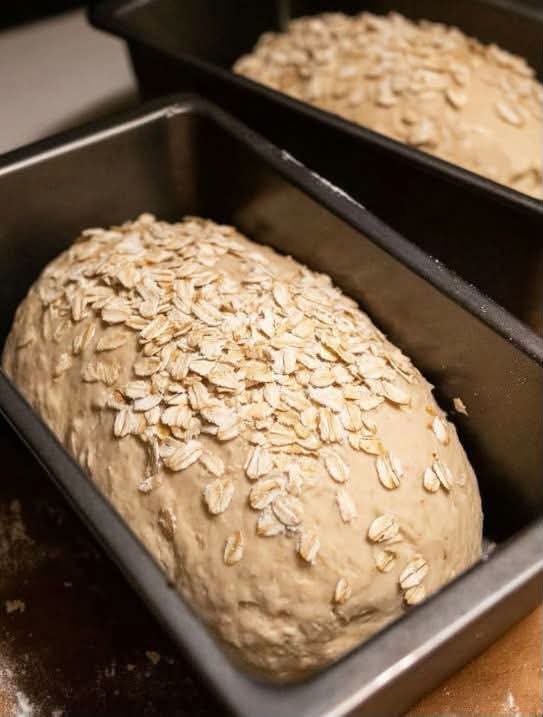
No-Knead Homemade Sandwich Bread
Introduction
This no-knead homemade bread is an excellent recipe for anyone baking bread for the first time. It requires only a handful of simple ingredients, no stand mixer, and no traditional kneading. The secret is giving the dough enough time to rest and develop its structure naturally.
The result is a beautifully golden loaf with a tender, soft interior and a lightly crisp crust. It is wonderful for sandwiches, toast, breakfast, grilled cheese, or simply enjoyed warm with butter.
Ingredients
- 3 cups all-purpose flour or bread flour
- 1 1/2 teaspoons salt
- 1 teaspoon instant yeast
- 1 1/2 cups warm water
- 1 tablespoon honey or sugar, optional
- 1 tablespoon olive oil or melted butter, optional
- Extra flour for shaping
- A little oil or butter for greasing the pan
Instructions
- In a large mixing bowl, combine the flour, salt, and instant yeast. If using honey or sugar, add it to the mixture.
- Slowly pour in the warm water while stirring with a wooden spoon or sturdy spatula.
- Continue mixing until all the flour is moistened. The dough should look sticky and somewhat rough. Do not worry about making it smooth.
- If using olive oil or melted butter, stir it into the dough.
- Cover the bowl tightly with plastic wrap, a lid, or a clean kitchen towel.
- Allow the dough to rest at room temperature for approximately 8 to 12 hours. Overnight is especially convenient. During this time, the yeast will slowly ferment the dough and create flavor and structure.
- When the dough has risen noticeably and looks bubbly on the surface, lightly flour your work surface.
- Gently turn the dough onto the floured surface. Avoid aggressively handling or kneading it because you want to preserve the air bubbles that have developed.
- Fold the dough over itself several times until it forms a loose loaf shape.
- Place the dough into a lightly greased loaf pan. Cover it and let it rise again for approximately 30 to 60 minutes.
- While the dough is finishing its second rise, preheat your oven to 425°F (220°C).
- Place the loaf in the preheated oven and bake for approximately 30 to 40 minutes, or until the top is deeply golden and the loaf sounds hollow when gently tapped.
- Remove the bread from the pan and place it on a wire rack.
- Allow the loaf to cool before slicing. Although the aroma may make it tempting to cut immediately, cooling allows the interior to finish setting and makes cleaner slices.
Method
The defining feature of this bread is the no-knead method. Traditional bread recipes often require kneading to develop gluten. In this recipe, time performs much of that work.
A long resting period allows the flour to absorb the water while fermentation gradually develops the dough’s gluten structure. The yeast also produces gases that become trapped within the dough, creating the airy texture associated with homemade bread.
The dough should remain relatively soft and sticky. Resist the temptation to add large amounts of extra flour, because too much flour can produce a dense and dry loaf.
The Formation of the Dough
During the first resting period, the flour hydrates and the gluten proteins begin forming a network. As the yeast feeds on available sugars, fermentation produces carbon dioxide and flavorful compounds.
The carbon dioxide becomes trapped within the developing gluten network, causing the dough to expand. This is why a simple mixture of flour, water, yeast, and salt can transform into a light loaf.
The second rise gives the dough additional volume before baking. Once the loaf enters the hot oven, the yeast becomes highly active for a short time before the heat stops fermentation. This final expansion is known as oven spring.
A Little History
Bread is one of the oldest prepared foods in human history. Early forms of bread were made from simple mixtures of grains and water and cooked on heated stones or other basic cooking surfaces.
As bread-making developed, people learned the importance of fermentation and eventually discovered that yeast could produce lighter, more flavorful loaves.
No-knead bread became especially popular in modern home baking because it simplified a technique that traditionally required considerable physical effort. The method demonstrated that excellent bread could be produced with minimal handling when fermentation and time were allowed to do much of the work.
Helpful Baking Tips
Use warm rather than hot water. Water that is excessively hot can damage the yeast.
Do not rush the first rise. A longer fermentation generally gives the bread more flavor and a better texture.
Avoid adding too much flour. Sticky dough is normal for a no-knead recipe.
Let the bread cool before slicing. Cutting while the loaf is extremely hot can make the crumb appear gummy.
For a softer crust, brush the hot loaf lightly with butter immediately after baking.
For a crispier crust, allow the loaf to cool completely on a wire rack without covering it.
Variations
For a richer loaf, replace part of the water with milk.
For a slightly sweeter sandwich bread, add 2 tablespoons of honey.
For a hearty loaf, replace up to 1 cup of the all-purpose flour with whole-wheat flour.
For a rustic version, add sunflower seeds, sesame seeds, oats, or flaxseeds.
For garlic bread, add a small amount of garlic powder and dried herbs to the dough.
Serving Ideas
This loaf is perfect for classic sandwiches filled with cheese, vegetables, roasted meats, eggs, or tuna.
It also makes excellent toast. Slice it thickly and toast until golden, then serve with butter, jam, honey, peanut butter, or your favorite spread.
For a simple breakfast, serve warm slices with butter and a cup of coffee or tea.
It is also excellent for French toast because the homemade crumb absorbs the egg mixture beautifully.
Conclusion
This no-knead loaf proves that making homemade bread does not have to be complicated. With basic ingredients, minimal effort, and a little patience, you can create a beautiful loaf with a soft interior, golden crust, and wonderful homemade flavor.
It is a particularly good first bread because there is no complicated kneading technique to master. Once you become comfortable with this recipe, you can experiment with whole grains, seeds, herbs, milk, honey, and other flavors to create your own favorite loaf.
For the Love of Homemade Bread
There is something special about taking flour, water, yeast, and salt and turning them into a warm loaf of bread. The smell filling the kitchen while it bakes, the sound of the crust cracking as it cools, and that first warm slice spread with butter make the entire process worthwhile.
This is the kind of simple recipe that can become a regular part of your kitchen. Make it once, and you may find yourself keeping the ingredients on hand so you can prepare another loaf whenever the craving for fresh homemade bread arrives.