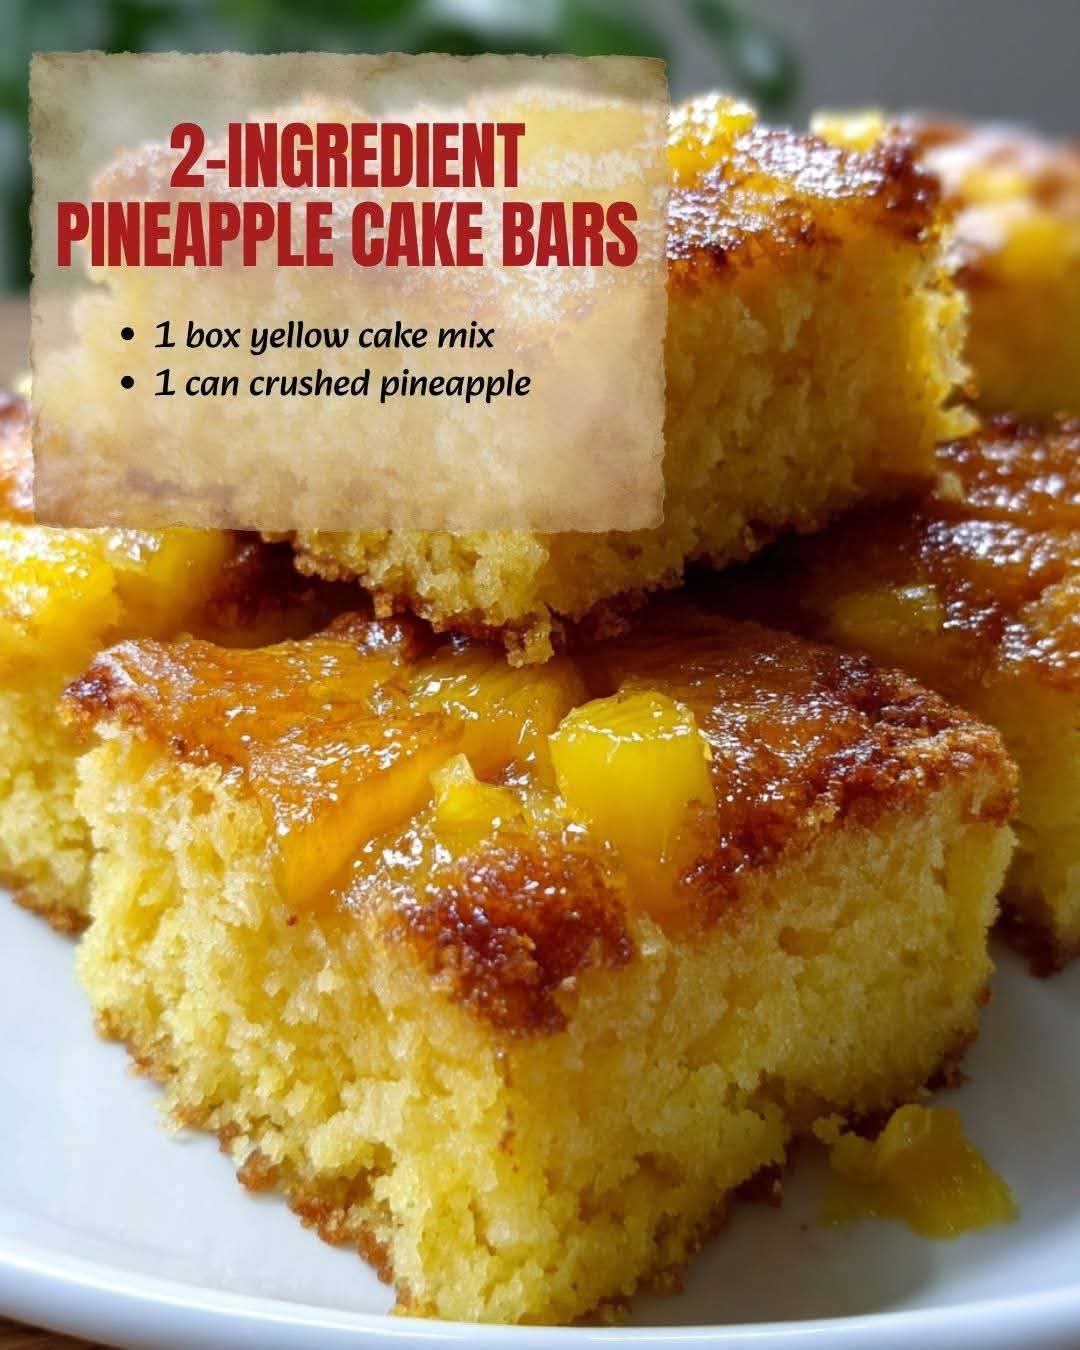
2-Ingredient Pineapple Cake Bars
Introduction
These 2-Ingredient Pineapple Cake Bars are one of the easiest desserts you can make when you want something sweet, soft, and full of tropical flavor without spending hours in the kitchen. With only a box of cake mix and a can of crushed pineapple, you can create tender golden bars with a wonderfully moist texture and naturally juicy pineapple flavor.
They are perfect for busy afternoons, potlucks, family gatherings, bake sales, or whenever you have a craving for a simple homemade dessert. The pineapple provides moisture and sweetness while the cake mix creates a soft, fluffy structure, making this recipe surprisingly delicious for something so simple.
Ingredients
Main Ingredients
- 1 box yellow or white cake mix, approximately 15.25 ounces
- 1 can crushed pineapple in juice, approximately 20 ounces, undrained
Optional Additions
The recipe works perfectly with only two ingredients, but if you want to dress it up, you can add:
- 1/2 cup shredded sweetened coconut
- 1/2 cup chopped pecans or walnuts
- 1 teaspoon vanilla extract
- 1/2 teaspoon ground cinnamon
- Powdered sugar for dusting
- Simple vanilla glaze for drizzling
- Toasted coconut for topping
Equipment
- 9 x 13-inch baking pan
- Mixing bowl
- Wooden spoon or rubber spatula
- Measuring cups and spoons
- Parchment paper or nonstick cooking spray
- Cooling rack
Instructions
Step 1: Prepare the Oven
Preheat your oven to 350°F (175°C). Lightly grease a 9 x 13-inch baking pan or line it with parchment paper, leaving a little overhang on the sides so the finished bars can be lifted out easily.
Step 2: Combine the Ingredients
Pour the entire box of dry cake mix into a large mixing bowl.
Add the entire can of crushed pineapple, including the juice.
Stir the mixture together until the dry cake mix is completely moistened and no large pockets of dry mix remain. The batter will be thick and somewhat sticky. Do not add eggs, oil, or water.
If using optional coconut, nuts, vanilla, or cinnamon, gently fold them into the batter at this stage.
Step 3: Spread the Batter
Transfer the mixture to the prepared baking pan. Use a spatula or the back of a spoon to spread it evenly across the pan.
Because the batter is thick, take your time spreading it into the corners so the bars bake evenly.
Step 4: Bake
Place the pan in the preheated oven and bake for approximately 25 to 30 minutes.
The bars should become lightly golden on top, and the center should look set. A toothpick inserted into the center should come out mostly clean, with a few moist crumbs attached.
Avoid overbaking, because the pineapple bars are best when they remain soft and moist.
Step 5: Cool
Remove the pan from the oven and allow the cake to cool in the pan for at least 20 to 30 minutes.
For cleaner slices, allow it to cool completely before cutting.
Step 6: Cut and Serve
Lift the cake from the pan using the parchment paper if you lined the pan. Cut into squares or rectangular bars.
For a simple finish, dust the cooled bars lightly with powdered sugar.
You can also drizzle them with vanilla glaze or sprinkle them with toasted coconut.
Method
The secret behind this recipe is the combination of dry cake mix and undrained crushed pineapple.
Normally, boxed cake mix requires eggs, oil, and water. In this recipe, the pineapple takes the place of much of the additional liquid and moisture. The pineapple juice hydrates the dry ingredients while the fruit contributes sweetness, flavor, and moisture.
Because there are no eggs or added oil, the finished texture is slightly different from a traditional cake. Instead of being rich and fluffy like a conventional layer cake, these bars are soft, tender, moist, and pleasantly dense.
The most important technique is simply to avoid overmixing and overbaking. Mix only until everything is incorporated, then bake until the center is set.
History and Inspiration
Simple cake-mix desserts became especially popular as boxed baking mixes became common in American kitchens during the twentieth century. They offered home cooks a convenient way to prepare cakes and other desserts without measuring every dry ingredient individually.
Pineapple desserts have an even longer history. Pineapple became closely associated with American baking and entertaining, particularly through desserts such as pineapple upside-down cake. Its sweet-tart flavor and juicy texture make it especially well suited to cakes, bars, cobblers, and other baked treats.
This two-ingredient version follows that tradition of combining convenient pantry ingredients with canned pineapple to create an easy dessert that tastes much more elaborate than the preparation suggests.
Formation and Texture
As the bars bake, the pineapple juice spreads throughout the cake mixture and keeps the interior moist. Meanwhile, the cake mix develops structure and creates a soft golden exterior.
The result should have:
- A lightly golden top
- Soft and tender edges
- A moist, slightly dense center
- Small pieces of juicy pineapple throughout
- A sweet tropical flavor
- A delicate cake-like texture
If you prefer firmer bars, bake them for an additional few minutes, but watch them carefully so they do not become dry.
Variations
Pineapple Coconut Bars
Fold 1/2 cup shredded coconut into the batter before baking. Sprinkle a little additional coconut over the top before placing the pan in the oven.
Pineapple Pecan Bars
Add 1/2 cup finely chopped pecans or walnuts for a pleasant crunch and nutty flavor.
Pineapple Cinnamon Bars
Add 1/2 teaspoon cinnamon to give the bars a warm, bakery-style flavor.
Pineapple Glazed Bars
Once the bars have cooled completely, drizzle them with a simple glaze made from powdered sugar and a small amount of milk or pineapple juice.
Tropical Dessert Bars
Add coconut and chopped macadamia nuts for a more tropical variation.
Serving Suggestions
These bars are delicious served at room temperature, but they can also be slightly chilled for a firmer texture.
Serve them with:
- Whipped cream
- Vanilla ice cream
- Fresh pineapple
- Toasted coconut
- Powdered sugar
- Vanilla glaze
- Caramel sauce
For a beautiful dessert platter, cut the bars into small squares and arrange them with fresh fruit.
Storage
Store the cooled pineapple bars in an airtight container.
They can be kept at room temperature for about 2 days or refrigerated for approximately 4 to 5 days.
If refrigerated, allow them to sit at room temperature for a few minutes before serving for the softest texture.
Tips for Perfect Pineapple Cake Bars
- Use undrained pineapple. The juice provides important moisture for the recipe.
- Do not add eggs, oil, or water. The recipe is designed around only the cake mix and pineapple.
- Spread the batter evenly. This helps the bars bake consistently.
- Do not overbake. Remove them once the center is set and the top is lightly golden.
- Cool before slicing. The bars become easier to cut as they cool.
- Use parchment paper. It makes removing and slicing the bars much easier.
- Choose your cake mix carefully. Yellow cake mix gives a buttery flavor, while white cake mix produces a lighter result.
Conclusion
These 2-Ingredient Pineapple Cake Bars prove that a delicious homemade dessert does not need a long ingredient list. A simple box of cake mix and a can of crushed pineapple transform into soft, golden, tropical bars with very little preparation.
They are especially loved by people who appreciate easy desserts that deliver homemade flavor without complicated techniques. Whether you serve them for a family gathering, afternoon treat, holiday table, or casual weekend dessert, they are simple, comforting, and satisfying.
Once you try the basic version, the possibilities are almost endless. Add coconut for a tropical twist, pecans for crunch, or a light glaze for extra sweetness. However you prepare them, these pineapple cake bars are a wonderful example of how two humble ingredients can create something truly delicious.