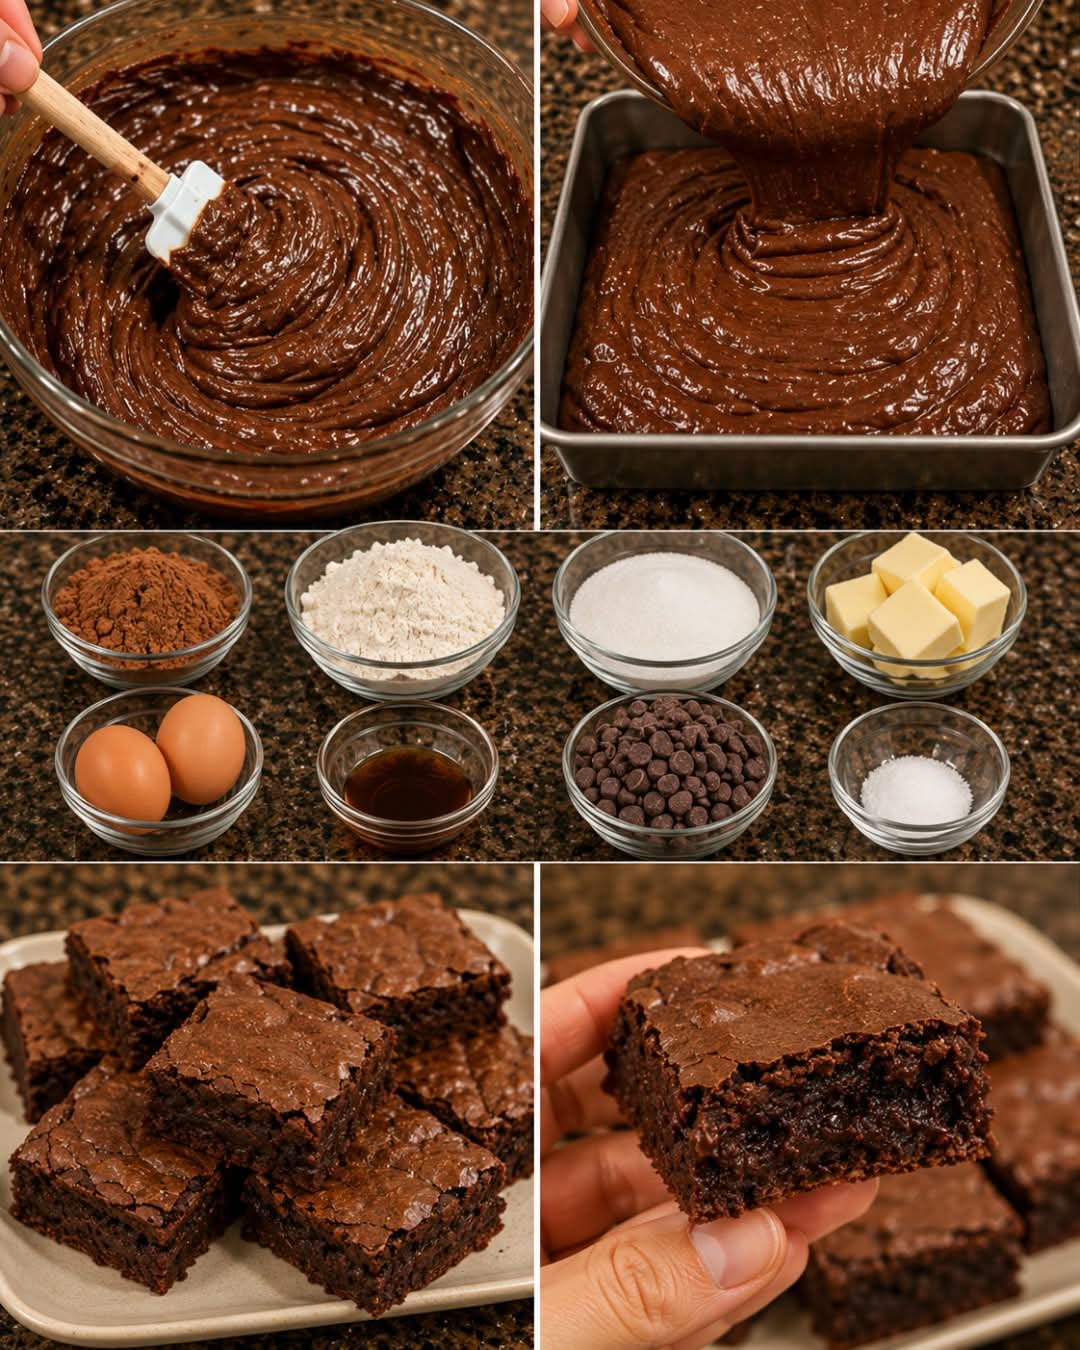
Classic Fudgy Brownies
Introduction
There are few homemade desserts as comforting and satisfying as a pan of rich, chocolatey brownies. The best brownies have a delicate, slightly crisp top, a deep chocolate flavor, and a soft, fudgy center that practically melts in your mouth. This classic recipe is simple enough for beginners but produces brownies worthy of sharing with family and friends.
These brownies are made with everyday pantry ingredients and do not require a mixer. The key is combining the ingredients carefully and avoiding overmixing once the flour is added. You can enjoy them plain, dusted with powdered sugar, topped with chocolate chips, or served warm with ice cream.
Ingredients
For the Brownies
- 1 cup unsalted butter, melted
- 2 cups granulated sugar
- 4 large eggs, room temperature
- 2 teaspoons pure vanilla extract
- 1 cup unsweetened cocoa powder
- 1 cup all-purpose flour
- 1/2 teaspoon salt
- 1/2 teaspoon baking powder
- 1 cup semi-sweet chocolate chips
- 1/2 cup chopped walnuts or pecans, optional
Optional Toppings
- Powdered sugar for dusting
- Extra chocolate chips
- Chopped walnuts or pecans
- Chocolate drizzle
- Caramel sauce
- Vanilla ice cream
- Whipped cream
Equipment
- 9 x 13-inch baking pan
- Parchment paper
- Large mixing bowl
- Medium mixing bowl
- Whisk
- Rubber spatula
- Measuring cups and spoons
- Cooling rack
Instructions
Step 1: Prepare the Oven and Pan
Preheat your oven to 350°F (175°C).
Line a 9 x 13-inch baking pan with parchment paper, leaving some parchment hanging over the sides. This makes it much easier to lift the brownies out after baking.
Lightly grease the parchment paper with butter or cooking spray.
Step 2: Prepare the Butter
Melt the butter gently in a saucepan or microwave-safe bowl.
Allow it to cool for a few minutes. The butter should be melted but not extremely hot.
Step 3: Combine the Wet Ingredients
In a large mixing bowl, whisk together the melted butter and granulated sugar.
Add the eggs one at a time, whisking well after each addition.
Add the vanilla extract and continue whisking until the mixture becomes smooth and glossy.
Step 4: Combine the Dry Ingredients
In a separate bowl, whisk together:
- All-purpose flour
- Cocoa powder
- Salt
- Baking powder
Mix until the cocoa powder is evenly distributed and there are no large lumps.
Step 5: Combine Wet and Dry Mixtures
Gradually add the dry ingredients to the wet mixture.
Use a rubber spatula to gently fold everything together.
Do not overmix. Stop as soon as you no longer see dry flour.
Overmixing can develop too much gluten and make the brownies cakey or tough rather than soft and fudgy.
Step 6: Add the Chocolate
Fold in the semi-sweet chocolate chips.
If you are using chopped walnuts or pecans, gently fold them in as well.
For an especially chocolate-rich brownie, reserve a small handful of chocolate chips and sprinkle them over the top before baking.
Step 7: Fill the Pan
Transfer the brownie batter into the prepared baking pan.
Spread it evenly into the corners using a spatula.
Smooth the surface as evenly as possible.
Step 8: Bake
Place the pan in the preheated oven.
Bake for approximately 25 to 32 minutes.
The exact baking time depends on your oven and how fudgy you want the brownies.
For fudgier brownies, remove them when the center is just set and a toothpick inserted near the center comes out with a few moist crumbs.
For firmer brownies, bake for a few additional minutes.
Do not wait for the toothpick to come out completely clean, because that can mean the brownies have been overbaked.
Step 9: Cool Completely
Remove the pan from the oven and place it on a cooling rack.
Allow the brownies to cool completely in the pan.
For exceptionally clean slices and an even fudgier texture, refrigerate the cooled brownies for about 30 to 60 minutes before cutting.
Step 10: Cut and Serve
Lift the brownies from the pan using the parchment paper.
Place them on a cutting board and cut into squares.
For neat slices, use a sharp knife and wipe the blade clean between cuts.
Dust with powdered sugar if desired.
Method for Extra Fudgy Brownies
If your goal is an extremely fudgy brownie, focus on three important techniques.
First, use melted butter rather than creaming softened butter with sugar. Melted butter contributes to the dense, rich texture.
Second, do not overmix after adding the flour. Mix only until the ingredients are incorporated.
Third, avoid overbaking. The brownies should still have a small amount of moisture in the center when they come out of the oven. They will continue to set as they cool.
Method for a Shiny Brownie Crust
A beautiful shiny crust is one of the most desirable features of homemade brownies.
Whisk the melted butter, sugar, eggs, and vanilla thoroughly before adding the dry ingredients. This helps create the characteristic thin, glossy crust on top.
Do not add the flour until the wet mixture is properly combined, and once the flour is incorporated, switch from vigorous whisking to gentle folding.
Method for Cakey Brownies
If you prefer brownies that are lighter and more cake-like, you can slightly increase the baking powder to about 1 teaspoon.
Beat the eggs and sugar a little longer before incorporating the remaining ingredients, then bake until the center is fully set.
The result will be lighter, taller, and less dense than the fudgy version.
Method for Double-Chocolate Brownies
For an even richer chocolate experience, add another 1/2 cup of chocolate chips to the batter.
You can also replace some of the semi-sweet chocolate chips with dark chocolate chips.
For a special finish, sprinkle additional chocolate chips over the batter immediately before baking.
Method for Walnut Brownies
Fold 1/2 to 1 cup of roughly chopped walnuts into the batter.
For deeper flavor, lightly toast the walnuts before adding them.
Allow toasted nuts to cool completely before folding them into the brownie batter.
Pecans can be used in exactly the same way.
The History of Brownies
Brownies are a classic American baked dessert that emerged around the end of the nineteenth century. Their exact origin is debated, and several stories have been associated with their creation.
One popular historical account connects brownies with the Palmer House Hotel in Chicago and the World’s Columbian Exposition of 1893. Another popular story involves a baker who supposedly forgot to add baking powder to a chocolate cake and ended up with a dense dessert.
Whatever their precise origin, brownies became increasingly popular in American cookbooks during the late nineteenth and early twentieth centuries.
Unlike traditional cakes, brownies are usually cut into squares or rectangles and can range from dense and fudgy to light and cakey. Their simplicity and adaptability helped make them a lasting favorite.
Today, brownies are enjoyed in countless variations, including chocolate brownies, blondies, cheesecake brownies, peanut butter brownies, caramel brownies, mint brownies, and brownies filled with nuts or chocolate pieces.
Formation and Texture
The formation of a brownie depends on the balance of fat, sugar, eggs, flour, cocoa, and leavening.
Butter provides richness and tenderness.
Sugar contributes sweetness and moisture while helping create the characteristic crust.
Eggs provide structure and help bind the ingredients together.
Cocoa powder delivers the main chocolate flavor.
Flour provides enough structure to hold the brownies together.
Baking powder adds a small amount of lift.
Chocolate chips create pockets of melted chocolate throughout the brownies.
The baking time determines much of the final texture. A shorter bake generally produces a softer, fudgier center, while a longer bake creates a firmer, more cake-like brownie.
Important Baking Tips
- Use good-quality cocoa powder because chocolate is the main flavor of the dessert.
- Measure flour carefully. Too much flour can make brownies dry.
- Do not overmix the batter after adding flour.
- Use parchment paper so the brownies can be removed easily.
- Do not overbake. Brownies continue cooking slightly from residual heat after they leave the oven.
- Let the brownies cool before cutting if you want clean, attractive squares.
- For the richest flavor, allow the brownies to rest for several hours before serving.
- Store leftovers in an airtight container to maintain their soft texture.
Serving Suggestions
These brownies are delicious on their own, but they can also become an impressive dessert.
Serve a warm brownie with a scoop of vanilla ice cream and a drizzle of chocolate or caramel sauce.
For a simple presentation, dust cooled brownies with powdered sugar.
For chocolate lovers, add chocolate ganache over the top.
For a nutty variation, sprinkle toasted walnuts or pecans over the brownies.
You can also crumble brownies over ice cream, use them to make brownie parfaits, or serve them as part of a dessert platter.
Storage
Store completely cooled brownies in an airtight container at room temperature for up to 3 to 4 days.
For longer storage, refrigerate them in a sealed container for approximately 5 to 7 days.
Brownies can also be frozen. Wrap individual pieces tightly in plastic wrap and place them in a freezer-safe container or bag.
Thaw at room temperature before serving.
Conclusion
These classic brownies are rich, chocolatey, soft, and wonderfully satisfying. The recipe is simple, but the small details make a big difference: use quality cocoa, measure the flour carefully, avoid overmixing, and most importantly, do not overbake.
Whether you prefer a dense fudgy center, a slightly chewy edge, melted chocolate chips, or crunchy toasted nuts, this recipe gives you a reliable foundation for creating your favorite homemade brownies.
For Brownie Lovers
For true brownie lovers, the best part is experimenting with different combinations. Try dark chocolate and sea salt, peanut butter and chocolate, walnuts and chocolate chips, caramel and pecans, or a cheesecake swirl.
The basic brownie can become dozens of different desserts simply by changing the chocolate, toppings, fillings, or finishing touches.
Once you master this recipe, you will have a dependable homemade brownie recipe that is perfect for family gatherings, parties, bake sales, holidays, afternoon treats, and whenever you want something deeply chocolatey and comforting.