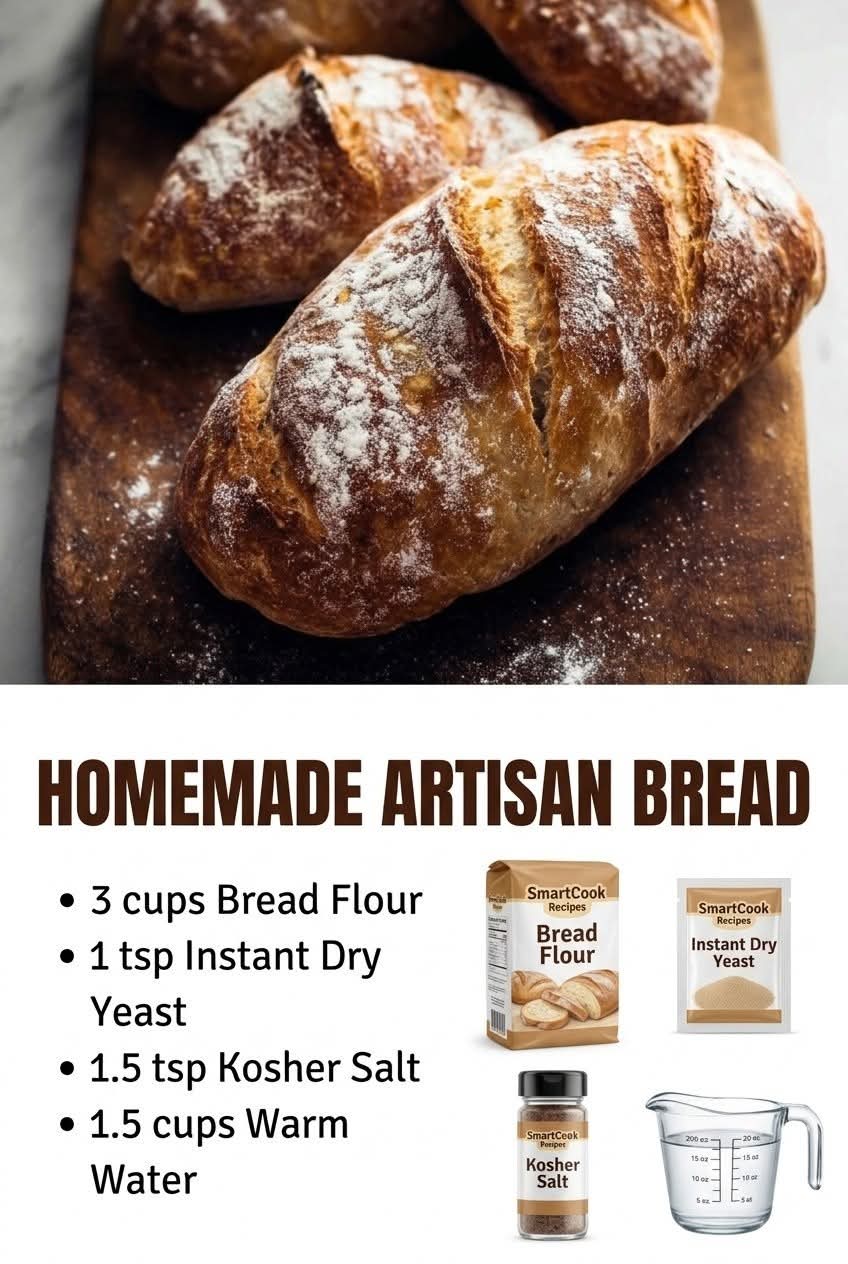
🍞 Homemade Artisan Bread — Crusty Outside, Soft & Chewy Inside
This beautiful Homemade Artisan Bread is the kind of bread that makes your kitchen smell like a little bakery. It has a golden, crackly crust, a tender and chewy center, and that rustic appearance everyone loves. Best of all, you don’t need a bread machine or complicated equipment—just a bowl, a spoon, a little patience, and a hot oven. 🥖🌾❤️
🌾 Introduction
Artisan bread is all about keeping things simple while allowing time to develop flavor and texture. This recipe uses a basic combination of flour, water, yeast, and salt. The dough is mixed gently, allowed to rise, shaped into a rustic loaf, and baked until beautifully browned.
The secret is not overworking the dough and giving the yeast enough time to create those lovely air pockets. The result is a loaf that’s wonderful for breakfast, sandwiches, soups, or simply tearing apart and enjoying warm with butter.
🛒 Ingredients
For the Bread
- 3 cups (375 g) all-purpose flour
- 1½ cups (360 ml) warm water
- 2 teaspoons active dry yeast
- 1½ teaspoons salt
- 1 teaspoon granulated sugar or honey, optional
- 1 tablespoon olive oil, optional
For the Topping
- A little flour for dusting
- Optional: sesame seeds, oats, sunflower seeds, or cracked wheat
For Baking
- Dutch oven or heavy oven-safe pot with lid
- Parchment paper, optional
👩🍳 Instructions
1. Activate the Yeast
Pour the warm water into a large mixing bowl. The water should feel warm but not hot.
Add the yeast and optional sugar or honey. Stir gently and let the mixture stand for about 5–10 minutes.
A light layer of foam should develop on top. This shows that the yeast is active.
2. Make the Dough
Add the flour and salt.
Using a wooden spoon or sturdy spatula, mix everything together until a shaggy, sticky dough forms.
Don’t worry if the dough looks rough. Artisan bread dough is supposed to be soft and somewhat sticky.
If using olive oil, add it now and mix it through.
🥖 The Folding Method
Instead of kneading the dough heavily, use a gentle folding technique.
Wet your hand slightly, grab one side of the dough, stretch it upward, and fold it toward the center.
Turn the bowl and repeat this process about 4 times.
Rest the dough for 10 minutes, then repeat the folding process.
Do this 2–3 times.
This helps develop gluten while keeping the bread light and airy.
⏰ First Rise
Cover the bowl tightly with plastic wrap, a lid, or a clean kitchen towel.
Leave it in a warm, draft-free place for approximately 1½–2 hours, or until the dough has roughly doubled in size.
For even more flavor, you can refrigerate the dough overnight. Slow fermentation allows the bread to develop a deeper, more complex taste.
✨ Shape the Loaf
Lightly flour your work surface.
Gently turn the dough onto the surface. Try not to press all the air out of it.
Fold the edges toward the center, then turn the dough over so the seam is underneath.
Using your hands, gently shape it into a round boule.
Don’t add too much flour—the dough should remain soft.
🕐 Second Rise
Place the shaped loaf on parchment paper or a lightly floured towel.
Cover it loosely and let it rest for about 30–45 minutes.
Meanwhile, place your Dutch oven inside the oven and preheat to:
🔥 450°F (230°C)
Allow the Dutch oven to heat for at least 30 minutes.
The extremely hot pot helps create the beautiful crust associated with artisan bread.
🔪 Score the Bread
Carefully remove the hot Dutch oven.
Place the dough inside.
Using a very sharp knife or bread lame, make one deep slash across the top.
You can also create:
- 🌾 Wheat patterns
- 🌿 Leaf designs
- ✨ Crosses
- Simple diagonal cuts
Scoring gives the expanding bread somewhere to open while baking.
🔥 Baking Method
Cover the Dutch oven with its lid.
Bake for approximately:
25 minutes covered.
Then carefully remove the lid and continue baking for another:
15–20 minutes uncovered.
The bread should become deeply golden brown.
For an especially crisp crust, allow it to bake until the surface is a rich golden-brown color.
❄️ The Most Important Step: Cooling
Remove the bread from the Dutch oven and place it on a wire rack.
Do not cut it immediately!
Allow it to cool for at least 45–60 minutes.
The inside continues setting as it cools. Cutting too soon can make the crumb appear gummy.
When cooled, listen for that wonderful crackling sound from the crust. That’s one of the joys of homemade bread! 🥰🥖
🌾 The History of Artisan Bread
The idea behind artisan bread is much older than modern bakeries.
For thousands of years, people have combined grains with water and used natural fermentation to produce bread. Early breads were generally simple mixtures of flour and water, with fermentation providing flavor and allowing the dough to rise.
Traditional European bread-making eventually developed into countless regional styles. French country loaves, Italian rustic breads, German farmhouse breads, and naturally fermented sourdoughs all demonstrate the same beautiful principle: simple ingredients can create extraordinary food when given time and careful preparation.
Modern artisan baking brings these traditional ideas into home kitchens using techniques such as long fermentation, gentle folding, high-temperature baking, and steam.
🧑🍳 Formation of the Bread
The formation of this loaf happens in several important stages:
1. Hydration
Water combines with the flour and allows the flour proteins and starches to develop.
2. Fermentation
Yeast consumes available sugars and produces carbon dioxide, which creates the bubbles that make the bread rise.
3. Gluten Development
Folding strengthens the gluten network without requiring aggressive kneading.
4. Shaping
The dough is formed into a tight round loaf, helping it maintain its structure during baking.
5. Oven Spring
When the dough enters the very hot oven, trapped gases expand rapidly and the yeast becomes highly active before the heat stops fermentation.
6. Crust Formation
The hot oven causes the surface to brown and develop that irresistible crisp crust.
❤️ Secrets for Perfect Artisan Bread
💧 Don’t make the water too hot
Very hot water can damage the yeast. Aim for comfortably warm water.
🌾 Don’t drown the dough in flour
A slightly sticky dough can produce a lighter, more open crumb.
⏰ Give the dough enough time
Proper fermentation is one of the biggest secrets to flavorful bread.
🔥 Preheat the Dutch oven
A thoroughly heated pot gives the dough a powerful burst of heat.
💨 Keep the lid on initially
The covered pot traps steam, helping the loaf expand and creating a thinner, crispier crust.
🔪 Score before baking
A controlled slash prevents the bread from splitting unpredictably.
❄️ Let it cool
As difficult as it is, wait before slicing!
🧈 Ways to Enjoy It
Fresh artisan bread is delicious in so many ways.
Serve it with:
- 🧈 Salted butter
- 🫒 Olive oil and herbs
- 🧄 Garlic butter
- 🍅 Tomato and mozzarella
- 🧀 Cheese and preserves
- 🥑 Avocado
- 🍳 Fried or scrambled eggs
- 🍲 Tomato soup
- 🥣 Creamy vegetable soup
- 🥪 Homemade sandwiches
- 🍯 Honey and butter
One of my favorite ways to enjoy it is simply warm bread with butter, when the crust is still slightly crisp and the inside is soft and chewy. ❤️
🥖 Storage
Once completely cool, keep the loaf at room temperature in a paper bag, bread box, or loosely wrapped clean kitchen towel.
Avoid storing freshly baked bread in the refrigerator because refrigeration can make bread stale more quickly.
For longer storage, slice the bread and freeze it in an airtight freezer bag. Individual slices can be thawed or toasted whenever you want fresh-tasting bread.
💕 For the Bread Lovers
There’s something special about making bread by hand.
You start with a few humble ingredients—flour, water, yeast, and salt—and somehow end up with a warm loaf full of flavor and character.
The smell filling the kitchen, the sound of the crust cracking as it cools, and that first slice with butter make all the waiting worthwhile.
Homemade bread doesn’t need to look perfect. In fact, the irregular shape, rustic crust, and uneven air pockets are part of its charm. Every loaf tells the story of the hands that made it. 🍞❤️
🏆 Conclusion
This Homemade Artisan Bread proves that incredible bread doesn’t require complicated ingredients.
With 3 cups of flour, 1½ cups of water, 2 teaspoons of yeast, salt, and a little patience, you can create a beautiful bakery-style loaf right in your own kitchen.
The most important ingredients aren’t only the ones you measure—they’re time, patience, heat, and love.
Slice it, toast it, dip it, sandwich it, or simply tear off a warm piece and enjoy it with butter.
🍞 Bake it with love, share it with family, and don’t forget to save this recipe! ❤️🥖🌾
Enjoy your homemade artisan bread! 🥰