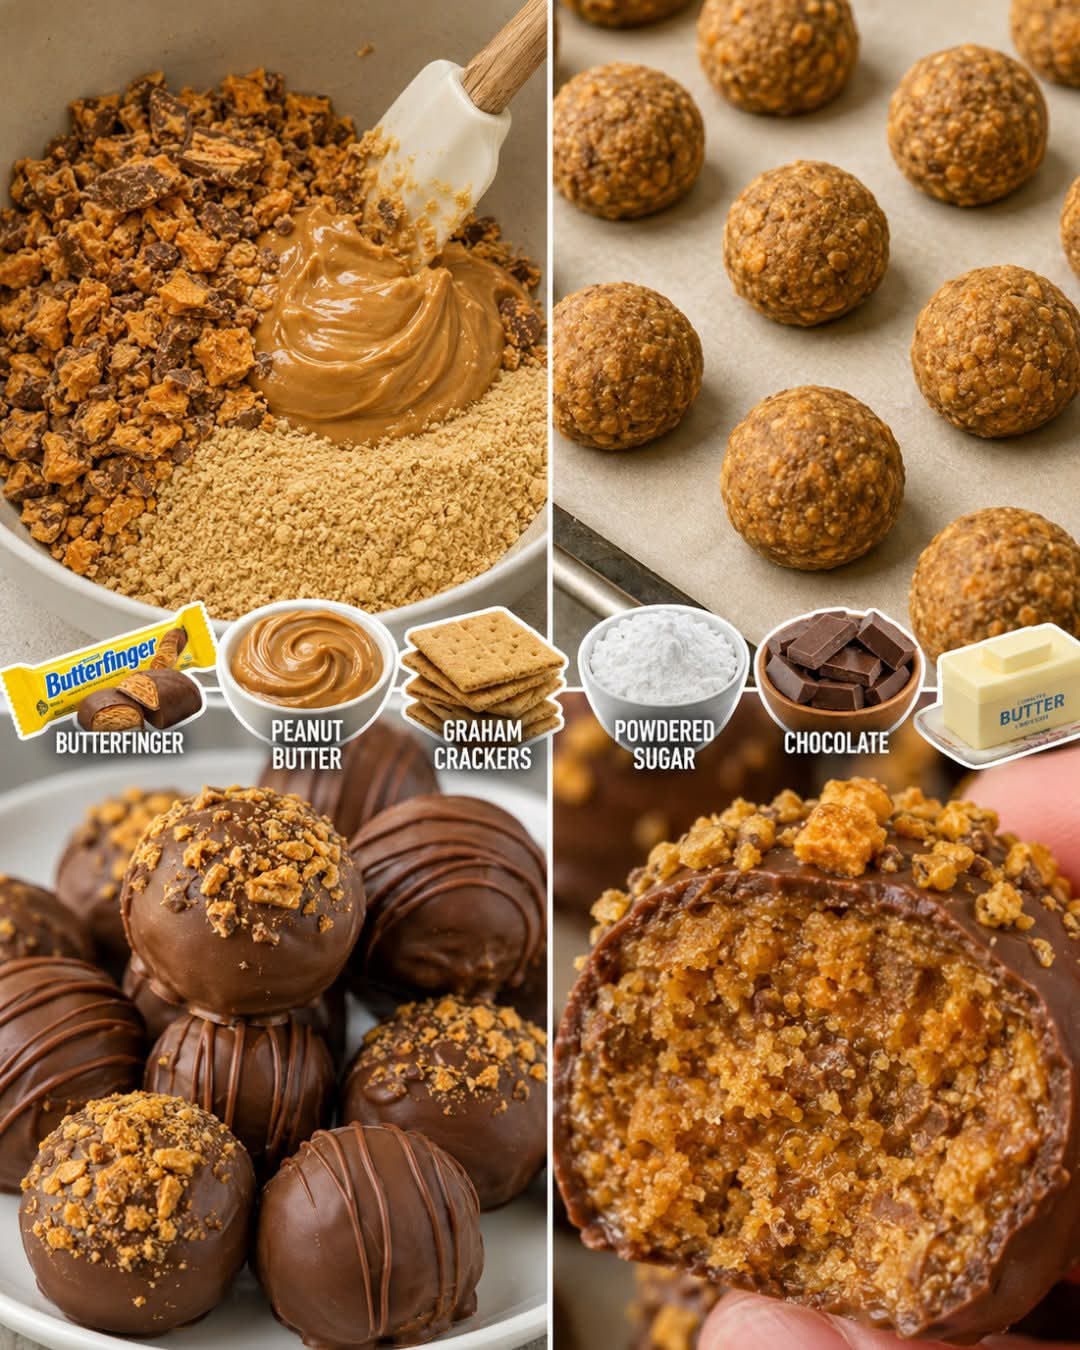
🍫🥜 Butterfinger Balls — Easy No-Bake Candy Treat
Butterfinger Balls are a fun bite-sized dessert inspired by the classic combination of peanut butter, sweet candy, and chocolate. This version uses melted candy corn and creamy peanut butter to create a rich, chewy center, then coats each little ball in smooth chocolate. Similar homemade Butterfinger-style recipes use this same simple combination of candy corn, peanut butter, and chocolate.
They are perfect for parties, holidays, cookie trays, potlucks, homemade gifts, or simply satisfying a chocolate-and-peanut-butter craving.
🛒 Ingredients
For the Butterfinger filling
- 1 cup candy corn
- ⅔ cup creamy peanut butter
- 2 cups semi-sweet chocolate chips
- 1 teaspoon vegetable shortening or coconut oil
- 1 teaspoon vanilla extract, optional
- Pinch of salt, optional
For decoration
- 2 tablespoons crushed Butterfinger candy, optional
- 2 tablespoons melted peanut butter, optional
- A little melted white chocolate, optional
This four-ingredient style is particularly popular because the candy corn and peanut butter create the characteristic sweet peanut-butter center, while the chocolate provides the outer coating.
👩🍳 Instructions
Step 1: Prepare your tray
Line a baking sheet with parchment paper or wax paper.
Set it aside while you prepare the filling.
Step 2: Melt the candy corn
Place the candy corn in a microwave-safe bowl.
Microwave at 50% power for 30 seconds.
Remove and stir thoroughly.
Continue heating in 15–30 second intervals, stirring after every interval, until the candy corn becomes completely melted and smooth.
Be careful because melted candy is extremely hot.
Step 3: Add the peanut butter
Immediately add the creamy peanut butter to the melted candy corn.
Stir vigorously until the mixture becomes smooth and completely combined.
Add the vanilla and tiny pinch of salt if desired.
The mixture will become thick and sticky.
Tip: Work fairly quickly because the candy mixture becomes firmer as it cools. Similar recipes recommend briefly reheating the mixture if it becomes too difficult to shape.
🥜 Step 4: Form the Butterfinger Balls
Allow the mixture to cool for a few minutes until it is comfortable enough to handle.
Using a small cookie scoop or tablespoon, portion out the mixture.
Roll each portion between your palms to create a smooth ball.
Place each ball on the parchment-lined baking sheet.
You should get approximately 18 bite-sized balls, depending on how large you make them.
❄️ Step 5: Chill
Place the tray in the refrigerator or freezer.
Refrigerator:
Chill for about 30–40 minutes.
Freezer:
Chill for approximately 15 minutes.
The balls should become firm enough to dip easily into the chocolate.
🍫 Step 6: Melt the chocolate
Place the chocolate chips in a clean microwave-safe bowl.
Add the shortening or coconut oil.
Microwave at 50% power for 30 seconds.
Stir well.
Continue heating in short intervals until the chocolate is completely smooth.
Don’t overheat the chocolate.
🍫 Step 7: Coat the balls
Take one chilled Butterfinger Ball at a time.
Drop it into the melted chocolate.
Use a fork to gently roll it around until completely coated.
Lift it out with the fork and gently tap the fork against the side of the bowl to allow excess chocolate to drip away.
Place the chocolate-covered ball back onto the parchment paper.
Repeat with all the remaining balls.
✨ Step 8: Decorate
While the chocolate is still wet, you can sprinkle the tops with:
- Crushed Butterfinger candy
- Chopped peanuts
- Chocolate sprinkles
- A drizzle of peanut butter
- White chocolate drizzle
- A tiny pinch of flaky salt
For an especially pretty presentation, drizzle melted white chocolate over the finished balls in thin lines.
❄️ Step 9: Let Them Set
Place the finished Butterfinger Balls in the refrigerator for approximately 20–30 minutes, or until the chocolate coating has completely hardened.
Then they’re ready to serve!
💡 The Method Behind the Recipe
The magic happens when candy corn is melted and combined with peanut butter. That mixture creates a sweet, dense filling that resembles the flavor profile of Butterfinger candy. Chocolate then surrounds the filling to create the familiar chocolate-and-peanut-butter combination.
One important difference is texture: homemade candy-corn versions can be softer and chewier than commercially produced Butterfinger candy because the commercial candy has a more specialized flaky/crisp structure.
📜 A Little History
Butterfinger is an American candy-bar style treat known for its combination of chocolate, peanut butter, and a distinctive crisp, flaky center.
Homemade Butterfinger-style recipes became especially popular as an easy way to transform leftover Halloween candy corn into a new dessert. Recipes using melted candy corn, peanut butter, and chocolate have circulated for years, with some versions turning the mixture into bars and others shaping it into bite-sized balls.
The ball version takes the same basic idea and makes it even easier to serve at parties.
❤️ Why You’ll Love These Butterfinger Balls
🥜 Peanut Butter Lovers
The creamy peanut butter gives every bite a rich, nutty flavor.
🍫 Chocolate Lovers
The thick chocolate shell makes these feel like little homemade candy-shop treats.
🎉 Party Lovers
They’re small, easy to grab, and don’t require plates or forks.
👩🍳 Easy-Recipe Lovers
There is no complicated baking process.
❄️ Make-Ahead Lovers
You can prepare them ahead of time and chill them until you’re ready to serve.
🎁 Gift-Giving Lovers
Place them in small candy cups inside a decorative box or tin for a delicious homemade gift.
⭐ Secrets for Perfect Butterfinger Balls
Use regular creamy peanut butter.
Natural peanut butter can separate and make the mixture more difficult to handle.
Don’t overheat the candy corn.
Heat gradually and stir frequently.
Work quickly after combining the ingredients.
The filling becomes firmer as it cools.
Chill before dipping.
Cold, firm balls are much easier to coat with chocolate.
Keep the chocolate smooth.
If it becomes too thick while dipping, gently warm it again in short intervals.
Don’t make the balls too large.
Small, bite-sized pieces give you the best chocolate-to-filling ratio.
🍬 Fun Variations
🥨 Salty Butterfinger Balls
Add crushed pretzels to the filling for a sweet-and-salty version.
🥜 Extra Peanut Butter
Drizzle melted peanut butter over the finished chocolate coating.
🍫 Triple Chocolate
Use milk chocolate for the coating and drizzle with both dark and white chocolate.
🎃 Halloween Version
Add orange and brown sprinkles for a festive Halloween candy tray.
🎄 Christmas Version
Decorate with red and green sprinkles.
☕ Dessert-Topping Version
Chop the finished balls and sprinkle them over ice cream, brownies, or cheesecake.
🕐 Storage
Store the finished Butterfinger Balls in an airtight container in the refrigerator.
They are best served slightly chilled or allowed to sit at room temperature for a few minutes before eating.
For longer storage, you can freeze them in a sealed freezer-safe container, separating layers with parchment paper.
🍽️ Serving Ideas
Serve your Butterfinger Balls:
- On a dessert platter
- With coffee
- With hot chocolate
- Alongside cookies and brownies
- At birthday parties
- At holiday gatherings
- In individual candy cups
- As homemade gifts
- On an after-dinner dessert board
❤️ Final Conclusion
These Butterfinger Balls are the kind of homemade treat that looks impressive but is surprisingly simple to prepare. The creamy peanut butter and sweet candy center are wrapped in a delicious chocolate coating, creating a bite-sized dessert with plenty of flavor in every mouthful.
They’re especially wonderful for peanut-butter lovers, chocolate lovers, candy lovers, and anyone who enjoys quick no-bake desserts.
Make a batch, chill them until perfectly firm, arrange them on a beautiful serving plate, and watch them disappear! 🍫🥜❤️
**Save this recipe, share it with someone who loves Butterfinger candy, and enjoy every delicious bite!**