🍫 Old Fashioned Fudge — A Timeless Chocolate Treasure 🍫
There’s something magical about homemade fudge. The rich chocolate aroma filling the kitchen, the glossy silky texture while stirring the pot, and that first creamy bite that melts in your mouth — it’s pure comfort and nostalgia wrapped into one sweet square. Old Fashioned Fudge is more than just candy; it’s a treasured family tradition passed from one generation to the next.
This classic recipe has been loved for decades because it uses simple pantry ingredients to create something unbelievably decadent. Whether you’re making it for the holidays, family gatherings, bake sales, gifting, or just because you deserve chocolate today, this fudge delivers old-school goodness every single time.
Unlike complicated candy recipes, this version comes together quickly in less than 20 minutes. The secret is patience while stirring and allowing the chocolate mixture to transform into a smooth, creamy masterpiece.
If you love rich chocolate desserts, creamy textures, and vintage recipes that never go out of style, this Old Fashioned Fudge will become one of your favorites.
🍫 Why Everyone Loves Old Fashioned Fudge
Chocolate lovers adore this recipe because it’s:
• Rich and deeply chocolatey
• Creamy and smooth
• Easy to make
• Perfect for holidays and gifts
• Great for parties and dessert trays
• Made with simple ingredients
• Nostalgic and comforting
• Ready fast with no fancy equipment needed
This fudge is perfect for:
✔ Christmas candy trays
✔ Birthday dessert tables
✔ Family movie nights
✔ Homemade gifts
✔ Potlucks and bake sales
✔ Chocolate cravings anytime
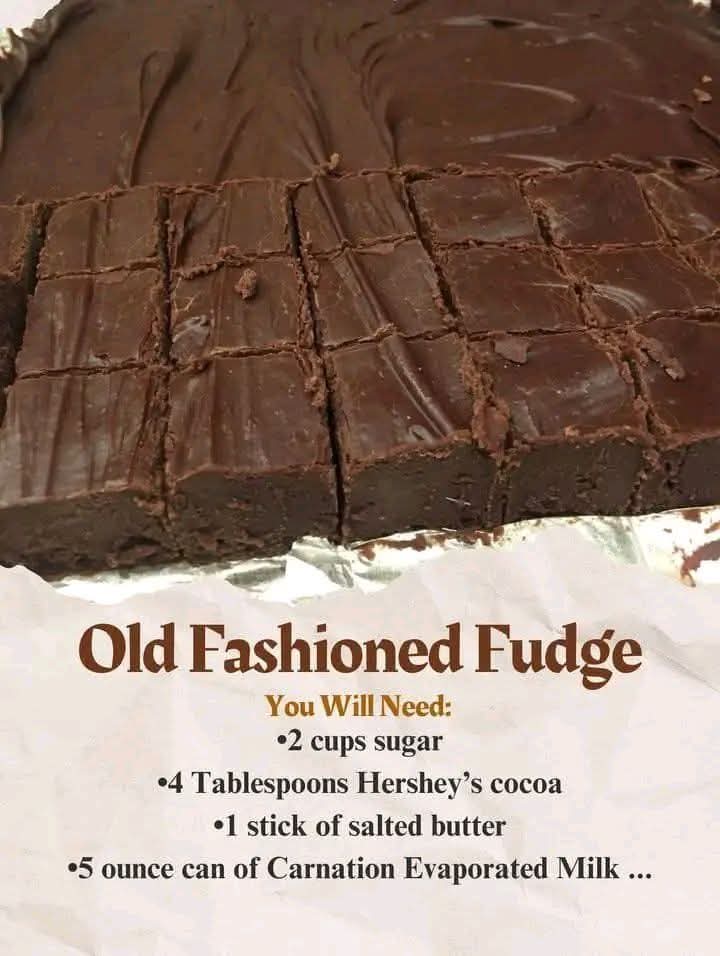
🍫 Ingredients
Main Ingredients
• 2 cups granulated sugar
• 4 tablespoons Hershey’s cocoa powder
• 1 stick salted butter
• 1 (5-ounce) can Carnation evaporated milk
• 1 teaspoon vanilla extract
• Nuts optional (pecans or walnuts work beautifully)
🍫 Optional Add-Ins
Want to customize your fudge? Try adding:
• Mini marshmallows
• Crushed peppermint candy
• Peanut butter swirls
• Toffee bits
• Chocolate chips
• Sea salt flakes
• Crushed cookies
• Coconut flakes
🍫 Kitchen Tools You’ll Need
• Medium saucepan
• Wooden spoon or silicone spatula
• Measuring cups and spoons
• Buttered baking dish or pan
• Wax paper or parchment paper
• Sharp knife for cutting
🍫 Step-By-Step Instructions
Step 1: Prepare the Pan
Before starting, butter your baking dish or line it with parchment paper. This helps the fudge release easily once set.
An 8×8-inch dish works perfectly for thick fudge squares.
Step 2: Combine the Ingredients
In a medium saucepan, combine:
• Sugar
• Cocoa powder
Mix these dry ingredients well first to prevent cocoa lumps.
Next add:
• Butter
• Evaporated milk
Place the saucepan over medium heat.
Step 3: Bring to a Boil
Stir constantly while the butter melts and the ingredients blend together into a glossy chocolate mixture.
Once the mixture begins to boil, continue stirring continuously.
This step is important because constant stirring keeps the fudge smooth and prevents burning.
Step 4: Cook the Fudge
Continue boiling and stirring for exactly 7 minutes.
The mixture will begin to thicken slightly and develop that classic rich fudge texture.
Do not stop stirring during this stage.
🍫 The Secret Method for Perfect Fudge
Perfect fudge depends on three important techniques:
1. Constant Stirring
This prevents grainy texture and scorching.
2. Correct Timing
Seven minutes gives the perfect consistency.
3. Cooling Slightly Before Setting
This creates creamy fudge instead of hard candy.
Old-fashioned candy makers knew patience was the key to perfect chocolate fudge.
Step 5: Add Vanilla
Remove the saucepan from heat.
Stir in:
• Vanilla extract
If using nuts, fold them in now.
The vanilla enhances the chocolate flavor beautifully.
Step 6: Beat the Fudge
Continue stirring the mixture for 3 more minutes.
This step helps create that classic creamy texture.
You’ll notice the fudge becoming slightly thicker and less glossy.
Step 7: Pour and Set
Pour the chocolate mixture into your prepared buttered dish.
Spread evenly with a spatula.
Allow the fudge to cool at room temperature until completely set.
For faster results, refrigerate for about 1 hour.
Step 8: Slice and Enjoy
Once firm, cut into squares and serve.
Each bite is rich, creamy, chocolatey perfection.
🍫 The History of Old Fashioned Fudge
Fudge dates back to the late 1800s in America and quickly became one of the nation’s favorite homemade candies.
The name “fudge” likely came from the phrase “fudged candy,” referring to batches that accidentally crystallized into a soft texture instead of hard caramel.
Over time, home cooks perfected the process and created the creamy chocolate fudge we know today.
Old-fashioned fudge recipes became especially popular during holidays because they were affordable, easy to share, and could feed many people with simple ingredients.
Today, this timeless treat remains one of the most beloved homemade candies in the world.
🍫 Best Nuts for Fudge
Nuts are optional, but they add wonderful texture and flavor.
Popular choices include:
• Pecans
• Walnuts
• Almonds
• Peanuts
• Hazelnuts
Toast nuts lightly before adding for extra flavor.
🍫 Tips for the Creamiest Fudge
✔ Use real butter
✔ Stir continuously
✔ Measure ingredients carefully
✔ Don’t overcook
✔ Use good-quality cocoa powder
✔ Let the fudge cool naturally
✔ Store in an airtight container
🍫 Common Fudge Mistakes
Grainy Fudge
Usually caused by not stirring enough or sugar crystals forming.
Too Soft
The mixture may not have boiled long enough.
Too Hard
The fudge may have cooked too long.
Burned Flavor
Heat was too high or stirring stopped.
🍫 Delicious Variations
Peanut Butter Fudge
Swirl peanut butter into the hot mixture.
Rocky Road Fudge
Add marshmallows and nuts.
Mint Chocolate Fudge
Add peppermint extract.
Cookies and Cream Fudge
Mix crushed sandwich cookies into the batter.
Salted Caramel Fudge
Drizzle caramel and sprinkle sea salt on top.
🍫 How to Store Fudge
Store fudge in an airtight container:
• Room temperature: up to 1 week
• Refrigerator: up to 3 weeks
• Freezer: up to 3 months
Layer pieces with wax paper to prevent sticking.
🍫 Best Ways to Serve Fudge
This dessert pairs beautifully with:
• Coffee
• Hot chocolate
• Cold milk
• Vanilla ice cream
• Holiday cookie trays
• Dessert charcuterie boards
🍫 Why Homemade Fudge Is Special
Homemade fudge carries warmth, love, and tradition in every bite.
It reminds many people of:
• Grandmother’s kitchen
• Christmas baking days
• Family gatherings
• Homemade holiday gifts
• Childhood memories
Few desserts feel as comforting and nostalgic as old-fashioned chocolate fudge.
🍫 Fudge Lovers Everywhere
Chocolate lovers can never resist homemade fudge because it combines:
• Rich cocoa flavor
• Smooth creamy texture
• Melt-in-your-mouth sweetness
• Pure homemade comfort
Fudge fans especially love how customizable it is. Every family has their own version, making each recipe unique and meaningful.
Some love it plain and silky while others prefer it packed with crunchy nuts or gooey marshmallows.
No matter the variation, fudge always brings smiles.
🍫 Final Thoughts
Old Fashioned Fudge proves that simple ingredients can create unforgettable desserts. This timeless recipe is rich, creamy, deeply chocolatey, and filled with homemade charm.
Whether you’re making it for holidays, sharing it with loved ones, or satisfying a late-night chocolate craving, this easy fudge recipe is guaranteed to impress.
One bite of this creamy chocolate goodness and you’ll understand why old-fashioned fudge has remained a beloved classic for generations.
So grab your saucepan, stir with love, and enjoy every sweet square of this homemade chocolate treasure.
Happy baking and even happier chocolate eating! 🍫