Here’s a rich, indulgent, and fully detailed recipe for your Monster Peanut Butter Cheesecake Pie—perfect for peanut butter lovers and dessert fans alike 🥜🍰
🥜 Monster Peanut Butter Cheesecake Pie
✨ Introduction
If you’re craving something creamy, decadent, and irresistibly peanut buttery, this Monster Peanut Butter Cheesecake Pie is exactly what you need. With a buttery graham cracker crust, a silky peanut butter cheesecake filling, and layers of chocolate and toppings, this dessert feels like a bakery masterpiece—but it’s surprisingly simple to make at home. It’s the kind of dessert that steals the spotlight at any gathering.
🧾 Ingredients
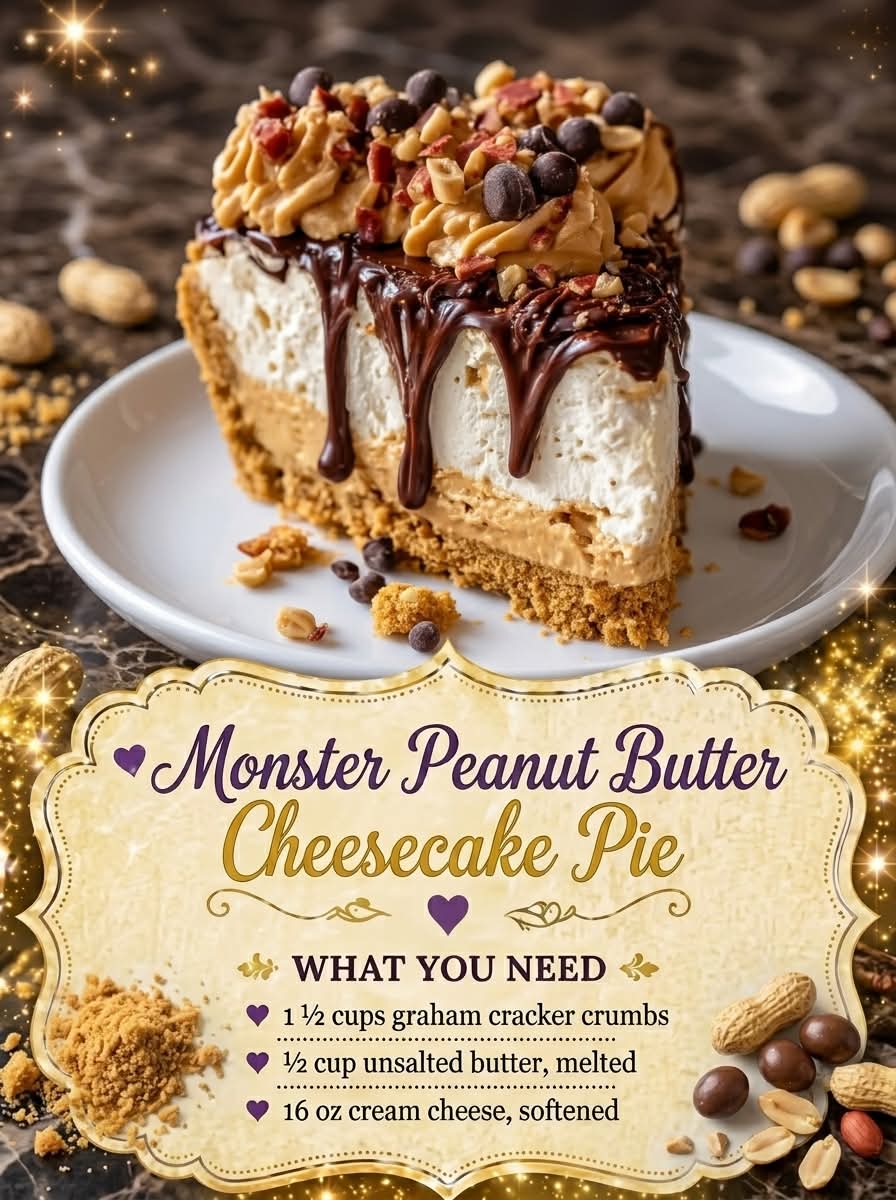
For the Crust:
- 1 ½ cups graham cracker crumbs
- ½ cup unsalted butter, melted
- 2 tablespoons sugar (optional, for extra sweetness)
For the Peanut Butter Cheesecake Filling:
- 16 oz (450 g) cream cheese, softened
- 1 cup creamy peanut butter
- 1 cup powdered sugar
- 1 teaspoon vanilla extract
- 1 ½ cups heavy whipping cream (cold)
For the Chocolate Layer (optional but recommended):
- 1 cup semi-sweet chocolate chips
- ½ cup heavy cream
Toppings (the “Monster” part!):
- Mini peanut butter cups
- Chocolate chips
- Crushed cookies (like Oreos)
- Whipped cream
- Drizzle of chocolate syrup or caramel
🍳 Instructions
Step 1: Make the Crust
- In a bowl, mix graham cracker crumbs, melted butter, and sugar.
- Press firmly into the bottom and sides of a pie dish.
- Chill in the fridge for at least 20–30 minutes to set.
Step 2: Prepare the Chocolate Layer (Optional)
- Heat the cream until warm (not boiling).
- Pour over chocolate chips and let sit for 2 minutes.
- Stir until smooth.
- Spread over the chilled crust and refrigerate again until set.
Step 3: Make the Cheesecake Filling
- Beat cream cheese until smooth and fluffy.
- Add peanut butter, powdered sugar, and vanilla extract. Mix well.
- In a separate bowl, whip the cold heavy cream until stiff peaks form.
- Gently fold the whipped cream into the peanut butter mixture.
Step 4: Assemble
- Spoon the filling over the crust (and chocolate layer if used).
- Smooth the top evenly.
- Chill for at least 4 hours (overnight is best for firm texture).
Step 5: Decorate
Top with whipped cream, peanut butter cups, chocolate chips, crushed cookies, and drizzle with chocolate or caramel sauce.
🧑🍳 Methods & Tips
- No-bake method: This recipe doesn’t require baking, making it quick and beginner-friendly.
- Texture tip: Use full-fat cream cheese for the creamiest result.
- Chilling is key: Don’t rush the chilling time—it helps the pie set properly.
- Flavor boost: Add a pinch of salt to enhance the peanut butter flavor.
📜 History
Cheesecake dates back to ancient Greece, but modern no-bake cheesecakes became popular in the United States in the 20th century due to convenience. Peanut butter desserts gained popularity in American cuisine thanks to the widespread love of peanuts and chocolate combinations. This “monster” version is a modern twist—loaded, over-the-top, and designed for indulgence.
🎨 Formation & Presentation
The pie forms in layers:
- Crunchy graham base
- Optional smooth chocolate ganache
- Creamy peanut butter cheesecake filling
- Loaded toppings
When sliced, it reveals a beautiful contrast of textures—crumbly, creamy, and rich.
❤️ Why People Love It
- Perfect balance of sweet and salty
- No baking required
- Crowd-pleasing dessert
- Easily customizable with toppings
- Rich, creamy, and satisfying
Peanut butter lovers especially go crazy for this dessert—it’s bold, comforting, and unforgettable.
🏁 Conclusion
This Monster Peanut Butter Cheesecake Pie is more than just a dessert—it’s an experience. Whether you’re making it for a party, family gathering, or just to treat yourself, it delivers big flavor with minimal effort. One slice is never enough!
If you want, I can give you a chocolate-only version, Nutella twist, or even a mini individual serving version 🍫