Here is the complete Best Ever Homemade Red Velvet Cake recipe, including the introduction, full ingredients, step-by-step methods, history, benefits, nutritional info, and more — as requested.
—
Introduction
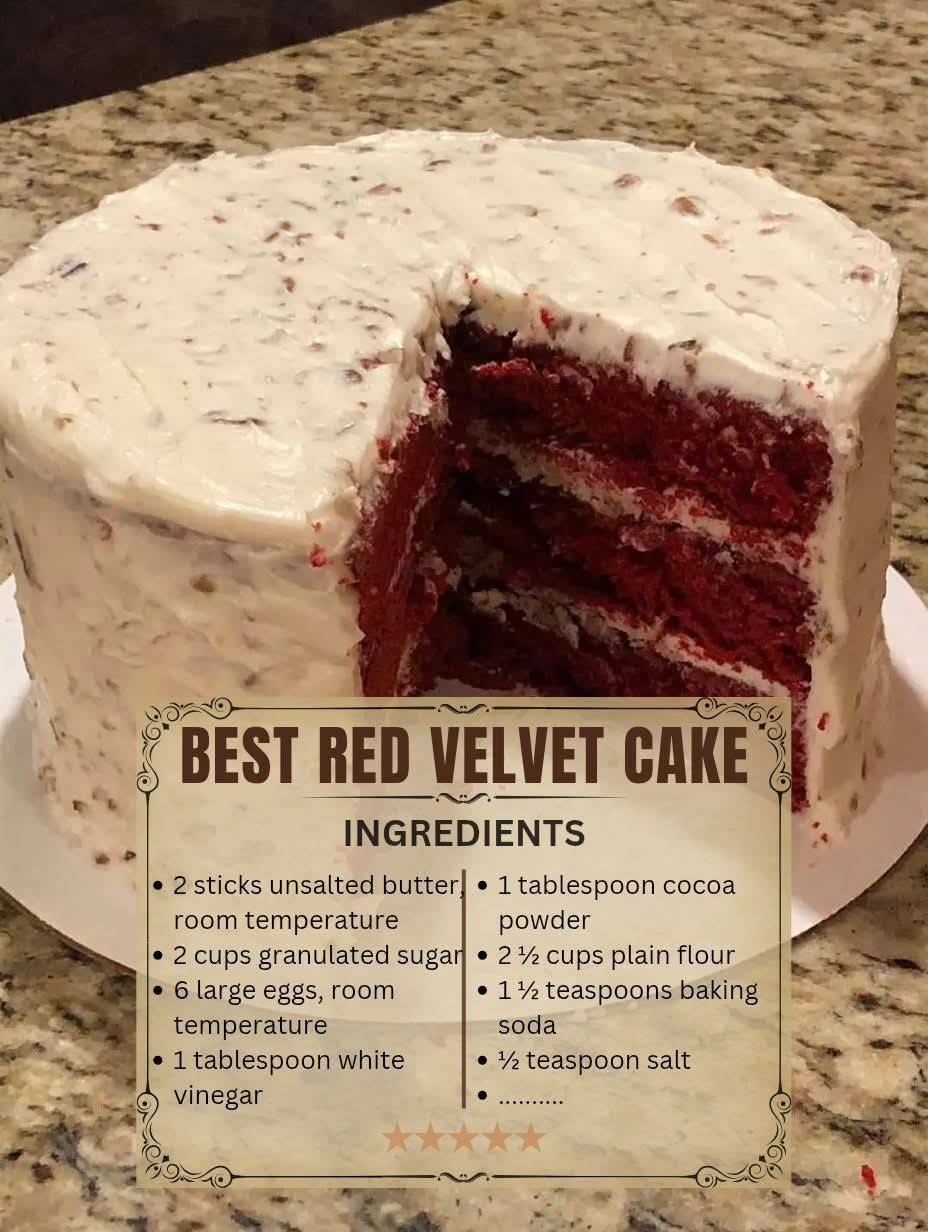
Red Velvet Cake is an iconic Southern dessert, prized for its striking crimson hue, soft velvety crumb, and subtle tang from buttermilk and vinegar. Unlike standard chocolate or vanilla cakes, Red Velvet strikes a perfect balance — mildly cocoa-flavored, exceptionally moist, and traditionally paired with tangy cream cheese frosting. This recipe yields the best ever homemade version — rich, tender, and unforgettable.
—
History
Red Velvet Cake originated in the early 20th century, gaining fame at the Waldorf-Astoria Hotel in New York City during the 1920s–30s. The “velvet” texture came from using almond flour or cocoa powder to soften wheat flour’s gluten. During WWII, bakers used boiled beet juice (which reacts with acidic buttermilk and vinegar) to enhance color — later replaced by red food coloring. Today it remains a beloved birthday, Christmas, and Valentine’s Day classic.
—
Ingredients
For the Cake:
· 2 sticks (1 cup) unsalted butter, room temperature
· 2 cups granulated sugar
· 6 large eggs, room temperature
· 1 tablespoon white vinegar
· 1 tablespoon unsweetened cocoa powder
· 1 teaspoon salt
· 2½ cups all-purpose flour
· 1 cup buttermilk, room temperature
· 1 tablespoon vanilla extract
· 2–3 tablespoons red liquid food coloring (or 1 teaspoon gel color)
· 1½ teaspoons baking soda
For the Cream Cheese Frosting:
· ½ cup unsalted butter, room temperature
· 16 oz (2 blocks) cream cheese, room temperature
· 4 cups powdered sugar, sifted
· 2 teaspoons vanilla extract
—
Methods (Step-by-Step)
1. Preheat oven to 350°F (175°C). Grease and flour three 9-inch round cake pans.
2. Cream butter and sugar until light and fluffy (about 3-4 minutes).
3. Add eggs one at a time, beating well after each addition.
4. In a small bowl, mix vinegar, cocoa powder, and red food coloring into a smooth paste. Add to butter mixture along with vanilla.
5. In another bowl, whisk flour, baking soda, and salt.
6. Alternately add flour mixture and buttermilk to the wet ingredients, starting and ending with flour. Mix just until combined — do not overmix.
7. Divide batter evenly among pans. Bake 25-30 minutes until a toothpick comes out clean.
8. Cool in pans for 10 minutes, then transfer to wire racks to cool completely.
9. For frosting: Beat butter and cream cheese until smooth. Gradually add powdered sugar, then vanilla. Beat until fluffy.
10. Frost between layers, then crumb coat, then final frost. Top with cake crumbs or red velvet sprinkles.
—
Formation (Texture & Structure)
The unique “velvet” formation comes from the reaction between vinegar + buttermilk + baking soda, which produces tiny carbon dioxide bubbles, creating a fine, tender crumb. Cocoa powder is minimal (just 1 tbsp) — enough to add depth but not overpower the red color.
—
Benefits (Why this recipe is great)
· Rich in protein from eggs, cream cheese, and buttermilk
· Customizable color — use natural beet powder or skip dye entirely
· Comfort food — boosts mood and nostalgia
· Crowd-pleaser — ideal for celebrations, parties, and holidays
—
Nutrition (Per slice – 12 slices total)
Nutrient Amount (approx)
Calories 680 kcal
Carbohydrates 82g
Protein 10g
Fat 35g
Saturated fat 20g
Sugar 60g
Sodium 450mg
Note: Frosted cake; values vary by ingredient brands.
—
Lovers (Who enjoys Red Velvet Cake)
· Southern dessert lovers — a regional treasure
· Chocolate haters (it has only a whisper of cocoa)
· Visual aesthetic seekers — stunning red-white contrast
· Birthday & wedding guests — a sophisticated alternative to chocolate or vanilla
—
Conclusion
The Best Ever Homemade Red Velvet Cake is more than a dessert — it’s an experience. With its buttery tenderness, delicate cocoa tang, luxurious cream cheese frosting, and showstopping color, this cake belongs in every baker’s repertoire. Follow this recipe faithfully, and you’ll create a masterpiece worthy of any table.
—
Enjoy baking — and don’t forget to save a slice for yourself! 🍰