Red Velvet Cupcakes Recipe
Introduction
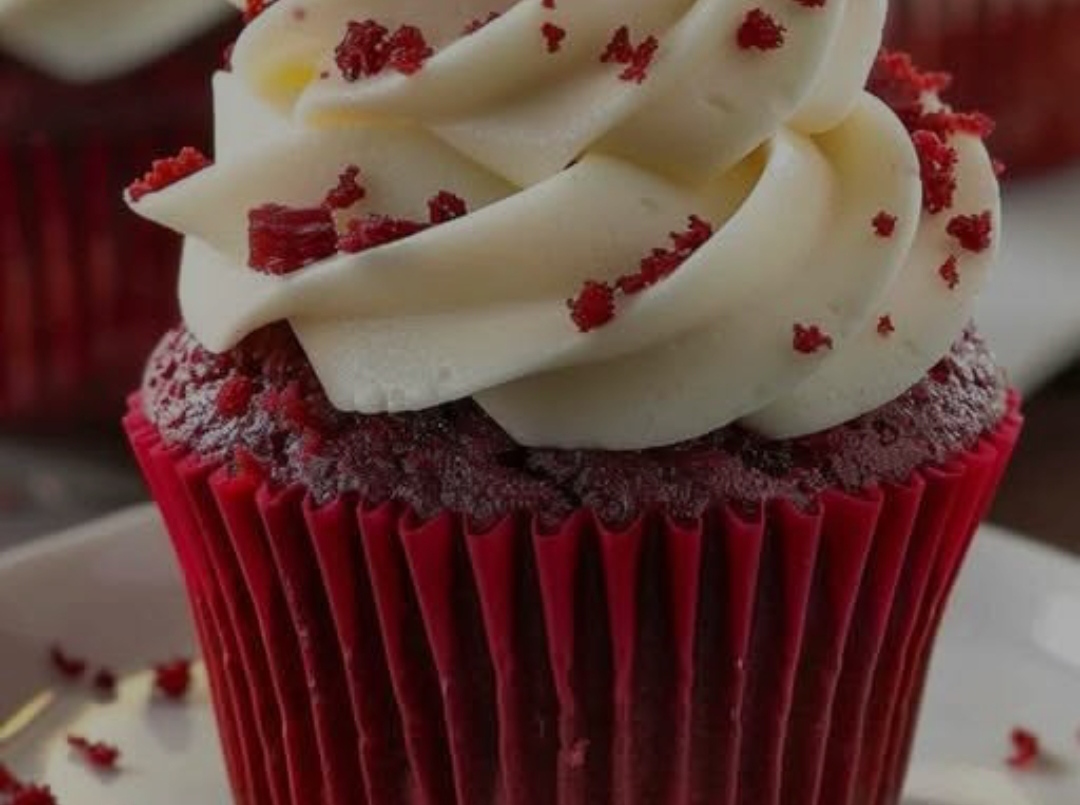
Red Velvet Cupcakes are a classic dessert known for their vibrant red color, soft and fluffy texture, and a hint of cocoa flavor. Paired with a rich and creamy cream cheese frosting, these cupcakes are perfect for any occasion, from birthdays to weddings. The origins of Red Velvet can be traced back to the 19th century, where they were considered a luxurious treat due to their soft, velvety crumb.
History of Red Velvet Cupcakes
Red Velvet cake originated in the United States and became popular in the early 20th century. The Waldorf-Astoria Hotel in New York played a role in making it famous. Originally, the reddish hue came from a reaction between vinegar, buttermilk, and cocoa powder. Later, during World War II, bakers used beet juice to enhance the color due to food rationing. Today, red food coloring is commonly used to achieve the signature shade.
Ingredients
For the Cupcakes:
2 ½ cups (310g) all-purpose flour
1 ½ cups (300g) granulated sugar
1 teaspoon baking soda
1 teaspoon salt
1 teaspoon cocoa powder
1 ½ cups (360ml) vegetable oil
1 cup (240ml) buttermilk, at room temperature
2 large eggs, at room temperature
2 tablespoons (30ml) red food coloring
1 teaspoon vanilla extract
1 teaspoon white vinegar
For the Cream Cheese Frosting:
8 ounces (225g) cream cheese, softened
½ cup (115g) unsalted butter, softened
4 cups (480g) powdered sugar
1 teaspoon vanilla extract
Instructions & Method
Step 1: Preheat the Oven
Preheat your oven to 350°F (175°C) and line a muffin tin with cupcake liners.
Step 2: Mix the Dry Ingredients
In a medium-sized bowl, sift together the flour, baking soda, salt, and cocoa powder. Set aside.
Step 3: Prepare the Wet Ingredients
In a large bowl, whisk together the sugar and vegetable oil. Add eggs one at a time, beating well after each addition. Stir in the vanilla extract and red food coloring.
Step 4: Combine Ingredients
Gradually add the dry ingredients to the wet ingredients, alternating with buttermilk. Mix until just combined. Stir in white vinegar, ensuring the batter remains smooth.
Step 5: Bake the Cupcakes
Divide the batter evenly among the cupcake liners, filling each about 2/3 full. Bake for 18-20 minutes or until a toothpick inserted into the center comes out clean. Let the cupcakes cool completely before frosting.
Step 6: Prepare the Frosting
Beat the cream cheese and butter together until smooth. Gradually add the powdered sugar and continue beating until light and fluffy. Mix in vanilla extract.
Step 7: Decorate the Cupcakes
Using a piping bag or a spatula, frost each cupcake with the cream cheese frosting. Garnish with sprinkles or red velvet cake crumbs.
Benefits of Red Velvet Cupcakes
- Rich in Antioxidants: Cocoa powder provides antioxidants that promote heart health.
- Mood Booster: The sugar and chocolate combination can elevate mood and provide instant happiness.
- Perfect for Celebrations: Their elegant appearance makes them ideal for special occasions.
- Customizable: They can be adapted with different frostings and decorations to suit personal preferences.
Nutritional Information (Per Cupcake)
Calories: 320 kcal
Carbohydrates: 40g
Protein: 3g
Fat: 16g
Sugar: 28g
Fiber: 1g
Sodium: 220mg
Lovers of Red Velvet Cupcakes
Red Velvet Cupcakes are adored worldwide. Dessert lovers, kids, and even professional bakers appreciate their rich flavor and aesthetic appeal. These cupcakes are a favorite at birthday parties, weddings, and festive gatherings. Many bakeries take pride in offering their unique twist on the classic Red Velvet Cupcake.
Conclusion
Red Velvet Cupcakes are a timeless dessert that continues to be a crowd-pleaser. Their striking red color, paired with the tangy cream cheese frosting, makes them both visually appealing and delicious. Whether you’re baking for a special event or simply indulging in a sweet treat, this recipe ensures a perfect batch every time. Enjoy making and sharing these delightful cupcakes with friends and family!