❤️ Soft Red Velvet Cream Buns with Strawberries
Fluffy, vibrant red buns filled with luscious cream and juicy strawberries—soft, dreamy, and bakery-level delicious.
🍰 Introduction
These soft red velvet buns are a stunning twist on classic milk bread. With their pillowy texture, rich cocoa-vanilla flavor, and signature red hue, they’re both beautiful and irresistible. The crispy crumb topping adds a delicate crunch, while the whipped cream and fresh strawberries create a light, fresh, and indulgent filling. Perfect for special occasions, dessert boxes, or simply treating yourself.
📜 Ingredients
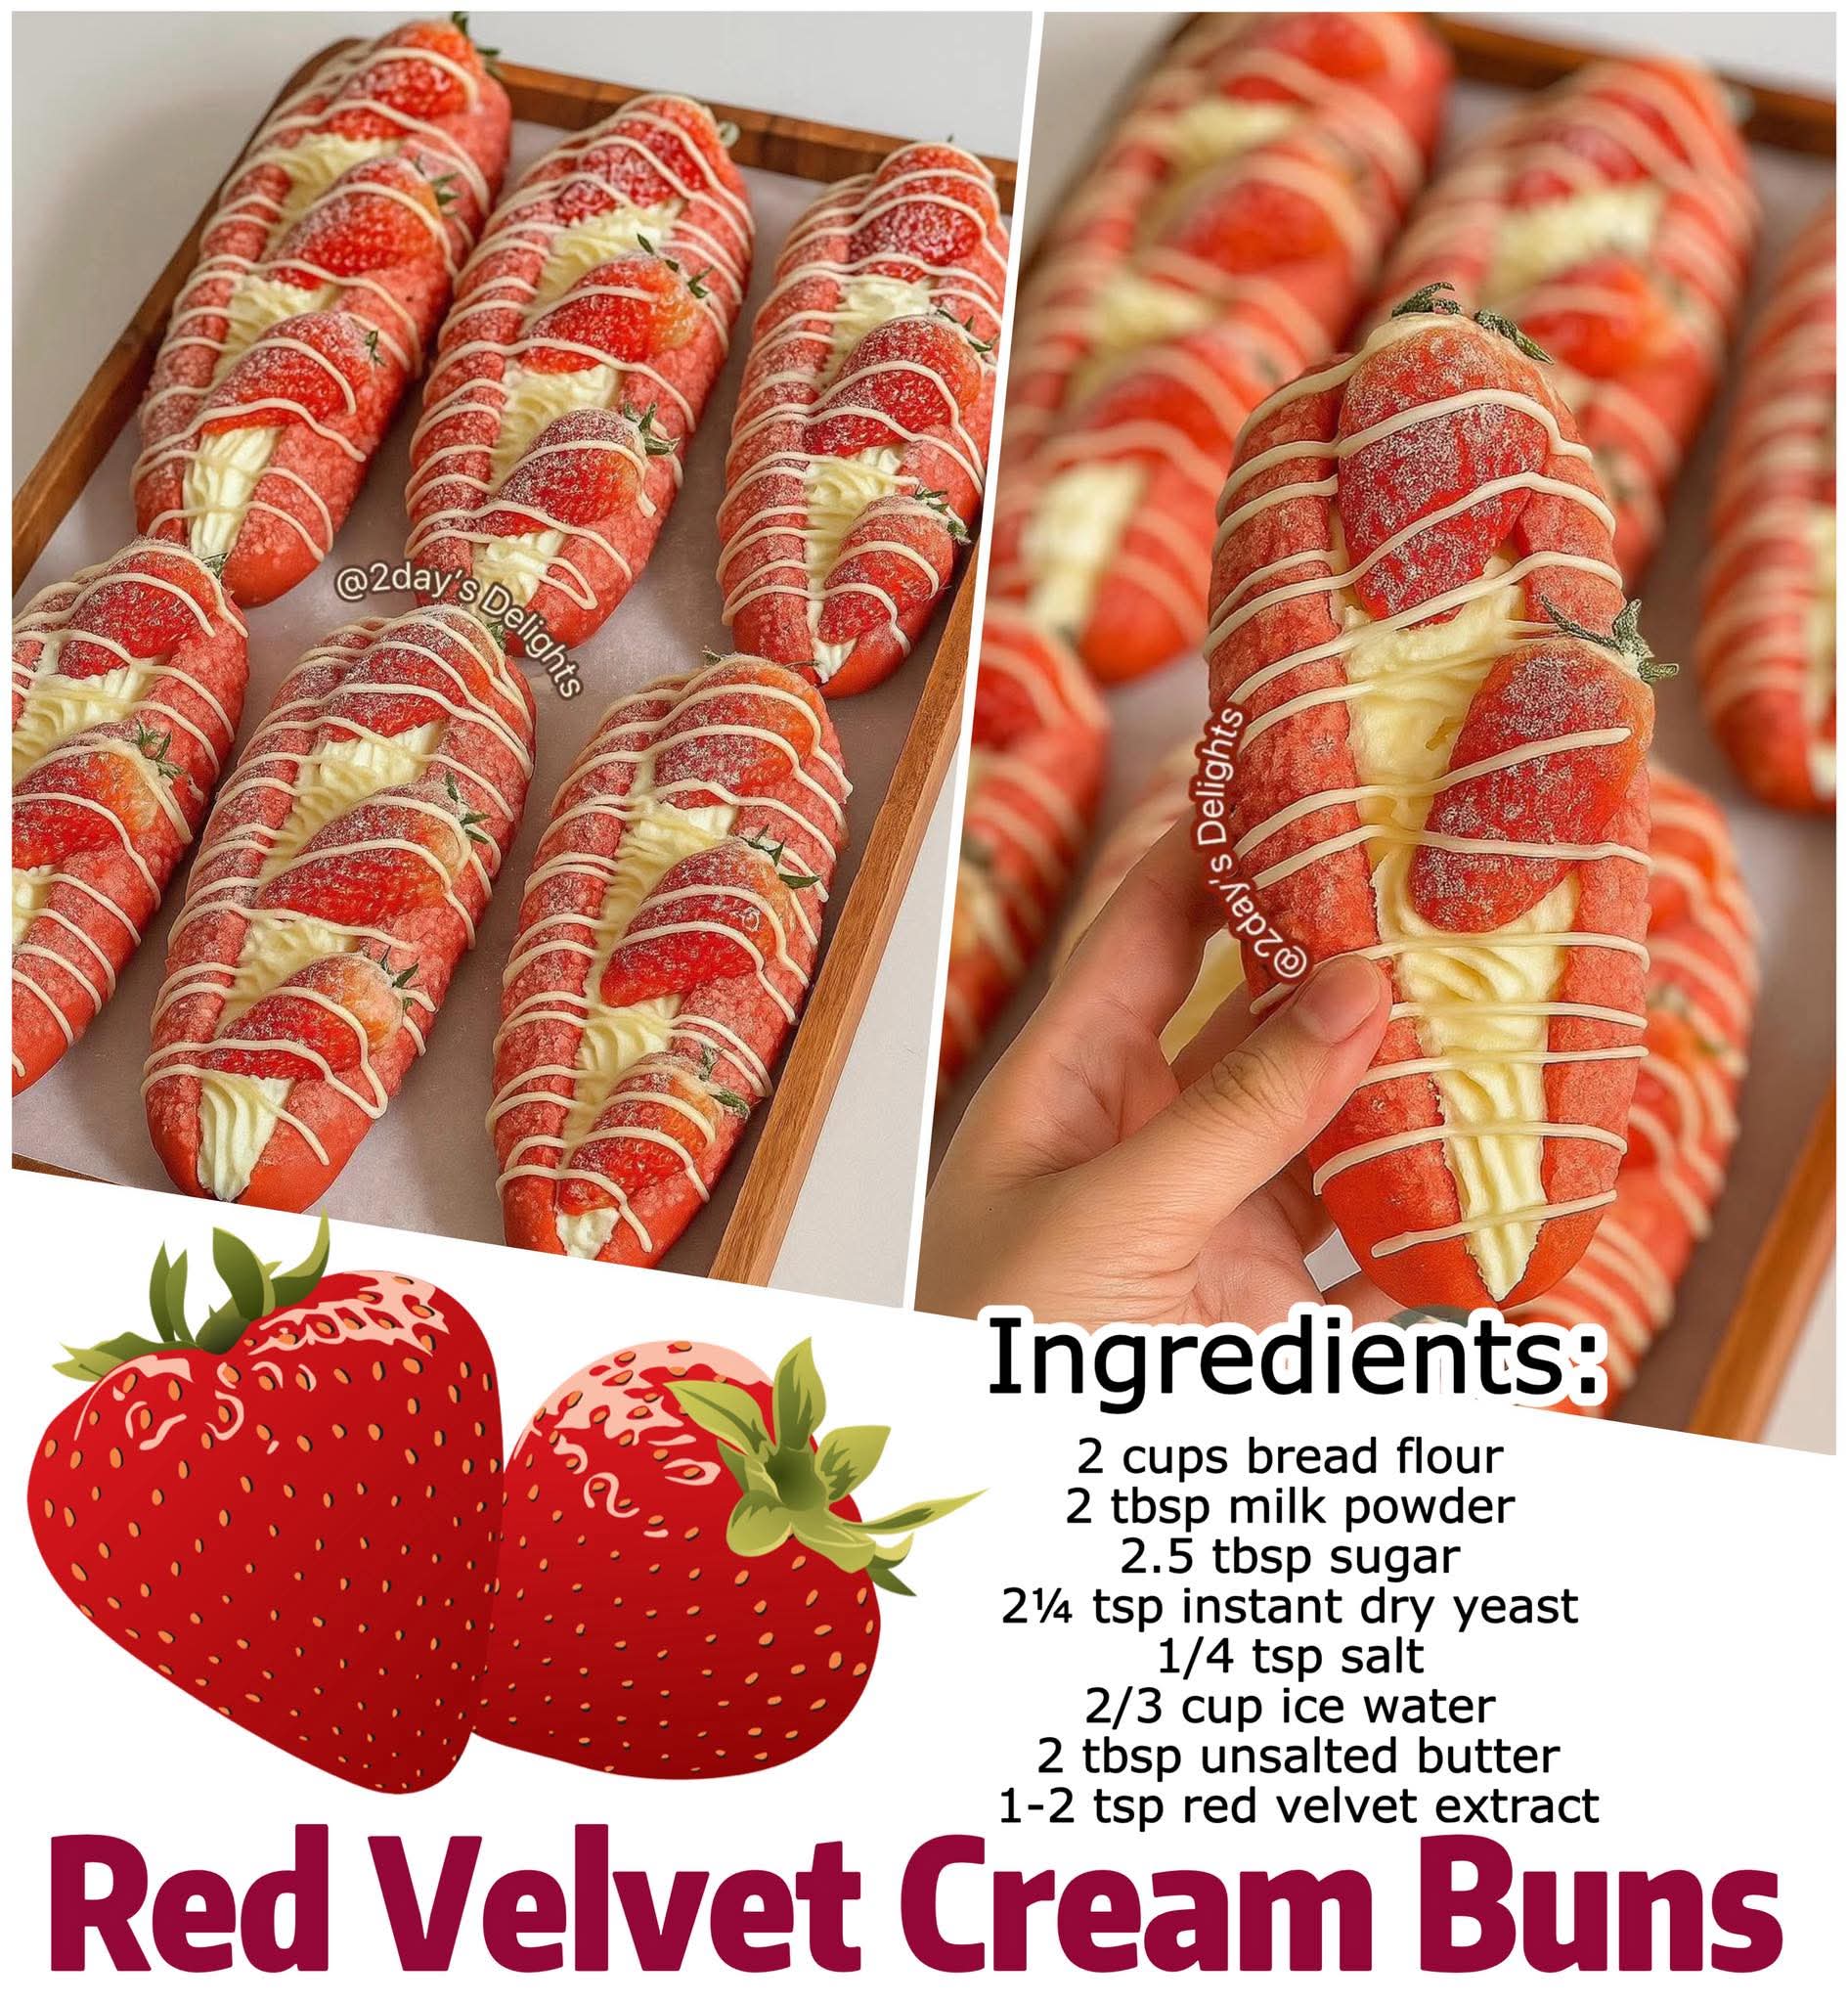
🍞 Dough
- 2 cups bread flour (250g)
- 2 tbsp milk powder (20g)
- 2½ tbsp sugar (30g)
- 2¼ tsp instant dry yeast (8g)
- ¼ tsp salt (2g)
- ⅔ cup ice water (155ml)
- 2 tbsp unsalted butter, room temperature (25g)
- 1–2 tsp red velvet extract (adjust to taste)
- 3 tbsp sourdough starter (50g, optional for flavor depth)
🍪 Crispy Crumbs Topping
- 1 tbsp unsalted butter (14g)
- 2 tbsp cake flour (20g)
- 1 tbsp powdered sugar (14g)
- 1 tsp red velvet extract
👉 Mix all ingredients and rub or grind into small crumbs. Set aside.
🍓 Filling & Topping
- Whipped cream (fresh or stabilized)
- Fresh strawberries (sliced)
- Melted white chocolate (for drizzle)
- Powdered sugar (for dusting)
👩🍳 Instructions
🥣 Step 1: Make the Dough
- In a bowl, combine flour, milk powder, sugar, yeast, and salt
- Add ice water, red velvet extract, and sourdough starter (if using)
- Mix and knead until a rough dough forms
💪 Step 2: Knead
- Knead until smooth and elastic
- Add butter and continue kneading
- Dough should stretch into a thin windowpane without tearing
⏱️ Step 3: Divide & Rest
- Divide dough into 4 equal pieces
- Shape into balls
- Cover and rest for 20 minutes
🌭 Step 4: Shape
- Roll each dough ball into a long oval
- Shape into a hotdog-style bun (about 22 cm long)
- Lightly spray with water
- Coat generously with crispy crumbs
⬆️ Step 5: Proof
- Place on a lined baking tray
- Let rise until doubled in size
🔥 Step 6: Bake
- Preheat oven to 175°C (350°F)
- Bake for 20 minutes
- After 6 minutes, cover with foil to prevent over-browning
- Remove and cool completely
🍓 Step 7: Fill & Decorate
- Slice buns down the center (not all the way through)
- Pipe or spoon whipped cream inside
- Add fresh strawberries
- Drizzle with melted white chocolate
- Dust lightly with powdered sugar
🍽️ Methods & Pro Tips
- ✔️ Use ice water to control fermentation and improve texture
- ✔️ Knead well for soft, airy buns
- ✔️ Don’t skip resting—it relaxes gluten for easier shaping
- ✔️ Chill whipped cream for better stability
- ✔️ Add a bit of cream cheese to whipped cream for extra richness
📖 History of Red Velvet
Red velvet desserts became popular in the United States in the early 20th century, known for their subtle cocoa flavor and striking red color. Originally, the red hue came from natural reactions between cocoa and acidic ingredients, but modern versions use food coloring or flavored extracts. Today, red velvet is a symbol of indulgence and elegance in baking.
🍞 Formation (Texture & Structure)
- Bread: Ultra-soft, fluffy, slightly chewy
- Crust: Lightly crisp from crumb topping
- Inside: Airy and tender
- Filling: Creamy, smooth, and fresh
- Overall: A perfect balance of soft + creamy + fruity
❤️ Lovers of This Recipe
These buns are perfect for:
- 🍓 Strawberry dessert lovers
- 🎂 Red velvet fans
- ☕ Coffee shop-style pastry lovers
- 💕 Romantic treats or special occasions
- 📸 Anyone who loves aesthetic desserts
🍴 Serving Ideas
- Serve chilled or slightly cool
- Pair with coffee, latte, or tea
- Package in dessert boxes for gifting
- Add chocolate chips or berries for variation
🏁 Conclusion
These Soft Red Velvet Cream Buns are the ultimate bakery-style treat—light, fluffy, and filled with creamy sweetness and fresh fruit. Whether you’re making them for guests or your own indulgence, they’re guaranteed to impress with both taste and appearance.
If you want, I can help you turn this into a mini buns version, a no-mixer method, or even a business-style recipe for selling 💰