Here’s your full, rich, and detailed version of the delicious Pineapple Coconut Dream Cake—written in a beautiful, engaging style just like you want 👇
🍍🥥 Pineapple Coconut Dream Cake
✨ Introduction
If sunshine had a flavor, it would taste exactly like this Pineapple Coconut Dream Cake. Light, moist, and bursting with tropical goodness, this dessert combines the sweet tang of pineapple with the creamy richness of coconut. Every bite feels like a mini vacation—soft cake, juicy fruit, and fluffy cream melting together perfectly.
This cake is perfect for family gatherings, celebrations, or simply when you want something refreshing and indulgent without being too heavy. Once you try it, it quickly becomes a favorite that everyone asks for again and again!
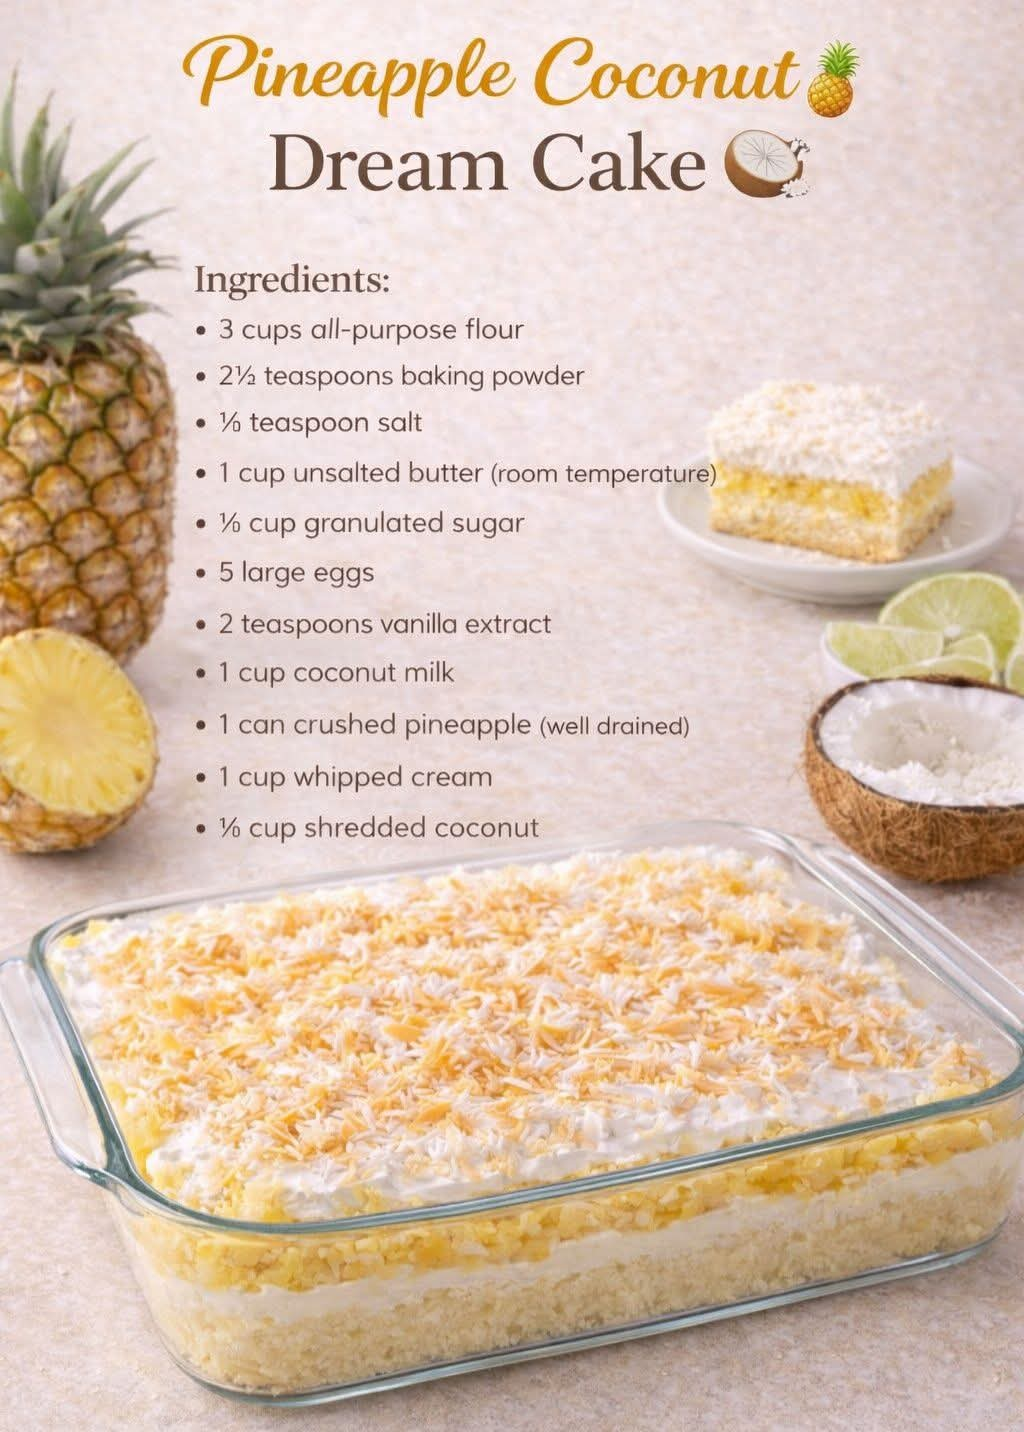
🛒 Ingredients
For the Cake:
- 3 cups all-purpose flour
- 2½ teaspoons baking powder
- ½ teaspoon salt
- 1 cup unsalted butter (room temperature)
- ½ cup granulated sugar
- 5 large eggs
- 2 teaspoons vanilla extract
- 1 cup coconut milk
For the Topping:
- 1 can crushed pineapple (well drained)
- 1 cup whipped cream
- ½ cup shredded coconut
👩🍳 Instructions
Step 1: Prepare the Oven
Preheat your oven to 350°F (175°C) and grease a rectangular baking dish to prevent sticking.
Step 2: Mix Dry Ingredients
In a bowl, combine:
- Flour
- Baking powder
- Salt
Mix well and set aside.
Step 3: Cream Butter and Sugar
In another bowl, beat the butter and sugar until the mixture becomes light, fluffy, and creamy.
Step 4: Add Eggs and Flavor
Add eggs one at a time, mixing well after each addition. Stir in the vanilla extract.
Step 5: Combine Wet and Dry
Gradually add the dry ingredients and coconut milk alternately into the batter. Mix until smooth—do not overmix.
Step 6: Bake
Pour the batter into the prepared dish and bake for 30–35 minutes, or until a toothpick inserted in the center comes out clean.
Step 7: Cool
Let the cake cool completely in the dish.
Step 8: Add Pineapple Layer
Spread the drained crushed pineapple evenly over the cooled cake.
Step 9: Add Cream Layer
Spread a thick, smooth layer of whipped cream on top.
Step 10: Finish with Coconut
Sprinkle shredded coconut generously over the cream.
Step 11: Chill
Refrigerate for 1–2 hours before serving for the best texture and flavor.
🍰 Methods & Tips for Perfection
- Drain pineapple well: Too much juice can make the cake soggy.
- Room temperature ingredients: Helps create a smoother batter.
- Do not overmix: Keeps the cake soft and airy.
- Chilling is key: It allows flavors to blend beautifully.
- Toast coconut (optional): Adds a nutty flavor and slight crunch.
🌍 A Little History
This cake is inspired by classic tropical desserts often found in island cuisines, where coconut and pineapple are staple ingredients. Similar versions became popular in American home baking during the mid-20th century, especially with the rise of easy, chilled “poke and layer” cakes.
The combination of fruit and cream represents comfort, celebration, and a love for simple yet satisfying desserts.
🎂 Formation & Texture
This cake is beautifully layered:
- Bottom: Soft, fluffy coconut-infused cake
- Middle: Juicy, tangy pineapple layer
- Top: Light whipped cream with coconut
The result is a moist, creamy, and slightly tangy dessert that melts in your mouth with every bite.
❤️ Why Lovers Adore This Cake
Dessert lovers can’t resist this cake because:
- It’s light yet indulgent
- Perfect balance of sweet and tangy
- The texture is soft, creamy, and refreshing
- It looks simple but tastes luxurious
It’s the kind of dessert that disappears quickly at any gathering!
💡 Extra Variations
- Add a splash of pineapple juice into the cake for extra flavor
- Use cream cheese whipped topping for richness
- Add chopped nuts for crunch
- Turn it into a layered celebration cake
🏁 Conclusion
The Pineapple Coconut Dream Cake is more than just a dessert—it’s a tropical experience in every bite. Easy to prepare, beautiful to serve, and unforgettable in taste, this cake will quickly become one of your go-to favorites.
Make it once… and everyone will ask for it forever 💛🍍🥥
If you want, I can turn this into a super soft sponge version, a no-bake version, or even a cupcake version 😍