Butterfinger Balls – A Sweet Treat for All Generations
Few desserts bring as much joy as these Butterfinger Balls—a delicious combination of peanut butter, butter, powdered sugar, and chocolate. This no-bake treat has been a favorite in many households, making appearances at family gatherings, holiday parties, and special occasions. The best part? They’re incredibly easy to make, requiring just a handful of ingredients and minimal effort. Whether you’re passing down a tradition or discovering this recipe for the first time, these treats will surely become a staple in your home.
History of Butterfinger Balls
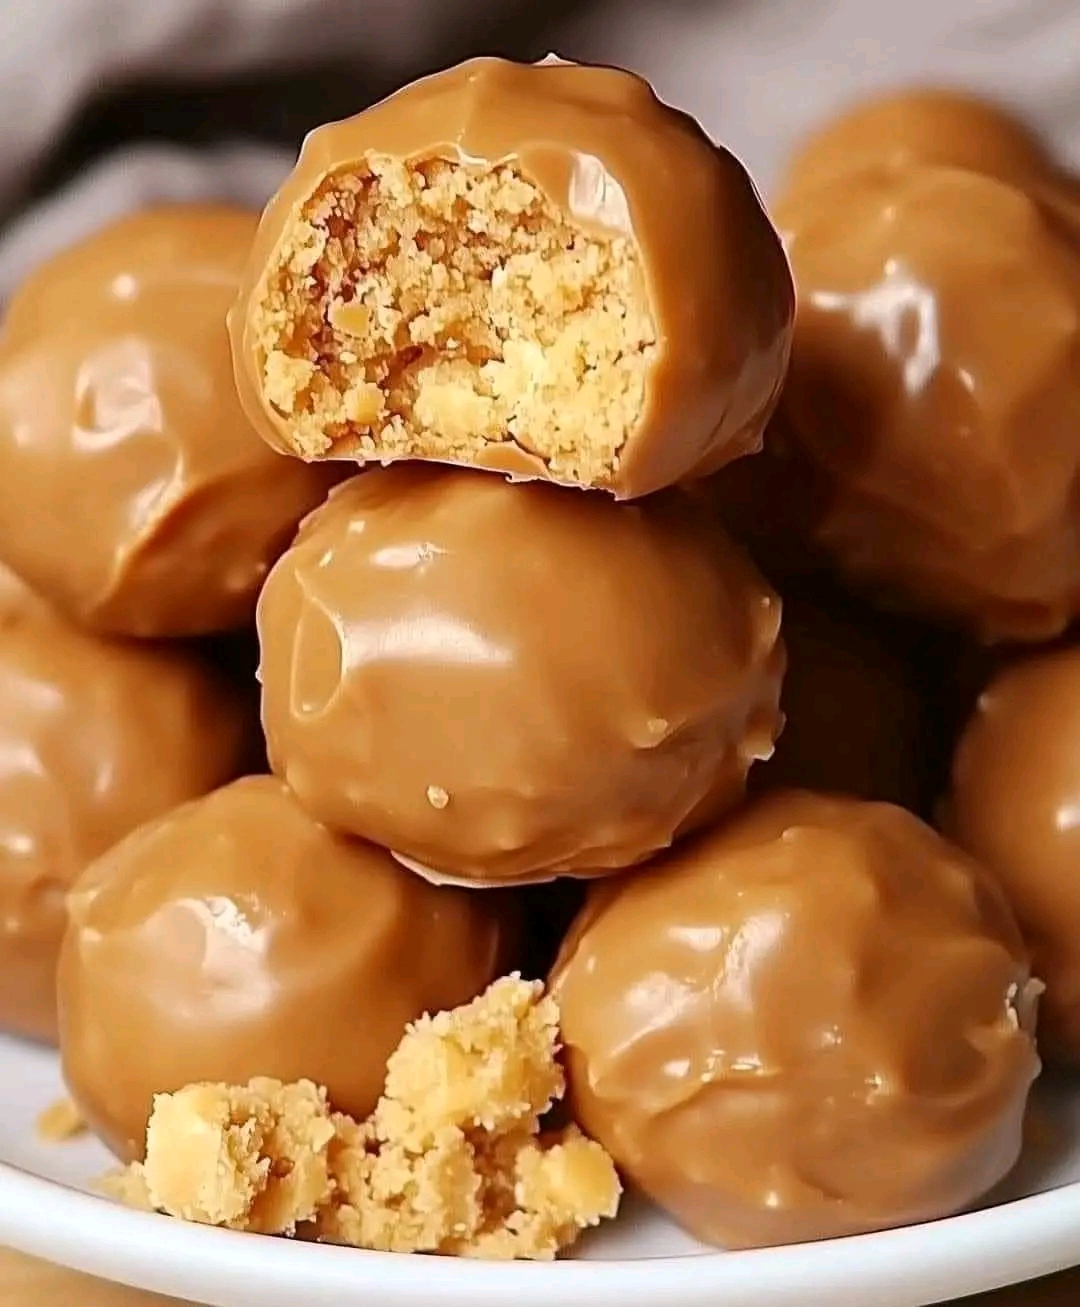
This delightful confection is inspired by the famous Butterfinger candy bar, which has been a beloved American treat since 1923. The bar’s crisp, peanut-buttery center coated in chocolate inspired home bakers to recreate the flavor in bite-sized, homemade versions. Over the years, the recipe has evolved, with some adding crushed Butterfinger pieces or a hint of extra vanilla for more depth. Regardless of the variations, the essence of the recipe remains the same: a creamy peanut butter center dipped in luscious chocolate, delivering an irresistible crunch with every bite.
Ingredients (Makes about 20-24 balls)
For the Peanut Butter Filling:
- 1 cup creamy peanut butter
- ½ cup butter, softened
- 1 teaspoon vanilla extract
- 1 cup powdered sugar
- 1 ½ cups crushed Butterfinger candy bars (for extra crunch, optional but highly recommended)
For the Chocolate Coating:
- 2 cups semi-sweet chocolate chips (or milk chocolate, based on preference)
- 1 tablespoon coconut oil or vegetable shortening (for smooth melting)
For Garnish (Optional):
- Extra crushed Butterfinger pieces
- Drizzle of white chocolate
Instructions & Methods
Step 1: Prepare the Peanut Butter Mixture
- In a large mixing bowl, combine peanut butter and softened butter. Beat with a hand mixer or mix thoroughly with a spatula until smooth and creamy.
- Add the vanilla extract and mix well.
- Slowly add powdered sugar, stirring until fully incorporated. The mixture should be thick but easy to mold.
- If using, fold in crushed Butterfinger pieces for extra crunch.
Step 2: Forming the Balls
- Line a baking sheet with parchment paper or a silicone mat.
- Scoop small portions of the mixture (about 1 tablespoon each) and roll into balls using your hands.
- Place the balls onto the baking sheet and chill in the refrigerator for about 30 minutes (or in the freezer for 15 minutes) to firm up.
Step 3: Melting the Chocolate
- In a microwave-safe bowl, combine chocolate chips and coconut oil/shortening.
- Microwave in 30-second intervals, stirring between each, until fully melted and smooth. (Alternatively, melt the chocolate using a double boiler.)
Step 4: Dipping the Balls in Chocolate
- Using a fork or a toothpick, dip each chilled peanut butter ball into the melted chocolate, ensuring it’s fully coated.
- Allow any excess chocolate to drip off before placing the coated ball back onto the parchment paper.
- If desired, sprinkle with extra crushed Butterfinger pieces or drizzle with white chocolate for an elegant touch.
Step 5: Setting and Serving
- Let the coated balls set at room temperature for about 15 minutes or refrigerate them for another 20-30 minutes until the chocolate hardens completely.
- Serve and enjoy! Store leftovers in an airtight container in the refrigerator for up to two weeks or freeze for longer storage.
Why People Love Butterfinger Balls
- Easy to make – No baking required!
- Perfect for any occasion – Holidays, parties, or a quick snack.
- Great for sharing – Kids and adults alike adore them.
- Rich and indulgent – The perfect balance of sweet, creamy, and crunchy.
Conclusion: A Treat Worth Sharing
Whether you’re making these for a holiday cookie exchange, a special family gathering, or just to satisfy your sweet tooth, Butterfinger Balls are guaranteed to be a hit. They capture the classic taste of the famous candy bar but in an easy-to-make, bite-sized version. Plus, they’re fun to make with kids, making them a great bonding activity.
So go ahead, try this recipe, and create new delicious memories with your loved ones!
Would you like a variation with almond butter or dark chocolate for a healthier twist? Let me know!