Absolutely! Let’s turn your “Perfect Chocolate Buttercream Frosting” into a full, rich, indulgent recipe write-up with history, methods, and a little extra flair for chocolate lovers. Here’s the big version:
🍫 Perfect Chocolate Buttercream Frosting – The Ultimate Indulgence
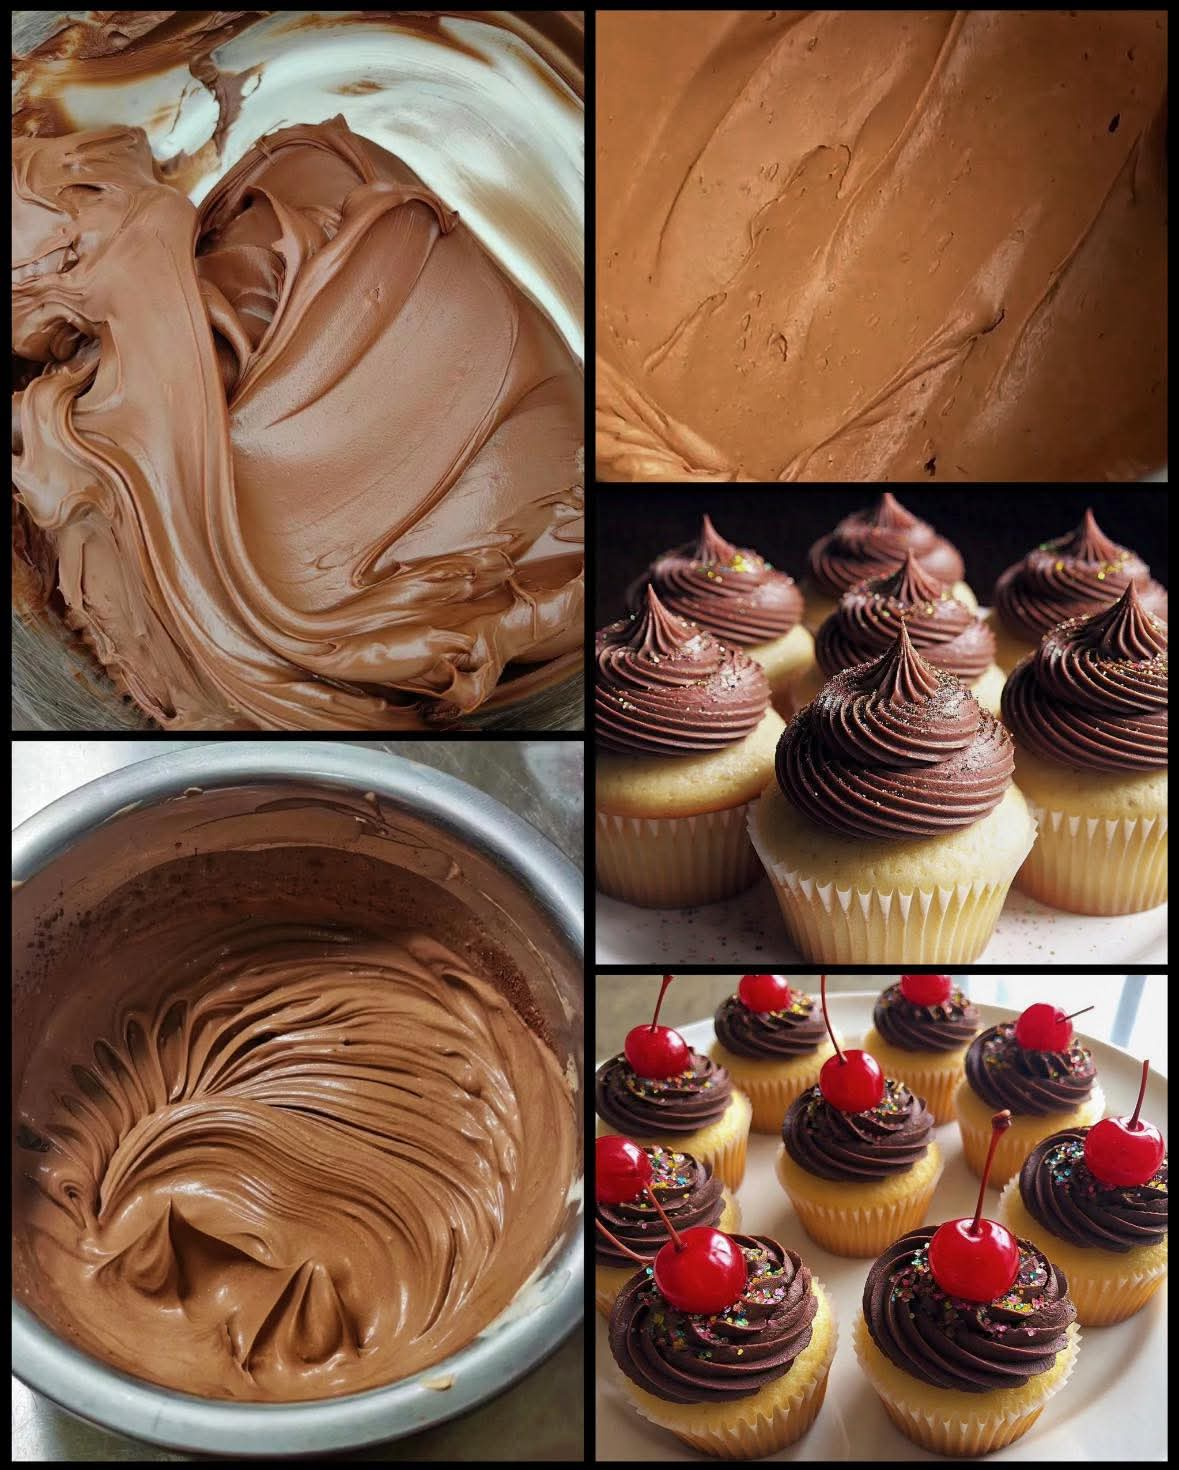
Chocolate and buttercream are a match made in dessert heaven. This luscious, silky frosting is creamy, chocolatey, and versatile enough to top cupcakes, layer cakes, or even swirl onto cookies. Whether you’re a beginner baker or a seasoned dessert lover, this recipe will guide you step by step to chocolate bliss.
🛒 Ingredients (makes enough for 12 cupcakes)
- 1 cup (227 g) unsalted butter, softened to room temperature
- 2–3 cups (428 g) powdered sugar, sifted for smoothness
- ½ cup (43 g) natural, unsweetened cocoa powder
- 1 teaspoon pure vanilla extract
- ¼ teaspoon salt (optional, especially if using salted butter)
- 4 tablespoons milk (plus extra if needed for consistency)
- Optional: ½ teaspoon espresso powder to intensify chocolate flavor
📝 Instructions & Methods
Step 1: Creaming the Butter
- Place the softened butter in a large mixing bowl.
- Using a hand mixer or stand mixer, whisk on high speed for 2–3 minutes until the butter is pale, light, and creamy.
- Scrape down the sides of the bowl with a spatula to ensure all butter is evenly aerated.
Method tip: Creaming introduces air into the butter, which gives your frosting its fluffy texture.
Step 2: Adding Dry Ingredients
- Reduce the mixer speed to low. Gradually add the powdered sugar and cocoa powder, alternating with small splashes of milk.
- Add vanilla extract and salt (if using).
- Increase the speed to medium-high and mix for 2–3 minutes until smooth and fully combined.
- Scrape down the bowl multiple times to avoid any pockets of dry ingredients.
Method tip: Sifting the powdered sugar and cocoa powder before mixing prevents lumps and ensures ultra-smooth frosting.
Step 3: Perfecting the Texture
- For a super smooth, professional finish, switch to a paddle attachment (if using a stand mixer) and mix on the lowest speed for 1–2 minutes.
- Check the consistency:
- Too thick → add 1 teaspoon of milk at a time until desired texture.
- Too thin → add more powdered sugar until the frosting holds its shape.
Extra flavor tip: Add a pinch of espresso powder to deepen the chocolate taste without adding coffee flavor.
Step 4: Frosting Your Cupcakes or Cake
- Transfer frosting into a piping bag fitted with your favorite tip (like a star or round tip).
- Pipe generously on cooled cupcakes or layer onto cakes.
- Optional: sprinkle with chocolate shavings, cocoa powder, or edible glitter for a special touch.
🏛️ A Bit of History
Buttercream frosting dates back to the 1600s in Europe, originally made with whipped sugar and egg whites (meringue style). Chocolate buttercream became popular in the 19th century when cocoa became more widely available. Today, chocolate buttercream is a symbol of celebration — from birthday cakes to wedding confections, it’s the frosting of choice for chocolate lovers everywhere.
🍰 Formation & Chemistry
- Butter provides structure and creaminess.
- Powdered sugar sweetens and stabilizes the frosting.
- Cocoa powder delivers rich chocolate flavor.
- Milk adjusts consistency, allowing the frosting to pipe smoothly.
- Creaming and mixing incorporate air, creating a light, fluffy texture.
❤️ Conclusion
This chocolate buttercream is more than a topping—it’s an experience. Rich, creamy, and perfectly balanced between sweet and chocolatey, it turns any simple cupcake into a showstopper. Once you’ve made this frosting, it will become your go-to for every celebration, holiday, and sweet craving.
💕 For the Chocolate Lovers
- Pair with classic vanilla cupcakes for a decadent contrast.
- Use as a filling for sandwich cookies or layered cakes.
- Try swirling with caramel or peanut butter for a gourmet twist.
- Freeze extra frosting in an airtight container for up to 3 months — just soften before piping.
Would you like me to also create a step-by-step visual guide with piping tips for this frosting? It would make it easier to get that bakery-style finish.