Here is a comprehensive guide to Homemade Orange Jam (Marmalade), structured as you requested.
—
Homemade Orange Jam (Marmalade): A Sunshiny Guide
Introduction
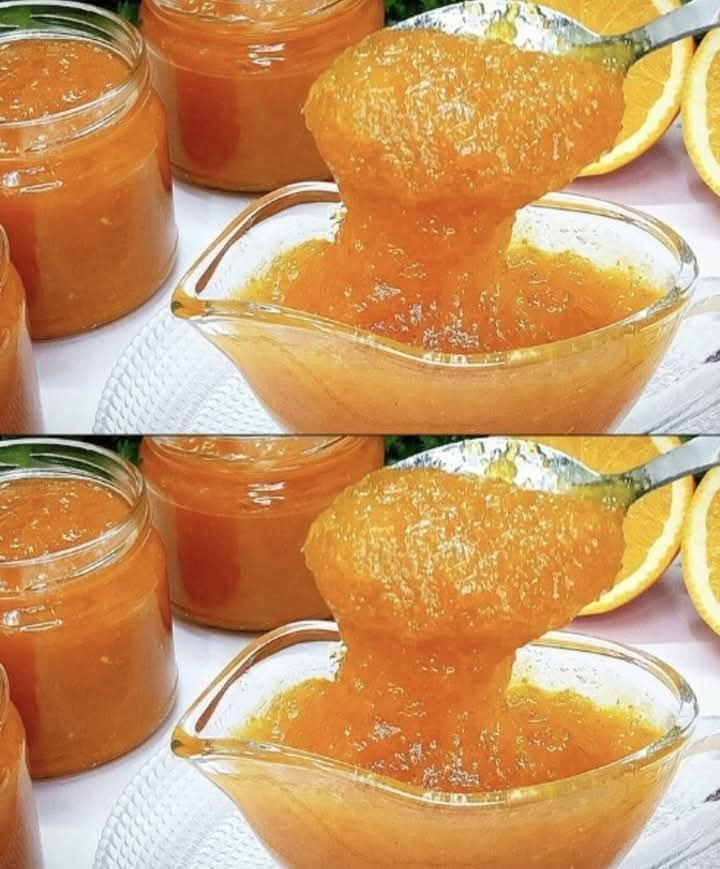
There is something truly magical about a jar of homemade orange marmalade. It’s not just a preserve; it’s a spoonful of sunshine captured at its peak. Unlike the uniform, often overly sweet commercial jams, homemade marmalade offers a complex symphony of flavors: the bright, citrusy zing, the deep, caramelized sweetness, and the delightful, subtle bitterness of the pith that cuts through the sugar. The crowning glory is the translucent, candied strips of peel suspended in a clear, jewel-like gel. Making marmalade is a rewarding kitchen ritual that connects us to the seasons and fills the home with an intoxicating citrus aroma, promising delicious breakfasts for months to come.
—
The History of Marmalade
The story of marmalade is a long and debated one. While the Romans knew how to preserve quinces with honey, the modern word “marmalade” is believed to derive from the Portuguese word marmelada, a solid quince paste. The first recorded recipe for a “marmalade” of oranges appears in the 17th century, and it was a luxurious, imported treat for the wealthy. It is said that Mary, Queen of Scots, used marmalade to settle her stomach, and the French phrase “Marie est malade” (Mary is ill) is a romantic, though likely false, etymology for the word. What is true is that Scotland fell in love with it, perfecting the thick-cut, bittersweet version made from Seville oranges that remains iconic today. It evolved from a medicinal paste to a beloved breakfast staple, a testament to the enduring appeal of bitter and sweet.
—
The Benefits of Homemade
Making your own orange jam has numerous advantages:
1. Purity of Ingredients: You control what goes in the jar. No high-fructose corn syrup, artificial pectins, or preservatives—just fruit, sugar, and water.
2. Customizable Flavor: You can adjust the sweetness, the intensity of the bitterness, and the cut of the peel (fine, medium, or chunky) to your exact preference.
3. Reduced Food Waste: It’s a fantastic way to use up a surplus of oranges, giving them a new, delicious life.
4. Mindfulness & Satisfaction: The process is a labor of love. The simple acts of slicing peel, stirring the pot, and watching it transform into a gleaming gel is incredibly satisfying. The pride of gifting a homemade jar is unmatched.
5. Nutritional Value: While still a sugar preserve, it retains the natural vitamins, minerals, and antioxidants from the fresh oranges, particularly Vitamin C and flavonoids from the peel.
—
The Perfect Pairing: Orange Jam Lovers
Orange marmalade is a preserve with a devoted following. It’s for the person who appreciates complexity in their morning routine, who enjoys a hint of bitterness to balance the sweet. It is beloved by:
· The Traditionalist: Who wouldn’t dream of a proper English breakfast without a generous spread of chunky marmalade on their toast or crumpet.
· The Culinary Adventurer: Who uses it as a glaze for roasted duck or salmon, a filling for cakes, or a secret ingredient in savory sauces and marinades.
· The Nostalgic: For whom the scent of oranges and sugar simmering evokes warm childhood memories of a grandparent’s kitchen.
· The Artisan: Who loves the process of canning and the beauty of seeing light shine through a perfectly set, peel-studded jar.
—
The Recipe: Homemade Orange Jam (Marmalade)
Yields: Approximately 4-5 half-pint (250 ml) jars
Prep time: 1 hour
Cook time: 1.5 – 2 hours
Ingredients
· 2 lb (900 g) Oranges: The star of the show.
· For a classic, bittersweet marmalade: Use Seville oranges (available for a short window in winter).
· For a sweeter, milder jam: Use Navel or Valencia oranges.
· 1 Lemon: The juice and seeds provide natural pectin and acidity to help the jam set and balance the sweetness.
· 2 ½ – 3 cups (500–600 g) Granulated Sugar: Adjust based on the sweetness of your oranges and your personal taste. Do not reduce the sugar too drastically, as it is essential for preservation, gelling, and texture.
· 2 cups (480 ml) Water
· Optional Flavorings (to be added at the end of cooking):
· ½ teaspoon vanilla extract
· 1 tablespoon orange liqueur (like Grand Marnier or Cointreau)
· 1 star anise or a cinnamon stick (cooked with the oranges and removed before potting)
Equipment
· Large, heavy-bottomed pot or preserving pan (stainless steel or enamel is best; avoid aluminum or copper, which can react with the acid).
· Sharp knife and cutting board
· Citrus juicer
· Small bowl (for seeds)
· Wooden spoon
· Sugar thermometer (highly recommended for consistent results)
· Ladle
· Canning funnel (optional, but very helpful)
· 4-5 sterilized half-pint jars with new lids
· Clean, lint-free kitchen towel
· Jar lifter (for safe handling)
—
Instructions & Methods: A Step-by-Step Guide
1. Preparation: The Pectin Bag & Peel Prep
· Wash the oranges and lemon thoroughly.
· Juice the fruit: Juice the oranges and the lemon. Pour the juice through a sieve into your large pot to catch any seeds. Do not discard the seeds or membranes.
· Save the seeds: Place all the lemon seeds and any orange seeds, along with the white membranes and pith from the juiced halves, into the center of a square of cheesecloth. Tie it up with kitchen string to create a bag. This is your “pectin bag,” a natural source of gelling power.
· Slice the peel: Slice the orange peels (and lemon peel, if desired) into thin strips. You can do this by hand for rustic charm or use a mandoline for uniform pieces. The thickness is up to you—from fine shreds to chunky “Oxford” cut.
2. The First Cook: Softening & Extracting Pectin
· Add the sliced peels, the pectin bag, and the 2 cups of water to the pot with the citrus juice.
· Bring the mixture to a boil over high heat, then reduce the heat, cover, and let it simmer gently for about 45 minutes to 1 hour. The goal is to soften the peels until they are tender and to extract the pectin from the seeds and membranes.
· Remove the pot from the heat. Using tongs, carefully lift out the pectin bag and place it in a bowl to cool slightly.
3. Extracting the Liquid Gold
· Once the bag is cool enough to handle, squeeze it firmly over the pot to release every last drop of pectin-rich liquid. This is crucial for a good set. Discard the bag.
4. The Sugar & The Boil
· Add the sugar to the pot. Stir over low heat until the sugar has completely dissolved. You should no longer feel any gritty sugar crystals on the bottom of the spoon.
· Once dissolved, increase the heat to high and bring the mixture to a rolling boil—a vigorous boil that cannot be stirred down.
· If using a sugar thermometer, clip it to the side of the pan, ensuring the bulb is submerged but not touching the bottom. Boil hard until the temperature reaches 220°F (105°C) , the setting point for jam.
· This can take anywhere from 15 to 30 minutes. Stir occasionally to prevent scorching, especially towards the end.
5. Testing for the Set
· If you don’t have a thermometer, use the Cold Plate Test. Place a few small plates in the freezer at the beginning of your cooking.
· When you think the marmalade is close, remove a plate from the freezer. Place a small spoonful of the hot marmalade onto the cold plate.
· Return the plate to the freezer for 1-2 minutes, then push the blob with your finger. If it wrinkles and feels set, like a gel, rather than running as a liquid, it’s done. If it’s still runny, continue boiling for another 3-5 minutes and test again.
6. Finishing & Resting
· Once the setting point is reached, remove the pot from the heat immediately. If using, stir in your optional vanilla or orange liqueur.
· Let the marmalade rest in the pot for 10-15 minutes. This is a key step. It allows the shredded peel to settle slightly and become evenly distributed throughout the jam, rather than all floating to the top once jarred.
7. Jarring & Sealing
· While the marmalade rests, have your sterilized jars and lids ready.
· Using a ladle and a canning funnel, carefully pour the marmalade into the hot jars, leaving about ¼ inch of headspace at the top.
· Wipe the rims of the jars with a clean, damp cloth to remove any sticky residue.
· Place the lids on and screw the bands on until they are fingertip-tight.
· Let the jars cool completely at room temperature. You will likely hear the satisfying “pop” of the lids sealing as they cool.
—
Nutritional Information (per 1 tablespoon serving)
Please note: This is an estimate and can vary based on the exact amount of sugar and fruit used.
· Calories: 45-55
· Total Fat: 0g
· Sodium: 0mg
· Total Carbohydrates: 13-14g
· Dietary Fiber: 0.2g
· Sugars: 12-13g
· Protein: 0.1g
· Vitamin C: Provides a small percentage of the Daily Value.
—
Conclusion
Making homemade orange marmalade is a beautiful act of preservation, transforming simple, fresh oranges into a complex and cherished condiment. It captures the essence of the fruit in a way that no store-bought version can replicate. Whether you prefer it thick-cut and bitter, or fine-shred and sweet, this guide provides you with the knowledge and method to create your own perfect jar. The process is an investment of time and love, but the reward is a pantry lined with golden sunshine, ready to brighten toast, pastries, and savory dishes throughout the year. So, gather your oranges and embark on this deliciously rewarding kitchen adventure.