Here is a comprehensive guide to making homemade Krispy Kreme-style glazed doughnuts, crafted exactly as you requested. It includes a detailed introduction, history, benefits, step-by-step methods, nutritional information, and more.
—
The Quest for the Perfect Glaze: Homemade Krispy Kremes
Introduction
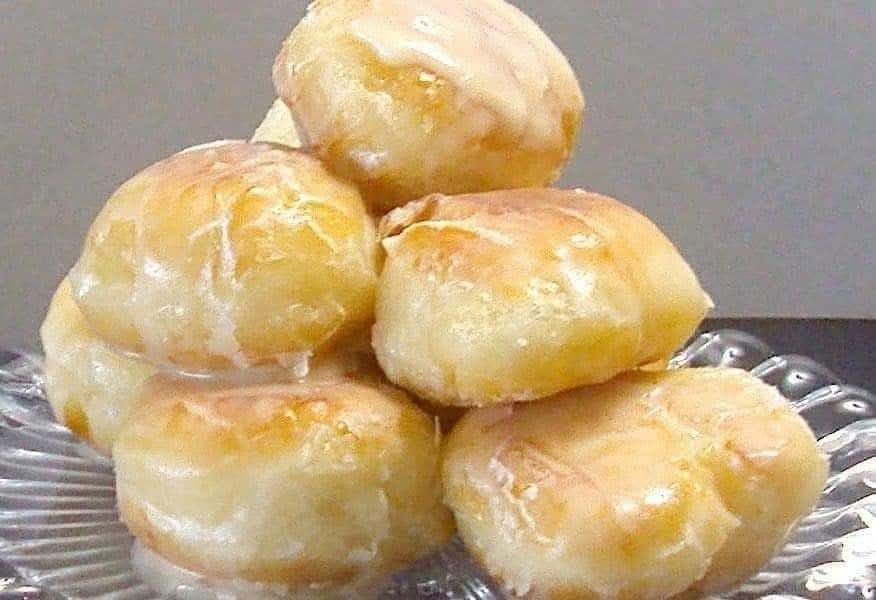
There is a moment of pure, unadulterated joy that comes from biting into a fresh, warm glazed doughnut. The slight crackle as your teeth break through the thin, glass-like shell of sweetness, followed by the pillowy-soft, airy cloud of dough beneath—it’s a textural symphony that has made Krispy Kreme a global phenomenon. For decades, the “Hot Light” sign has been a beacon of temptation, signaling that doughnuts are emerging from the glazing waterfall, at their absolute peak of perfection.
But what if you could capture that magic in your own kitchen? What if you could fill your home with the intoxicating aroma of yeast, fried dough, and warm sugar? This recipe is your ticket. While we may not be able to perfectly replicate the secrets of an industrial glazing machine, we can absolutely achieve a homemade version that rivals, and some might argue surpasses, the original. These Homemade Krispy Kremes are a labor of love, a project for the baker who understands that the best things in life are worth waiting for. Prepare to embark on a delicious journey to create a batch of doughnuts so light, so airy, and so perfectly glazed, you’ll never want to miss them again.
—
A Brief History of the Glazed Ring
The story of Krispy Kreme begins in 1933, when Vernon Rudolph bought a yeast-raised doughnut recipe from a New Orleans chef. He started selling them to grocery stores in Nashville, Tennessee, but the aroma was so intoxicating that people kept stopping him, asking if they could buy hot doughnuts right there. In 1937, Rudolph borrowed a small sum of money and rented a building in Winston-Salem, North Carolina—the site of the first Krispy Kreme. He cut a hole in an exterior wall to sell hot doughnuts directly to customers on the street. The company’s iconic secret recipe and its signature glazing technique were perfected over the decades, turning a simple ring of fried dough into a cultural icon. This recipe is a humble homage to that legacy.
—
The “Hot Now” Benefits of Making Your Own
Why go through the effort of making doughnuts at home?
1. The “Hot Now” Experience, On Demand: You get to control the timer. You can have a doughnut mere seconds after it has been dipped in warm glaze, achieving that legendary melt-in-your-mouth texture that no store-bought doughnut can replicate.
2. Incomparable Freshness: Store-bought doughnuts, even from the best shops, lose their magic within hours. Homemade doughnuts are at their absolute peak for a short, glorious window. You get to be the one to enjoy them in that moment.
3. Ingredient Control: You know exactly what’s going into your food. You can opt for high-quality butter, fresh milk, and even experiment with organic flour.
4. The Aroma of Heaven: The smell of yeast dough rising and doughnuts frying is one of the most comforting and enticing scents on the planet. It will fill your home and create a warm, inviting atmosphere.
5. Pure Satisfaction: The look on the faces of your family and friends when you present them with a platter of warm, homemade glazed doughnuts is a reward in itself. It’s a true baking achievement.
—
Ingredients
This recipe yields approximately 18-24 doughnuts, depending on size.
For the Dough (The Sponge):
· 2 ¼ teaspoons (1 packet) Active Dry Yeast
· ¼ cup Whole Milk, lukewarm (about 105-115°F)
· ¼ cup Water, lukewarm
· 1 tablespoon Granulated Sugar
For the Dough (The Final Dough):
· 3 ¼ cups All-purpose Flour, plus more for dusting
· ¼ cup Granulated Sugar
· 1 teaspoon Salt
· ¼ cup Unsalted Butter, very soft
· 1 large Egg, lightly beaten
· 1 teaspoon Vanilla Extract
· ½ cup Whole Milk, lukewarm
For the Famous Glaze:
· ⅓ cup Whole Milk, lukewarm
· 1 teaspoon Vanilla Extract
· 4 cups Powdered Sugar, sifted
For Frying:
· 2-3 quarts Vegetable Oil, Canola Oil, or Peanut Oil (for high-heat frying)
—
Step-by-Step Methods: The Path to Glory
Part 1: Formation – Making the Dough
1. Proof the Yeast: In the bowl of a stand mixer, combine the lukewarm milk, lukewarm water, 1 tablespoon of sugar, and the yeast. Stir gently and let it sit for 5-10 minutes until it becomes foamy and fragrant. This confirms your yeast is alive and active.
2. Form the Sponge: Add 1 cup of the flour to the yeast mixture and stir until combined. This creates a loose “sponge.” Cover the bowl with a clean kitchen towel and let it rest for 30 minutes. It should become bubbly.
3. Build the Dough: To the sponge, add the remaining ¼ cup of sugar, salt, soft butter, beaten egg, vanilla extract, and the remaining ½ cup of lukewarm milk. Mix on low speed with the paddle attachment until combined.
4. Add Flour: Switch to the dough hook. With the mixer on low, gradually add the remaining 2 ¼ cups of flour, one cup at a time. Mix until a soft, shaggy dough forms.
5. Knead: Increase the speed to medium-low and knead for about 5-7 minutes. The dough should be smooth, elastic, and slightly sticky to the touch. If it’s too wet, add a tablespoon of flour at a time. If it’s too dry, add a teaspoon of milk.
6. First Rise (Bulk Fermentation): Form the dough into a ball and place it in a lightly greased bowl, turning to coat. Cover with plastic wrap or a damp towel and let it rise in a warm, draft-free place until doubled in size. This will take about 1 to 1.5 hours.
7. Shape the Doughnuts: Gently punch down the dough to release the air. Turn it out onto a lightly floured surface. Roll the dough out to about ½-inch thickness. Using a floured 3-inch round cutter, cut out as many rounds as you can. Then, use a floured 1-inch cutter to cut out the centers, forming rings. Place the doughnuts and the doughnut holes on separate parchment paper-lined baking sheets, leaving space between them.
8. Second Rise: Cover the doughnuts loosely with a clean kitchen towel and let them rise again until they are puffy and almost doubled. This will take about 30-45 minutes. They should feel very light and airy to the touch.
Part 2: The Main Event – Frying and Glazing
1. Heat the Oil: In a large, heavy-bottomed pot or Dutch oven, heat about 2-3 inches of oil to 350°F (175°C). Use a candy/deep-fry thermometer to maintain this temperature. It’s crucial for preventing greasy or burnt doughnuts.
2. Prepare the Glaze: While the oil heats, make the glaze. In a wide, shallow bowl (wide enough to dip a whole doughnut), whisk together the lukewarm milk, vanilla, and sifted powdered sugar until completely smooth. The glaze should be thin enough to coat the back of a spoon but thick enough to cling to the doughnut. Keep it warm by placing the bowl over another bowl of warm water.
3. Fry in Batches: Gently pick up a risen doughnut and carefully slide it into the hot oil. Do not overcrowd the pot. Fry for about 45-60 seconds per side, until golden brown. Use a slotted spoon or spider skimmer to flip them. The doughnut holes will fry much faster, about 30 seconds per side.
4. Drain: As soon as they are golden brown, transfer the fried doughnuts to a wire rack set over a baking sheet to drain for just about 30 seconds.
5. Glaze While Hot: This is the most critical step! While the doughnut is still hot (but cool enough to handle), immediately dip it into the warm glaze. Use a fork or your fingers to submerge the top, then flip it to coat the bottom. Lift it out, allowing the excess glaze to drip back into the bowl.
6. Set: Place the glazed doughnuts back on the wire rack (with the baking sheet underneath to catch drips). The glaze will set into a beautiful, crackly shell as it cools. Repeat with all doughnuts and holes.
—
Nutritional Information (Per Doughnut, Approximate)
Please note that this is an estimate and will vary based on exact ingredients, oil absorption, and size.
· Calories: 250-300
· Fat: 12-15g
· Carbohydrates: 35-40g
· Protein: 3-4g
· Sugar: 18-22g
—
Conclusion & A Final Word for the Lovers
These Homemade Krispy Kremes are more than just a recipe; they are an experience. They are a project for a lazy Sunday, a surprise for a loved one, or a nostalgic trip back to childhood. The process is therapeutic, the result is spectacular, and the memory of that first warm, glazed bite will linger long after the last doughnut is gone.
For the lovers of simple pleasures, of warm sugar and soft dough, this recipe is a declaration of love. Share them with the people you cherish, and watch the magic unfold. Enjoy every single, glorious bite.