🥟 Homemade Samosa Sheets (Perfect, Thin & Crispy Wrappers)
🌟 Introduction
Samosa sheets are the foundation of one of the world’s most beloved snacks—crispy, golden samosas filled with spiced potatoes, meat, or vegetables. Making your own sheets at home may seem intimidating, but it’s actually simple, economical, and gives you better taste and texture than store-bought versions. Once you master this dough, you’ll unlock endless possibilities for homemade snacks that are fresher, thinner, and perfectly crisp every time.
🧂 Ingredients
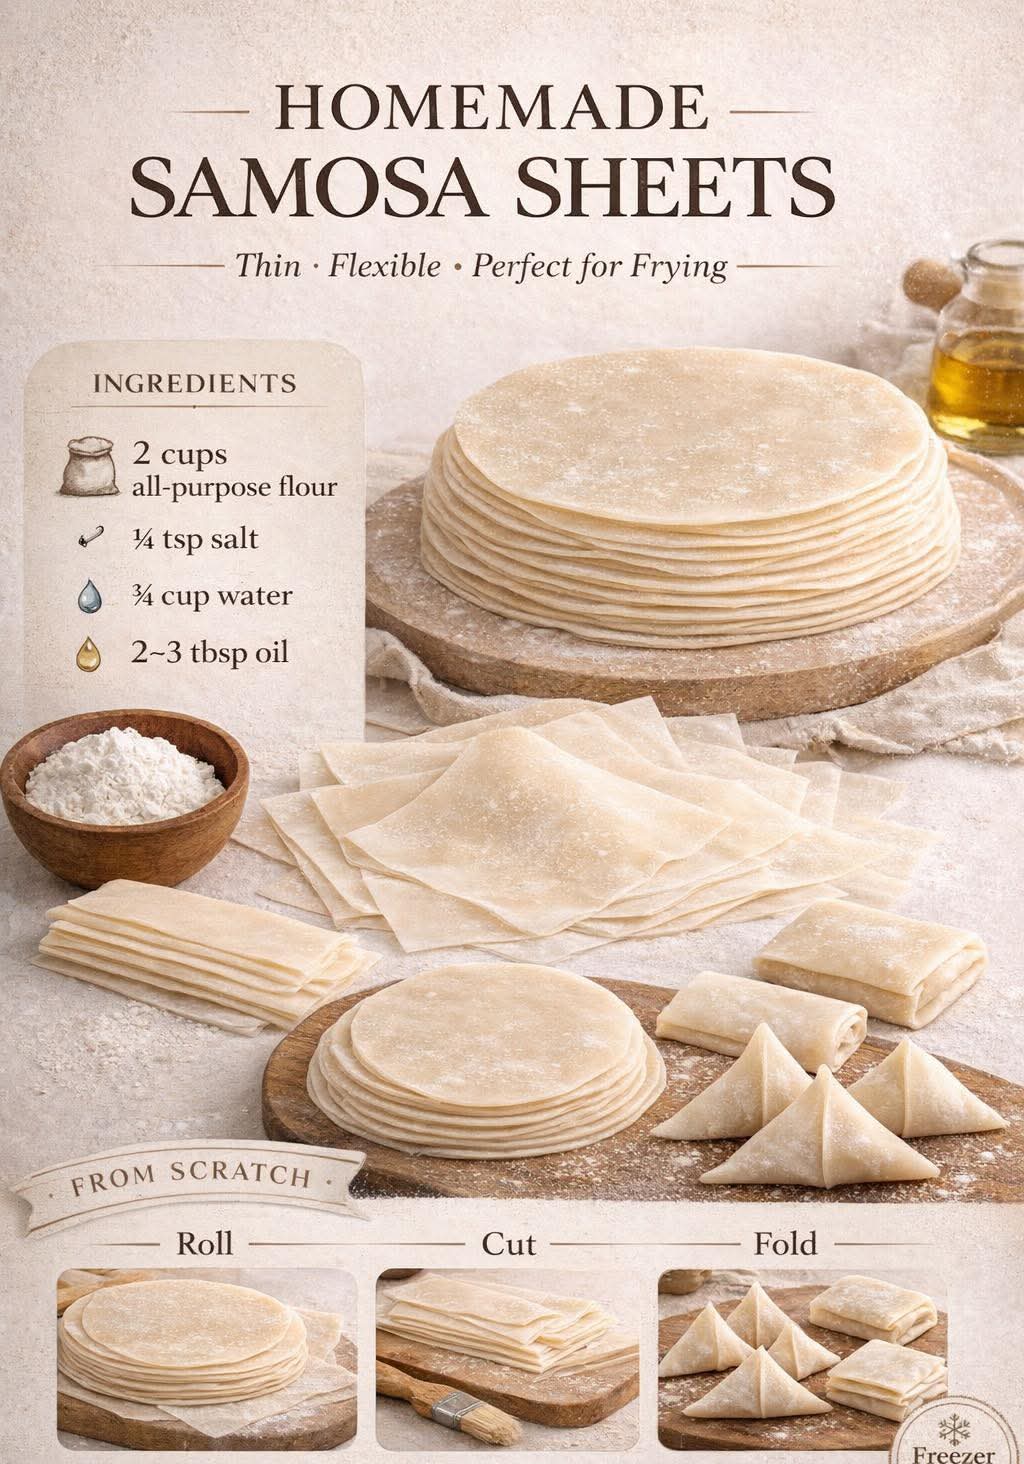
- 2 cups all-purpose flour
- ¼ teaspoon salt
- ¾ cup water (adjust as needed)
- 2–3 tablespoons oil (plus extra for brushing)
🥣 Instructions
Step 1: Make the Dough
- In a large bowl, mix the flour and salt.
- Add oil and rub it into the flour until it resembles breadcrumbs.
- Gradually add water and knead into a smooth, firm dough.
- Cover with a damp cloth and let it rest for 20–30 minutes.
Step 2: Divide & Roll
- Divide the dough into small equal balls (about golf ball size).
- Roll each ball into a thin oval or circle (like a tortilla).
- For ultra-thin sheets, stack two rolled discs with a light brush of oil and dust of flour between them, then roll again.
Step 3: Cook the Sheets
- Heat a flat pan or tawa over medium heat.
- Lightly cook each sheet for a few seconds on each side—do NOT fully brown.
- If you stacked sheets, gently separate them while warm.
Step 4: Store or Use
- Keep sheets covered with a cloth to prevent drying.
- Use immediately or refrigerate/freeze for later.
🔥 Methods & Pro Tips
✔ Dough Method
- Keep the dough slightly firm—soft dough makes sticky sheets.
- Resting is essential for elasticity.
✔ Rolling Method
- Roll as thin as possible for crispy samosas.
- Use minimal flour to avoid dryness.
✔ Cooking Method
- Half-cook only—overcooking makes folding difficult.
- Always keep sheets covered to retain moisture.
🕰️ History & Cultural Background
Samosas trace their roots back to the Middle East and Central Asia before becoming hugely popular in the Indian subcontinent. Historically known as “sambosa,” traders and travelers carried this snack across regions. Over time, it evolved into the crispy triangular pastry we know today. Homemade samosa sheets reflect traditional cooking practices where everything was made from scratch—bringing authenticity and pride into every bite.
🧩 Formation (How to Shape Samosas)
- Cut a sheet into two halves.
- Fold one half into a cone shape.
- Fill with your favorite stuffing (potato, meat, cheese, etc.).
- Seal edges with a flour-water paste.
- Fry or bake until golden and crisp.
❤️ Why People Love Homemade Samosa Sheets
- Fresher and healthier than store-bought
- Perfectly thin and crispy
- Customizable size and thickness
- Budget-friendly
- Gives a true homemade taste
💡 Extra Lover’s Tips
- Add a pinch of ajwain (carom seeds) for extra flavor.
- Brush lightly with oil before storing to prevent sticking.
- Freeze in layers with parchment paper for easy use.
- Pair with chutneys like mint, tamarind, or spicy chili sauce.
🏁 Conclusion
Homemade samosa sheets are a game-changer in your kitchen. Once you try them, you’ll never want to go back to packaged versions. They’re simple, versatile, and bring a touch of tradition to your cooking. Whether you’re making snacks for family or impressing guests, these sheets are your secret weapon for perfectly crispy samosas every time.
✨ Ready to fill and fry? Your homemade samosas are about to steal the show!