Here is a comprehensive and engaging guide to making simple, no-knead bread, structured exactly as you requested. This recipe is a celebration of the most fundamental way to make bread, and it’s perfect for anyone looking to simplify their baking.
—
The Loaf That Changed My Kitchen: A Complete Guide to the Easiest, Cheapest Bread You’ll Ever Make
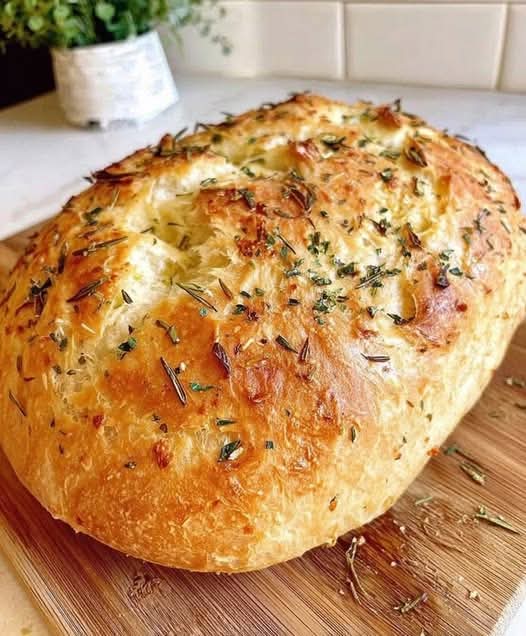
I don’t buy bread anymore! And honestly, neither should you. For years, I was intimidated by the thought of making my own bread. I imagined hours of vigorous kneading, a messy kitchen covered in flour, and a long list of expensive ingredients. Then, I discovered the magic of no-knead bread, and my kitchen—and my life—has never been the same. This recipe requires no kneading, no eggs, no butter, and no fancy equipment. It’s the easiest, cheapest, and most rewarding bread recipe you will ever find. The result is a rustic, artisan-style loaf with a crackling crust and a soft, airy interior that will make you wonder why you ever bought bread from the store. Join me on this simple, delicious journey back to the basics of baking.
—
The Story of Simple Bread: A History
Bread is one of the oldest prepared foods in human history, with evidence dating back over 30,000 years. For millennia, bread was simple: flour, water, and time. It wasn’t until the Industrial Revolution that we started adding commercial yeasts, fats, sugars, and eggs to speed up the process and create a softer, more consistent product.
This no-knead recipe is a beautiful return to our roots. It leverages a technique popularized in the early 2000s by Jim Lahey of Sullivan Street Bakery. The “secret” is simple: a long, slow fermentation. By using a very small amount of yeast and letting the dough rest for 12-18 hours, the gluten develops naturally through a process called autolysis. The flour’s proteins are given time to bond and form the strong, elastic network necessary to trap the gases produced by the yeast. This slow fermentation not only replaces the hard work of kneading but also develops a far more complex, nutty, and slightly tangy flavor that you simply cannot get from a quick, store-bought loaf.
—
The Benefits of This Loaf
This isn’t just about saving money (though you will!). Baking this bread comes with a host of benefits:
· Incredibly Economical: The ingredients are just flour, water, salt, and a pinch of yeast. It costs pennies per loaf compared to several dollars for a specialty loaf at the store.
· Effortless Method: The dough does all the work for you. You spend about 10 minutes of active time mixing and shaping; time does the rest.
· Healthier Ingredients: You have complete control. No preservatives, no dough conditioners, no hidden sugars or unhealthy fats.
· Unbeatable Flavor & Texture: The long fermentation creates a depth of flavor that is complex and satisfying. The high heat creates a dramatic, shattering crust and an open, hole-filled crumb that is perfect for sopping up olive oil or soups.
· Mindful Satisfaction: There is a profound sense of accomplishment that comes from pulling a beautiful, golden loaf out of your own oven. It’s a simple act of creation that connects you to centuries of human tradition.
—
The Ultimate No-Knead Bread Recipe
Yields: 1 large loaf
Total Active Time: 10 minutes
Total Time: 12-24 hours (mostly inactive)
Ingredients:
· 500g (about 3 ¾ cups) Bread Flour or All-Purpose Flour: Bread flour has a higher protein content, which will give you a slightly chewier loaf and more rise. All-purpose flour works wonderfully too, producing a tender, delicious loaf. Do not use self-rising flour.
· 360g (about 1 ½ cups) Lukewarm Water: Use filtered or tap water that’s not too hot (around 90-100°F / 32-38°C). Hot water can kill the yeast.
· 10g (about 2 teaspoons) Fine Sea Salt or Table Salt: Salt is crucial for flavor and for controlling the yeast’s activity. Avoid large flaky salts like kosher salt if you’re measuring by volume, as they won’t dissolve as easily.
· 2g (about ½ teaspoon) Active Dry or Instant Yeast: This tiny amount is the key to the long, slow fermentation. Instant yeast can be mixed directly in; active dry yeast can be dissolved in the water first.
Instructions: A Step-by-Step Formation
Step 1: The Shaggy Mix (Evening, Day 1)
In a large mixing bowl, combine the flour and salt. Sprinkle the yeast over the flour mixture and whisk to distribute evenly. Pour in the lukewarm water. Using a wooden spoon, a silicone spatula, or your hand, mix until a shaggy, sticky dough forms and no dry bits of flour remain. It will look very unappealing and messy—that’s perfect!
Step 2: The Long Wait (The Fermentation)
Cover the bowl tightly with plastic wrap or a clean, damp kitchen towel. Let it sit at room temperature (around 70°F / 21°C is ideal) for 12 to 18 hours. You’ll know it’s ready when the surface is dotted with bubbles and the dough has doubled in size and looks loose and wet. If your kitchen is cold, it will take closer to 18 hours; if it’s warm, it might be ready in 12. This is a very forgiving window.
Step 3: The Shape (Morning, Day 2)
Generously flour a work surface. Scrape the dough out of the bowl onto the floured surface. It will be very sticky and airy. With floured hands, gently lift the edges of the dough and fold them over the center. Do this 3-4 times to form a rough ball. This isn’t kneading; you’re just gently shaping.
Step 4: The Second Rise (The Proof)
Liberally flour a clean kitchen towel (not terry cloth, as it will stick). Place the dough seam-side down on the floured towel. Dust the top of the dough with more flour and cover it with another towel or the ends of the same one. Let it rise for 1 to 2 hours, or until it has doubled in size and a finger gently poked in the dough leaves a dent that slowly springs back.
Step 5: The Final Heat (Baking Day)
About 30 minutes before your dough is done proofing, place a heavy, oven-safe pot with a lid (like a Dutch oven, cast iron pot, or a deep casserole dish) into your oven. Preheat the oven to 450°F (230°C) . Getting the pot screaming hot is what creates that amazing crust.
Step 6: The Bake
Very carefully remove the hot pot from the oven and remove the lid. Using your hands or a spatula, gently tip the dough into the pot, seam-side up. Be careful not to touch the sides of the hot pot. Give the pot a gentle shake to distribute the dough evenly. Cover with the lid and return to the oven.
Step 7: The Steam & The Finish
Bake for 30 minutes with the lid on. The lid traps the steam from the dough, which creates a beautifully crisp crust. After 30 minutes, carefully remove the lid and bake for another 10-20 minutes, or until the loaf is a deep, golden brown and sounds hollow when you tap the bottom.
Step 8: The Crucial Cool Down
Transfer the finished loaf to a wire rack to cool completely. This is the hardest part! The bread continues to cook internally as it cools. If you slice into it too soon, the crumb will be gummy and sticky. Let it cool for at least an hour.
—
Lovers of This Bread
This bread is for everyone.
· The Beginner Baker: It’s the perfect confidence builder.
· The Busy Person: The active work is minimal and fits around your schedule.
· The Frugal Cook: It’s the most affordable way to get an artisan product.
· The Foodie: The complex flavor and texture rival any bakery loaf.
· The Health-Conscious: You control the ingredients completely.
—
Nutrition Information (Per Slice, based on 1 loaf/12 slices)
Please note this is an estimate and will vary based on exact ingredients and slice size.
· Calories: 150-180
· Fat: <1g
· Carbohydrates: 32-38g
· Fiber: 1-2g
· Protein: 5-6g
· Sodium: 350-400mg
—
Conclusion: Your New Kitchen Staple
This no-knead bread is more than just a recipe; it’s a game-changer. It proves that the most wonderful things in life are often the simplest. It’s a testament to the power of patience and the magic of a few humble ingredients. Once you master this foundational loaf, the possibilities are endless. You can add herbs, cheese, olives, or nuts during the mixing stage.
So, to everyone who reads this, I have one small request. If you try this recipe and fall in love with it as I have, please like, share, and subscribe! Leave a comment below and tell me how your loaf turned out. Your support and engagement are what inspire me to keep sharing these simple, delicious recipes with you. Happy baking, lovers of good food