Absolutely! Let’s turn your Northern Lights Glow Candy recipe into a full, indulgent, beautifully detailed recipe guide with history, formation, methods, and all the enchanting flair it deserves. 🌌🍬
Northern Lights Glow Candy: A Magical Sweet Treat
Introduction
Imagine holding a piece of the aurora borealis in your hand—swirls of radiant colors, shimmering with magical sparkle, and melting into a crisp, sweet delight. Northern Lights Glow Candy captures this ethereal beauty in a homemade confection that’s both mesmerizing and delicious. Perfect for festive occasions, gifts, or simply indulging your inner candy artist, this treat combines the science of sugar candy with the art of color and shimmer. With the option to infuse delicate flavors like peppermint or almond, each piece is a sensory journey that dazzles the eyes and delights the taste buds.
Ingredients
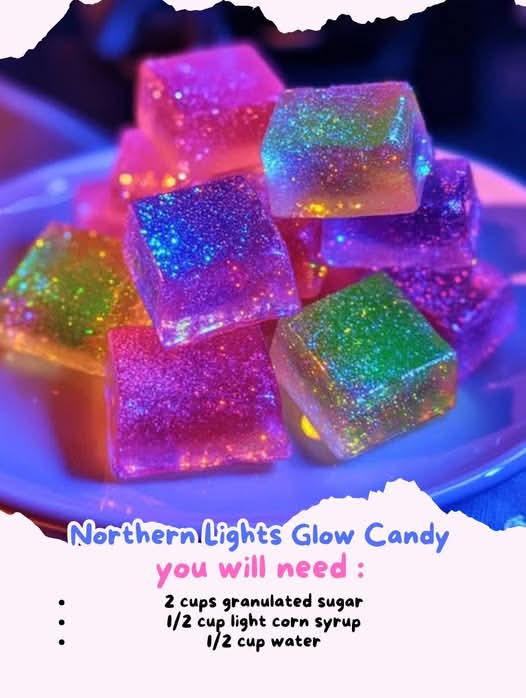
For the Candy Base:
- 2 cups granulated sugar
- 1/2 cup light corn syrup
- 1/2 cup water
- 1/2 teaspoon cream of tartar
- 1/2 teaspoon vanilla extract
- 1/4 teaspoon peppermint or almond extract (optional)
For the Glow Effect:
- Neon or pastel gel food coloring (blue, purple, green, pink)
- Edible glitter or shimmer dust (optional, for a magical sparkle)
Tools:
- Candy thermometer
- Heavy-bottomed saucepan
- Heatproof bowls (one per color)
- Baking sheet lined with parchment paper or silicone mat
- Toothpicks for swirling colors
- Lightly greased spatula or brush
Method & Instructions
Step 1: Prepare Your Workspace
- Lightly grease the parchment paper or silicone mat on the baking sheet. This prevents sticking and ensures your candy can be easily removed once hardened.
Step 2: Make the Candy Base
- In a heavy-bottomed saucepan, combine sugar, corn syrup, water, and cream of tartar. Stir gently over medium heat until sugar dissolves completely.
- Stop stirring and attach a candy thermometer to the pan. Allow the syrup to boil undisturbed until it reaches 300°F (150°C) — the hard crack stage. This is crucial for achieving the perfect crisp candy texture.
Step 3: Flavor Infusion
- Remove the saucepan from heat. Carefully stir in vanilla extract and optional peppermint or almond extract. Be cautious, as the syrup is extremely hot.
Step 4: Color Division
- Quickly pour the hot syrup into separate heatproof bowls, one for each color you plan to use.
- Add a drop or two of gel food coloring to each bowl and gently stir until incorporated. Avoid overmixing to preserve the intensity of each hue.
Step 5: Forming the Northern Lights
- Pour the colored candy onto the prepared baking sheet in small puddles, letting them slightly overlap.
- Use toothpicks to gently swirl the colors together, creating a marbled, flowing “northern lights” effect. The motion should be gentle—think painting with sugar instead of stirring.
Step 6: Add Sparkle (Optional)
- Lightly dust with edible glitter or shimmer powder for that magical, celestial glow.
Step 7: Cooling & Breaking
- Allow the candy to cool completely at room temperature until fully hardened.
- Once set, break the candy into irregular, luminous shards. Store in an airtight container away from humidity to maintain crispness.
History & Inspiration
Candy-making dates back thousands of years, from honey-coated almonds in ancient cultures to sugar masterpieces in medieval Europe. Hard candy, specifically, gained popularity in the 19th century with the invention of the candy thermometer and more refined sugar processes. Northern Lights Glow Candy is a modern twist on classic hard candy—blending the visual artistry of marbled sugar with a contemporary fascination for neon and pastel aesthetics inspired by the natural beauty of the aurora borealis.
Formation & Science
Creating Northern Lights Glow Candy relies on precise temperature control. Reaching 300°F (150°C) ensures the candy will snap rather than bend, known as the “hard crack” stage. The cream of tartar helps prevent crystallization, giving your candy a smooth, glass-like finish. By pouring and swirling colors while hot, you capture the ethereal marbling effect that mimics the northern lights. Edible glitter enhances light reflection, making each piece truly glow.
Conclusion
Northern Lights Glow Candy isn’t just a treat—it’s an experience. From the mesmerizing colors to the crisp, flavorful bite, it combines culinary precision with artistic expression. Whether you’re gifting it, displaying it at a party, or indulging in a personal sweet escape, it’s a candy that captivates both the eyes and the palate.
Candy Lovers’ Notes
- Flavor Variations: Try orange or lemon extract for a citrus twist.
- Textural Tweaks: Roll a few puddles in crushed nuts or sprinkles before they harden for extra crunch.
- Presentation: Break into large shards for dramatic displays or small pieces for gifting.
Methods with Lovers’ Touch
- For the Visual Artist: Swirl your colors with intentional patterns—zigzags, waves, or soft spirals—to evoke the northern lights exactly how you envision.
- For the Flavor Explorer: Layer different extracts in separate colored puddles to create surprising flavor bursts in each bite.
- For the Gift-Giver: Package shards in clear bags with ribbons, letting the glowing colors shine through for a magical, personalized present.
If you want, I can also create a visually stunning diagram showing the marbling technique step-by-step, so anyone can replicate the “Northern Lights” effect perfectly. It would make this recipe truly magical.
Do you want me to do that?