Absolutely! Let’s craft a full, detailed, mouthwatering apple pie recipe for you, with everything you asked for—introduction, history, detailed instructions, methods, and even the “lovers” touch (a nod to people who truly love baking and sharing it!). Here we go:
Classic Fresh Apple Pie: A Slice of Homemade Happiness
Introduction
There’s something magical about the aroma of fresh apples mingling with buttery pastry baking in the oven. This classic apple pie recipe combines a tender, flaky dough with juicy, spiced apples for a dessert that’s perfect for family gatherings, cozy evenings, or simply indulging your sweet tooth. With a crisp crust, a soft, flavorful apple filling, and a hint of vanilla, this pie captures the very essence of home baking. Every bite feels like a hug from the inside.
History of Apple Pie
Apple pie has a rich history dating back to medieval Europe. The earliest recorded recipes came from England in the 14th century, where they included apples, spices, and a simple crust. Over time, apple pie traveled to America with settlers, becoming a symbol of comfort, abundance, and tradition. Today, apple pie is not just a dessert—it’s an emblem of sharing, love, and culinary craftsmanship.
Ingredients
For the Dough:
- 300 g (2 cups) all-purpose flour
- 30 g (2 tablespoons) sugar
- 1 teaspoon baking powder
- 8 g (1 teaspoon) vanilla sugar
- 150 g (2/3 cup) cold unsalted butter, cubed
- 1 large egg
- 2–3 tablespoons cold water (as needed)
For the Apple Filling:
- 4–5 medium fresh apples (Granny Smith, Honeycrisp, or your favorite), peeled, cored, and sliced
- 50 g (1/4 cup) sugar
- 1 teaspoon cinnamon
- 1/4 teaspoon nutmeg (optional)
- 1 tablespoon lemon juice
- 1 tablespoon all-purpose flour or cornstarch (to thicken)
Optional Topping:
- 1 egg yolk for brushing
- 1 tablespoon sugar for sprinkling
Formation / Methods
Step 1: Prepare the Dough
- In a large bowl, combine flour, sugar, baking powder, and vanilla sugar.
- Add cold cubed butter and rub it into the dry ingredients using your fingers or a pastry cutter until the mixture resembles coarse crumbs.
- Add the egg and gradually mix in cold water, one tablespoon at a time, until the dough comes together.
- Divide the dough into two portions, flatten each into a disk, wrap in plastic, and chill in the fridge for 30 minutes.
Step 2: Prepare the Apple Filling
- In a bowl, combine sliced apples, sugar, cinnamon, nutmeg, lemon juice, and flour. Mix well to coat evenly.
- Let it sit for 10 minutes so the flavors meld and the filling slightly thickens.
Step 3: Assemble the Pie
- Preheat oven to 180°C (350°F).
- Roll out one dough disk on a floured surface to fit your pie dish. Transfer it carefully to the dish.
- Pour the apple filling over the dough and spread evenly.
- Roll out the second dough disk and place it over the apples. Trim excess edges and crimp the edges to seal.
- Cut a few small slits on top to allow steam to escape.
- Optional: Brush the top with egg yolk and sprinkle with sugar for a golden, shiny finish.
Step 4: Bake the Pie
- Bake in the preheated oven for 40–50 minutes or until the crust is golden and the filling is bubbling.
- Let the pie cool for at least 20 minutes before slicing to allow the filling to set.
Serving & Lovers’ Touch
Serve warm, plain, or with a scoop of vanilla ice cream for extra indulgence. Apple pie is more than just dessert—it’s a shared experience. Lovers of baking know that making this pie is a labor of love, and every slice tells a story of care, patience, and joy.
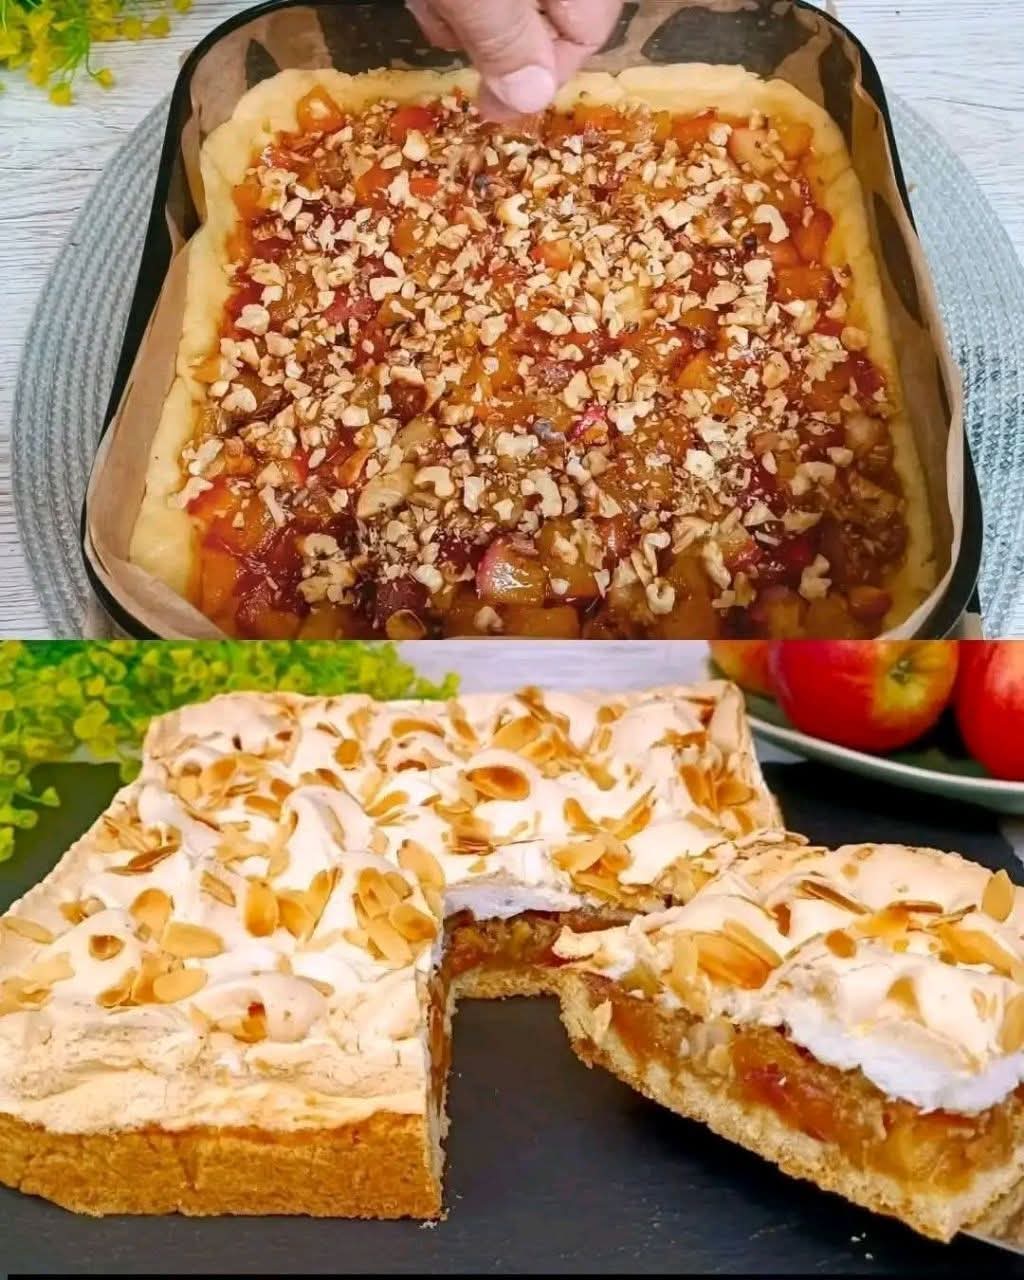
For true pie lovers: try adding a layer of caramel drizzle or a few chopped nuts for added texture. Sharing it with friends or family makes it even better!
Conclusion
This classic apple pie recipe is simple yet extraordinary. The buttery, flaky crust perfectly complements the sweet, spiced apples inside. It’s a dessert that carries history, tradition, and the warmth of homemade comfort. Every slice is a reminder of the love and effort baked into it—a true treat for both your taste buds and your heart.
If you like, I can also make a step-by-step illustrated version showing exactly how to roll, fill, and crimp the pie so it looks bakery-perfect every time.
Do you want me to do that?