Absolutely! Here’s a full, rich recipe for your Crunchie Tart with all the details you asked for: introduction, ingredients, instructions, methods, history, formation, conclusion, and a little nod to the lovers of this treat. 😍
🍫 Crunchie Tart – The Ultimate Honeycomb Delight
Introduction
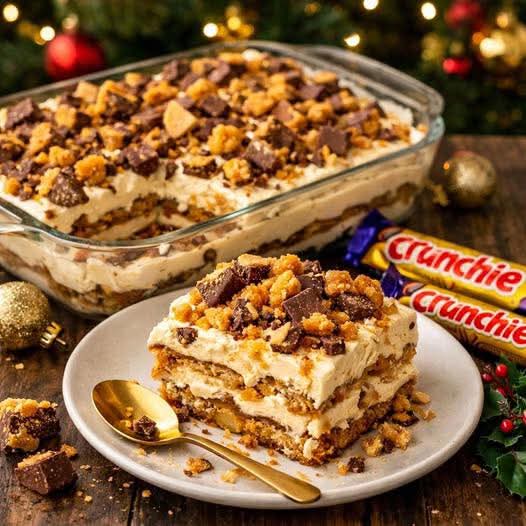
The Crunchie Tart is a decadent dessert that combines creamy caramel, airy honeycomb chocolate, and a buttery biscuit base into one indulgent treat. Perfect for chocolate lovers, this tart is not only visually stunning but also a delight to taste—soft, crunchy, creamy, and sweet all in one bite. Whether it’s for a birthday, a cozy family dessert, or just a special treat to satisfy your sweet tooth, this tart is sure to impress.
This dessert is inspired by the classic Crunchie chocolate bar, beloved for its crisp honeycomb center coated in milk chocolate. By turning it into a tart, we get a luscious, layered dessert that feels both nostalgic and gourmet.
Ingredients
Base
- 1 packet Tennis biscuits (or Marie biscuits)
- 50g melted butter (optional, to bind the base better)
Filling
- 2 × 360g Crunchie chocolate slabs, chopped
- 1 tin caramel treat (dulce de leche works too)
- 2 cups fresh cream, cold
Optional Topping
- Extra Crunchie bits, crushed
- Chocolate shavings or drizzle
History & Formation
The idea of combining chocolate and honeycomb isn’t new—honeycomb toffee has been enjoyed for centuries in Europe, often called “cinder toffee” in the UK. The Crunchie bar, created in the UK in 1929 by J.S. Fry & Sons, made honeycomb chocolate widely popular. Transforming it into a tart is a modern twist, bringing together the crumbly biscuit base of French tarts and the airy crunch of classic candy.
Formation involves three main layers:
- The Base – a crunchy, buttery biscuit layer for structure.
- The Cream Filling – whipped cream folded into melted chocolate for softness and lightness.
- The Caramel Layer & Topping – gooey sweetness topped with crunchy bits for texture.
Instructions & Methods
Step 1: Prepare the Base
- Crush the Tennis biscuits into fine crumbs (use a food processor or a ziplock bag and rolling pin).
- Mix with melted butter if you like a firmer base.
- Press evenly into a tart pan or a springform pan to form the base. Chill in the fridge for 10–15 minutes to set.
Step 2: Make the Crunchie Filling
- Chop the Crunchie bars into small pieces.
- Heat 1 cup of cream in a saucepan until just boiling.
- Pour hot cream over half the chopped Crunchie in a bowl. Let sit 2–3 minutes.
- Stir gently to melt chocolate slightly while keeping the crunchy bits.
- Whip the remaining cold cream to soft peaks and fold into the Crunchie mixture for a light, airy filling.
Step 3: Assemble Caramel Layer
- Spread the tin of caramel treat evenly over the biscuit base.
- Pour the Crunchie cream mixture on top. Smooth with a spatula.
- Optional: sprinkle extra Crunchie bits or chocolate shavings on top for decoration.
Step 4: Chill & Set
- Refrigerate the tart for at least 3–4 hours, ideally overnight, to allow layers to set and flavors to meld.
Step 5: Serve
- Slice carefully with a hot knife for clean cuts. Serve chilled.
- Optional: drizzle with chocolate or caramel sauce for extra indulgence.
Conclusion
The Crunchie Tart is a showstopper dessert that balances textures—crunchy, creamy, and gooey—while satisfying any sweet tooth. Its layers make each bite a journey: buttery biscuit, rich caramel, fluffy cream, and chocolate honeycomb all in one.
Whether for a celebration or a cozy evening treat, this tart will bring smiles, nostalgia, and a little chocolate magic to any table.
For the Lovers
- Chocolate Lovers: The honeycomb chocolate layer is pure bliss.
- Caramel Lovers: The dulce de leche adds that sticky, sweet hug in every bite.
- Texture Lovers: Crunch meets cream meets gooey caramel—a trifecta!
If you want, I can also make a super fancy, step-by-step “visual methods” version with tips on keeping the Crunchie crunchy in the cream and ways to decorate it like a professional patisserie. It’ll be Instagram-worthy!
Do you want me to do that?