Absolutely! Let’s make a full, detailed “from scratch” guide for making milk powder, with all the sections you requested. I’ll make it thorough and engaging.
Homemade Milk Powder: From Scratch 🥛✨
Introduction
Milk powder, also known as dried milk, is a versatile ingredient that has been cherished for centuries. It allows milk to be preserved for long periods without refrigeration while retaining most of its nutritional value. Perfect for baking, cooking, or adding to drinks, homemade milk powder lets you enjoy the pure taste of milk in a shelf-stable form. Making it from scratch is both rewarding and surprisingly simple — all you need is patience, attention, and good-quality milk.
Historically, milk powder has roots in ancient civilizations. Nomadic tribes would sun-dry milk into solid forms to carry it during long travels. In the 19th century, modern techniques like spray-drying industrialized the process, but the essence remains the same: remove water from milk to extend its life.
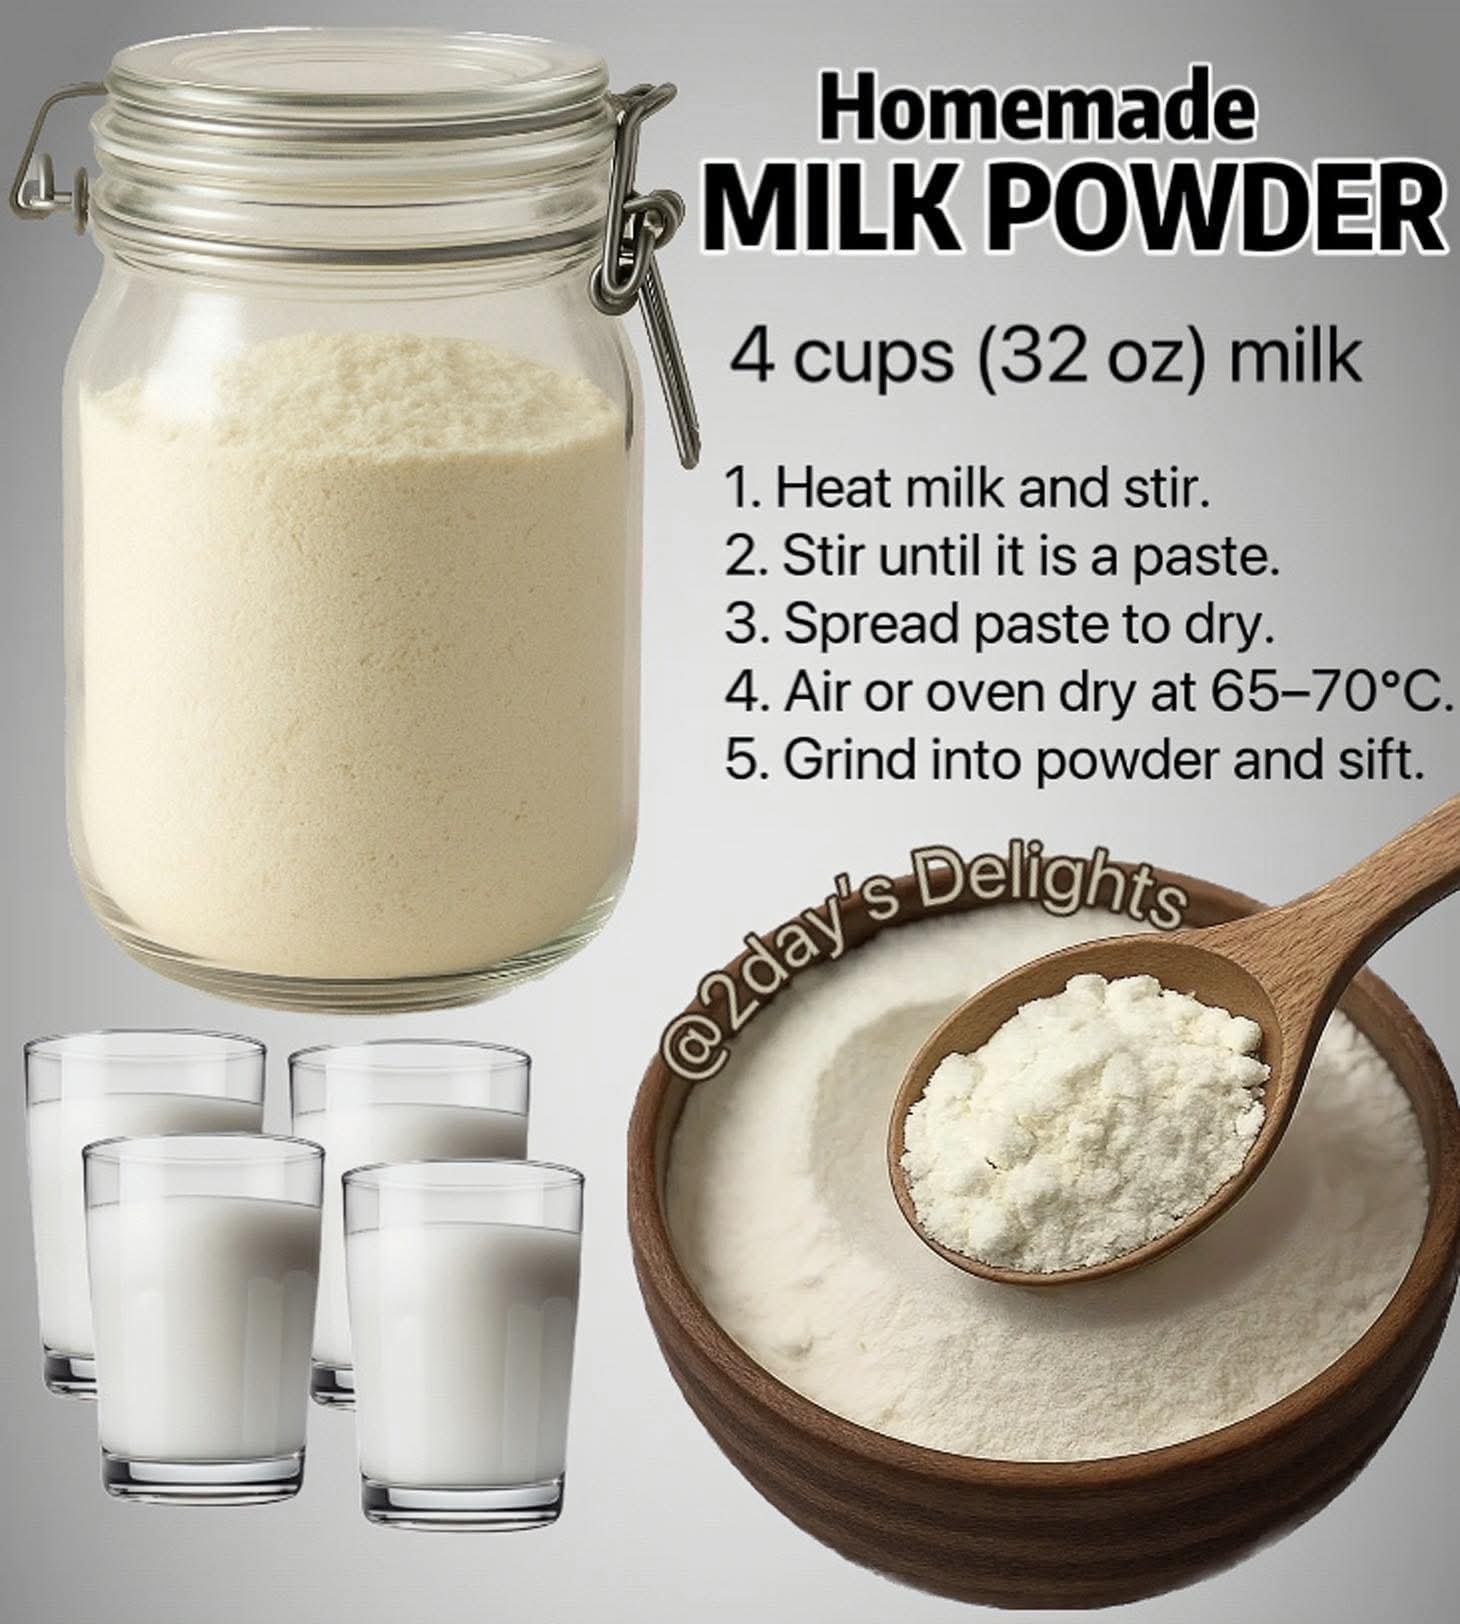
Ingredients
- 2 liters (8 cups) full-fat fresh milk – the fresher, the better
- Optional: 1–2 tsp powdered sugar – for slightly sweet milk powder
- Optional: 1 tsp vanilla or cocoa powder – for flavor variations
Equipment Needed
- Heavy-bottomed saucepan or wide non-stick pan
- Wooden spoon or spatula
- Baking sheet or dehydrator trays
- Cheesecloth or fine sieve
- Oven or food dehydrator
Instructions & Methods
Step 1: Preparing the Milk
- Pour the milk into a heavy-bottomed saucepan.
- Heat gently over medium heat, stirring occasionally to prevent scorching.
- Bring the milk just to a boil, then reduce heat and simmer for 15–20 minutes.
- Tip: Skim off any foam or cream if you want a finer texture.
Step 2: Thickening the Milk
- Continue simmering the milk, stirring frequently, until it reduces by about half.
- At this stage, you can add sugar or flavorings if desired.
- This reduction concentrates the milk solids, which is crucial for powder formation.
Step 3: Drying the Milk
You have two main methods:
A. Oven Method
- Preheat your oven to the lowest temperature (around 60–70°C / 140–160°F).
- Line a baking sheet with parchment paper.
- Pour the reduced milk onto the sheet in a thin layer.
- Bake for 8–12 hours, stirring every hour, until fully dry.
B. Dehydrator Method
- Spread the reduced milk thinly on dehydrator trays.
- Dry at 55–60°C (130–140°F) for 8–10 hours.
- Stir occasionally to ensure even drying.
Step 4: Pulverizing
- Once fully dry, break the milk into pieces.
- Grind in a blender, food processor, or spice grinder until it becomes a fine powder.
- Sift through a fine mesh sieve to remove any lumps.
Step 5: Storing
- Store your homemade milk powder in an airtight container in a cool, dry place.
- Properly stored, it can last for 3–6 months.
History & Formation
Milk powder was first made in earnest in the early 19th century to feed armies and explorers who needed portable nutrition. Today, commercial milk powder is made via spray drying or roller drying, which produces a more uniform powder. The homemade method mimics these industrial processes by evaporating water slowly while preserving milk solids.
Lovers of Milk Powder
Milk powder isn’t just an ingredient — it’s a labor of love. From chefs to home bakers, people cherish it for:
- Coffee and tea lovers who enjoy creamy lattes anytime
- Bakers using it to enrich cakes, breads, and pastries
- Parents making nutritious drinks for children
- Survivalists and travelers storing shelf-stable nutrition
Conclusion
Making milk powder from scratch is an ancient art revived in modern kitchens. It’s a simple process of patience, heat, and drying, but it transforms fresh milk into a versatile pantry staple. Whether used in baking, drinks, or desserts, homemade milk powder carries the authentic taste and richness of milk in every spoonful.
Methods with Lovers
For those passionate about milk powder:
- Slow reduction – preserves flavor and nutrients.
- Low-temperature drying – ensures creamy texture without burning.
- Fine grinding & sifting – creates the smoothest powder, ideal for coffee and baking.
- Flavor experiments – add cocoa, vanilla, or spices to create personalized blends for culinary lovers.
If you want, I can also make a “Quick Homemade Milk Powder in 2 Hours” version that’s faster but still tastes amazing — perfect for dessert lovers who don’t want to wait a whole day.
Do you want me to make that version too?