Absolutely! Let’s turn your quick no-knead zip-bag bread into a full, rich, storybook-style recipe—complete with introduction, history, methods, formation, conclusion, and of course, “lovers” (because every great recipe deserves devoted fans!). Here’s the expanded version:
Nana’s Heart & Bag Homemade Bread 🍞💛
Introduction
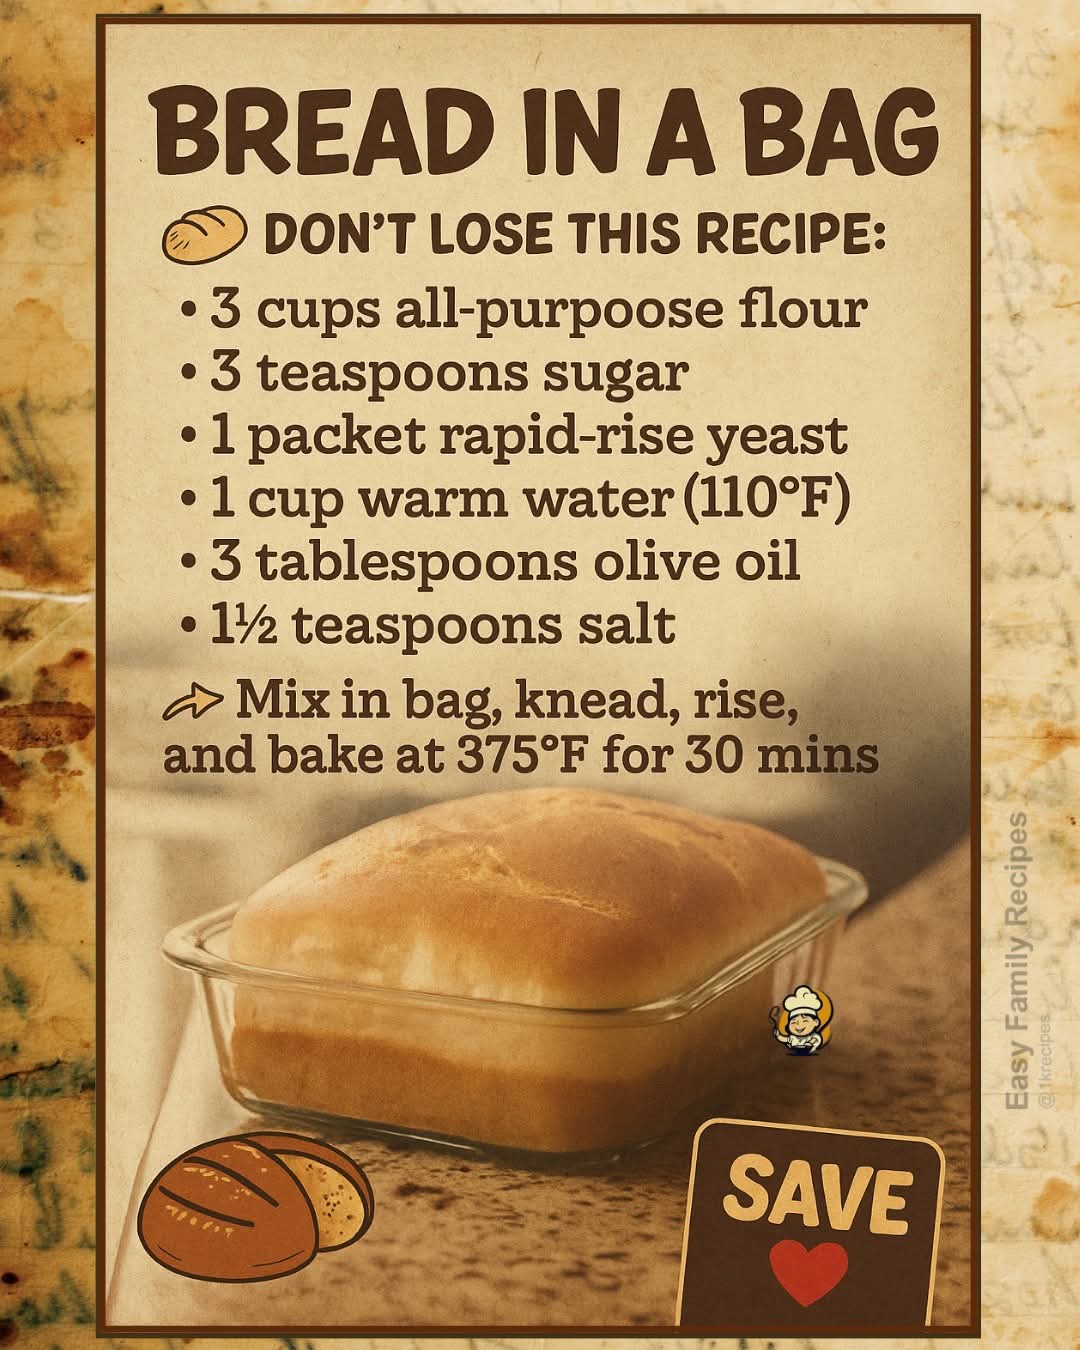
Some recipes are timeless, and this one comes straight from Nana’s kitchen—a place filled with love, laughter, and the irresistible aroma of fresh bread. Nana always said, “The best bread comes from the heart… and a bag!” Forget fancy mixers and endless kneading. With just a few simple ingredients, a zip-top bag, and a little patience, you can create a loaf that’s soft, golden, and far better than any store-bought version. Perfect for breakfast toast, sandwiches, or just stealing slices straight from the pan.
Ingredients
- 1 tbsp sugar
- 2 tsp active dry yeast
- 1 cup warm water (110°F / 43°C)
- 2 tbsp vegetable oil (or melted butter)
- 1 tsp salt
- 3 cups all-purpose flour (divided: 1 cup first, 2 cups later)
Instructions & Methods
Step 1: Activate the yeast
- In a large zip-top bag, combine sugar, yeast, and warm water.
- Seal the bag loosely and squish to mix. Let it rest for 5 minutes until foamy—this signals your yeast is awake and ready to work its magic.
Step 2: Start the dough
- Add oil, salt, and the first cup of flour to the bag. Seal it and squish, mix, and press with your hands through the bag. No floury mess, no bowls—just fun!
Step 3: Knead in the bag
- Gradually add the remaining 2 cups flour.
- Seal the bag and knead by pressing and folding the dough against the bag walls for 5–7 minutes, or until the dough is smooth, elastic, and slightly sticky.
Step 4: Shape & rise
- Remove dough from the bag and shape into a loaf.
- Grease a loaf pan and place the shaped dough inside.
- Cover lightly and let it rise for 30 minutes, until puffy.
Step 5: Bake
- Preheat oven to 375°F (190°C).
- Bake the bread for 25–30 minutes until golden brown and fragrant.
- Remove from oven, let cool slightly, then slice and enjoy warm.
History & Formation
Bread has been called the “staff of life” for centuries. This simple, no-fuss version mirrors old-fashioned hand-kneaded methods, simplified for modern kitchens. Nana’s twist—mixing and kneading inside a bag—is inspired by her playful practicality: she believed baking should be joyful, hands-on, and, above all, mess-free. The formation of the dough inside a bag not only keeps things tidy but also makes kneading feel almost like a game, a sensory connection to the food we love.
Conclusion
The result? A loaf that’s tender on the inside, lightly crisped on the outside, and full of that “homemade soul” flavor only a Nana could teach you. From toast to sandwiches, this bread is versatile, comforting, and utterly addictive.
For the Bread Lovers ❤️
- Spread it with butter and a sprinkle of cinnamon sugar for a morning treat.
- Turn it into hearty sandwiches with fresh veggies and deli meat.
- Toast it lightly, drizzle with olive oil, and sprinkle with sea salt for a rustic snack.
- Freeze slices to enjoy fresh bread anytime—Nana always said, “A loaf saved is a loaf loved twice.”
Extra Method Tips from Nana
- Warm water should be slightly above body temperature; too hot and it kills the yeast.
- Knead gently but thoroughly; this develops gluten without flour flying everywhere.
- Letting it rise fully makes all the difference—don’t rush the puff!
- Experiment with adding herbs, cheese, or seeds directly into the dough for extra flair.
If you want, I can also make a visual “step-by-step guide” version of this bread—like a mini illustrated recipe that shows the bag-kneading method, shaping, and golden baked loaf. It’s perfect for beginners and fun for social media sharing.
Do you want me to make that?