Of course! Here is the “Best Banana Pudding Ever” recipe, expanded into a complete culinary guide, just as you requested—so you never have to lose it.
A Love Letter to Banana Pudding: An Introduction
Banana pudding is more than a dessert; it’s a hug in a bowl. A cornerstone of Southern U.S. cuisine and a staple at potlucks and family gatherings, its magic lies in the sublime contrast of creamy vanilla custard, soft vanilla wafers, and the fresh, bright note of ripe bananas. This particular recipe, often called “Not Yo’ Mama’s Banana Pudding,” bypasses the traditional stove-top custard for a foolproof, no-bake method that is astonishingly rich, fast, and guaranteed to elicit groans of pleasure. It’s the recipe you’ll be asked to bring everywhere.
—
The Historical Journey: From Humble Roots to Icon
Banana pudding’s history is intertwined with the availability of bananas in North America in the late 19th century, along with the invention of vanilla wafers (c. 1901) and instant pudding (c. 1930s). Early recipes were layered and baked, like a trifle. This no-bake version gained legendary status in the late 20th century, popularized for its decadent simplicity and revolutionary use of sweetened condensed milk and cream cheese. It represents a beautiful evolution of tradition—honoring the classic flavors while embracing modern convenience.
—
The Grand Formation: Ingredients & Equipment
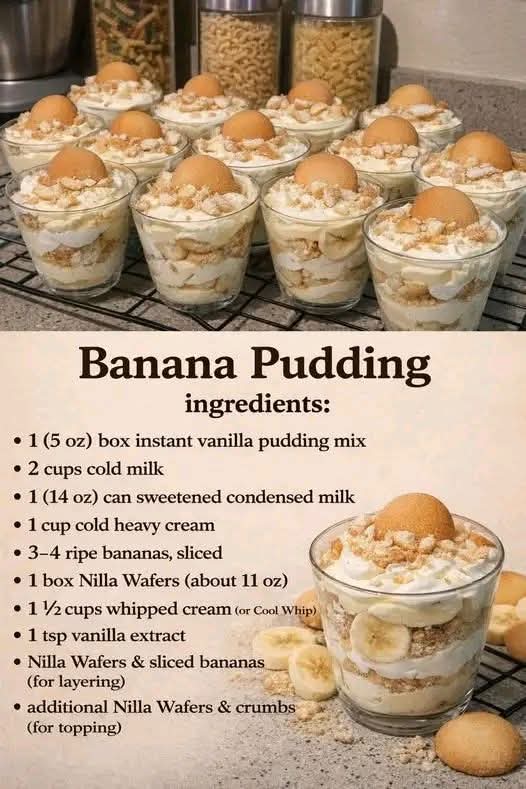
Ingredients:
· 2 cups cold whole milk
· 1 (5 oz) box instant vanilla pudding mix
· 1 (14 oz) can sweetened condensed milk
· 1 (8 oz) block of cream cheese, softened to room temperature
· 1 (12 oz) container of frozen whipped topping (like Cool Whip), thawed, divided
· 1 (11 oz) box of vanilla wafers (Nilla Wafers are classic)
· 4-5 large, firm-ripe bananas, sliced
· Optional: A pinch of salt, 1 tsp vanilla extract
Equipment:
· Large mixing bowl (stand or hand mixer ideal)
· Medium mixing bowl
· Rubber spatula
· 9×13 inch baking dish or a large trifle bowl for a stunning presentation
—
The Sacred Methods: Step-by-Step Instructions
1. Create the Pudding Base:
In a medium bowl, whisk together the 2 cups cold milk and the instant vanilla pudding mix for about 2 minutes until it just begins to thicken. Immediately whisk in the entire can of sweetened condensed milk until fully incorporated and smooth. Set aside.
2. Build the Creamy Foundation:
In your large mixing bowl, beat the softened cream cheese until it is completely smooth and fluffy, about 2 minutes. Gradually add the pudding mixture to the cream cheese, beating on low speed until the mixture is homogenous and has no lumps.
3. Fold in the Fluff:
Using your rubber spatula, gently fold in about 2/3 of the whipped topping (roughly 8 oz) into the pudding mixture until no white streaks remain. This is your luxurious custard.
4. Assemble the Masterpiece:
In your 9×13 dish or trifle bowl, begin your layers.
· Layer 1: Cover the bottom with a single layer of vanilla wafers.
· Layer 2: Add a layer of sliced bananas over the wafers.
· Layer 3: Spread one-third of the pudding mixture evenly over the bananas.
· Repeat the layers two more times, ending with a final layer of pudding. You should have 3 full sets of layers.
5. The Grand Finale:
Spread the remaining whipped topping over the entire top. You may crumble a few additional vanilla wafers and sprinkle them over the top for garnish.
6. The Crucial Rest:
Cover tightly with plastic wrap and refrigerate for at least 4 hours, preferably overnight. This is non-negotiable. It allows the wafers to soften into cake-like layers and the flavors to marry into pure bliss.
—
Nutrition & Benefits: A Balanced Perspective
Let’s be honest: this is a celebration dessert. Its benefits are for the soul. However, it does offer some nutritional notes:
· Bananas: Provide potassium, vitamin B6, vitamin C, and dietary fiber.
· Milk & Dairy: Offer calcium, protein, and vitamin D.
· Moderation is Key: This rich dessert is high in sugars, fats, and calories. The true benefit is the joy and community it fosters when shared. Enjoy it as an occasional treat within a balanced diet.
—
For the True Lovers: Pro-Tips & Variations
· The Lover’s Upgrade: Use homemade whipped cream instead of frozen topping. Whip 1.5 cups of heavy cream with 2 tbsp of sugar until stiff peaks form.
· The Adventurer: Add ½ cup of sour cream to the pudding mix for tang, or a sprinkle of sea salt on top to elevate the sweetness.
· The Purist: Add 1-2 teaspoons of good vanilla extract to the pudding base.
· Banana Wisdom: Use bananas that are yellow with a few speckles—not green, not mushy. Slice them just before assembling to minimize browning.
· Make-Ahead: This is the perfect make-ahead dessert. It holds beautifully for 2-3 days in the fridge (though the bananas will soften further).
—
Conclusion: The Recipe That Captures Hearts
This banana pudding recipe is a masterpiece of texture and flavor that respects its heritage while embracing simplicity. It requires no baking, forgives small errors, and consistently delivers a result that feels both nostalgic and excitingly decadent. It’s a recipe built for sharing, for potlucks, for new neighbors, and for family dinners where the only request is, “Please save me the last spoonful.”
So, to all the banana pudding lovers out there—from the traditionalists to the innovators—this is your holy grail. Keep it, share it, and pass it down. It’s more than a recipe; it’s a promise of creamy, dreamy, banana-infused happiness. Don’t lose it!