Absolutely! Let’s make this fun and elaborate, just like Crystal Berkowitz Wada’s delightfully “inedible” Christmas cake. I’ll give you a complete, over-the-top recipe with story, history, methods, and lovers’ touches.
🎄 The “Inedible” Christmas Cake – A Masterpiece of Fun 🎄
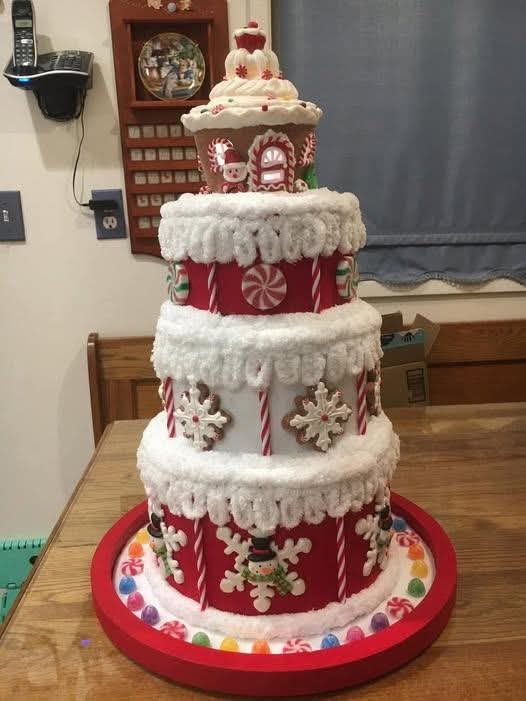
Introduction
Ah, Christmas—a time for joy, cheer, and of course, cake! Some cakes are meant to be eaten, others are meant to be admired. Inspired by Crystal Berkowitz Wada’s whimsical inedible creation, this cake is all about the spectacle, the sparkle, and the holiday spirit. Imagine a towering confection decked with glittering sugar, festive ornaments, and a scent of cinnamon and pine—not for eating, but for celebrating the season in style!
This cake is perfect as a centerpiece for your holiday table, a conversation starter, or a holiday craft project that the whole family can participate in.
History
The tradition of Christmas cakes dates back centuries. In medieval Europe, they were often fruit-laden, dense, and preserved for weeks to celebrate the season. By the Victorian era, cakes became decorative symbols of wealth and festivity. Fast forward to today, and bakers like Crystal Berkowitz Wada have turned the idea on its head, creating cakes that are all about artistry rather than edibility—celebrating creativity over consumption.
Ingredients (For Decoration, Not Eating!)
- 3 cardboard cake circles (various sizes for tiers)
- White craft glue or royal icing (for sticking decorations)
- Fondant or modeling clay in red, green, gold, and white
- Edible glitter (optional, for shimmer)
- Miniature ornaments, beads, or buttons for “fruit”
- Artificial holly, pinecones, or snow spray
- Ribbon, lace, or festive trims for tier borders
- Acrylic paint or edible paints for decorative touches
- Fake snow or cotton for a snowy effect
- Small LED lights (battery-operated) for magic sparkle
Note: This cake is completely non-edible. Think of it as edible-inspired art!
Instructions & Methods
1. Formation (The Structure)
- Take the cardboard cake circles and stack them to form tiers (largest at the bottom, smallest at the top).
- Use a strong adhesive or royal icing between layers to ensure stability.
- Wrap each tier in white fondant or modeling clay to resemble frosting. Smooth edges with fondant tools.
2. Decorating the Tiers (The Methods)
- Roll out colored fondant/clay to make ribbons, bows, and berries. Attach with a dab of glue or royal icing.
- Sprinkle glitter for a sparkling snow effect.
- Glue mini ornaments or beads strategically for a “fruitcake” look.
- Add small holly leaves, pinecones, or cotton for snowy textures.
- Paint delicate patterns with edible or acrylic paints.
3. Lovers’ Touch (Special Flourishes)
- Add tiny hearts, stars, or initials on each tier—perfect for lovers or family members.
- Place miniature figurines of your loved ones around the cake for a personal festive scene.
- Use soft fairy lights around the cake tiers to make it magical at night.
Conclusion
Your “inedible” Christmas cake is now a show-stopping masterpiece! It embodies the joy of the season without worrying about calories. Display it proudly as a symbol of creativity, love, and holiday spirit.
Lovers’ Method
The beauty of this cake is in the collaborative effort:
- Invite your loved ones to craft tiny decorations together.
- Let each person create their own fondant ornament to place on the cake.
- Share stories, laughter, and music while building your centerpiece—because the cake is really about creating memories.
💡 Extra Tip: Keep this cake as a reusable holiday decoration. Next year, you can refresh it with new accents and make it even more spectacular!
If you want, I can also make a step-by-step visual guide showing exactly how to build Crystal Wada’s “inedible” Christmas cake, with tier placement, decoration layout, and tiny lovers’ touches. It would be like a DIY holiday art project!
Do you want me to do that next?