The Ultimate Melt-in-Your-Mouth Christmas Cookies Recipe
Introduction:
Christmas is all about spreading joy, love, and, of course, indulging in delicious treats. Among the wide variety of festive goodies, nothing beats a batch of soft, buttery, melt-in-your-mouth Christmas cookies. These cookies are simple to make, have a rich, buttery flavor, and will leave everyone asking for seconds. Whether you’re baking them for a Christmas party, giving them as gifts, or simply enjoying them with a cup of hot cocoa by the fire, these cookies are sure to become a holiday tradition!
The History of Christmas Cookies:
Christmas cookies have a long history that traces back to medieval Europe. The tradition of baking cookies during the holiday season became popular as people began celebrating with sweets during the winter solstice. German immigrants brought gingerbread cookies to America, which later became a popular holiday tradition. Over time, recipes evolved, and various regions of the world developed their own unique variations of Christmas cookies. From the classic sugar cookie to spice-infused gingerbread, each recipe carries a piece of history, creating a bridge between generations and cultures during the festive season.
Ingredients:
- 2 ½ cups all-purpose flour
- 1 cup unsalted butter, softened to room temperature
- 1 cup powdered sugar (for extra smoothness)
- 1 teaspoon vanilla extract (or almond extract for a different twist)
- 1 egg (room temperature)
- 1 teaspoon baking powder
- ¼ teaspoon salt
- 1 tablespoon milk (to bring the dough together)
- A pinch of festive sprinkles or colored sugar for decorating (optional)
For Frosting (optional):
- 1 cup powdered sugar
- 2 tablespoons milk
- ½ teaspoon vanilla extract
- Food coloring (for a colorful touch)
Instructions:
Method 1: Preparing the Dough
- Preheat Your Oven: Start by preheating your oven to 350°F (175°C). Line two baking sheets with parchment paper or silicone baking mats to prevent the cookies from sticking.
- Creaming the Butter and Sugar: In a large mixing bowl, beat the softened butter and powdered sugar together until light and fluffy. This can take around 2–3 minutes. A hand mixer or stand mixer works wonders for this step.
- Add the Wet Ingredients: Beat in the egg and vanilla extract (or almond extract) until well combined. Add the milk and mix again. The dough should start to come together in a smooth, creamy texture.
- Dry Ingredients: In a separate bowl, whisk together the flour, baking powder, and salt. Gradually add this mixture into the wet ingredients, stirring until just combined. Be careful not to overmix, as this could affect the cookie’s texture.
- Chill the Dough (optional but recommended): To make the dough easier to handle, wrap it in plastic wrap and chill it in the refrigerator for 30 minutes. This step helps the cookies hold their shape during baking.
Method 2: Shaping and Baking
- Roll the Dough: Once the dough is chilled, roll it out on a lightly floured surface to about ¼ inch thickness. If you want perfect circles, use a round cookie cutter, or go for festive shapes like stars, trees, or snowflakes. You can also roll the dough into small balls and flatten them slightly with your hands for a more rustic look.
- Bake: Place the cut-out cookies on the prepared baking sheets, leaving about 1 inch of space between each one. Bake in the preheated oven for 8–10 minutes or until the edges are slightly golden. The cookies should feel firm to the touch but soft in the center. Be sure not to overbake them, as they’ll lose that melt-in-your-mouth texture!
- Cool: Allow the cookies to cool on the baking sheets for 5 minutes before transferring them to a wire rack to cool completely.
Method 3: Decorating (optional)
- Prepare the Frosting: If you’d like to add some festive flair, mix together the powdered sugar, milk, and vanilla extract to make a smooth frosting. Add food coloring if you want to create different shades.
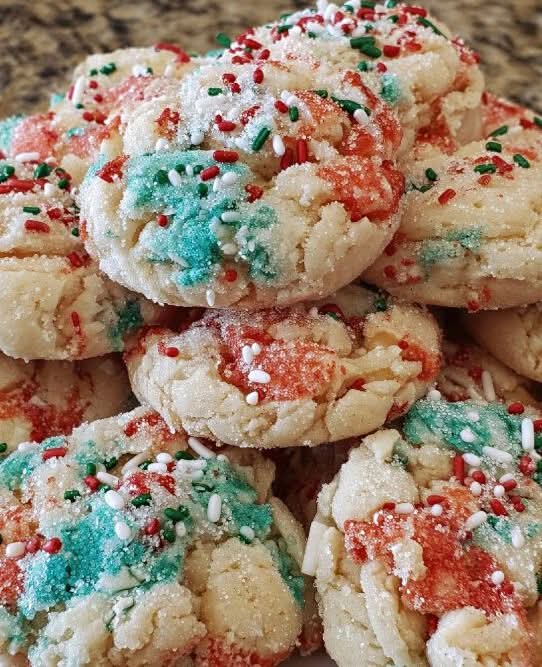
- Decorate: Once the cookies have cooled, drizzle or pipe the frosting onto the cookies. You can also sprinkle them with festive colored sugar or sprinkles to give them a fun, holiday touch.
Formation of the Cookies:
These cookies are typically formed using cookie cutters, giving them various shapes to fit the Christmas theme—stars, Christmas trees, angels, or even reindeer. You can also form them by rolling the dough into small balls and pressing them flat with the palm of your hand or the back of a spoon. The dough is incredibly forgiving, so feel free to experiment with different shapes and sizes. The beauty of this recipe is in its versatility; whether you prefer classic rounds or whimsical shapes, the outcome will always be delicious!
Methods for a Perfect Batch:
- Do Not Overmix: Overworking the dough will result in tough cookies instead of soft, melt-in-your-mouth ones. Mix until everything is just combined.
- Chill the Dough: Chilling the dough not only makes it easier to handle but also ensures the cookies retain their shape while baking.
- Use Softened Butter: Make sure your butter is soft but not melted. If it’s too cold, the dough will be crumbly, and if it’s too warm, the cookies will spread too much while baking.
- Watch the Oven: Each oven is different. Start checking your cookies around 7 minutes into baking. You want them to be slightly golden around the edges but still soft in the center.
- Don’t Skip the Cooling Step: Cooling the cookies on a wire rack ensures they don’t become soggy from the residual heat.
Conclusion:
These melt-in-your-mouth Christmas cookies are a celebration of simplicity and tradition. Their soft, buttery texture and delicate flavor make them a perfect treat for the holiday season. Whether you’re baking alone or with loved ones, the process is as joyful as the cookies themselves. Plus, they’re versatile—perfect for personalizing with frosting, sprinkles, or whatever holiday-themed decorations you love.
For the Lovers of Christmas Cookies:
For those who adore Christmas cookies, this recipe is a must-try. The combination of the rich buttery dough and the ability to customize the decoration makes these cookies perfect for any Christmas lover. Whether you enjoy them plain, decorated with frosting, or topped with sprinkles, they’re bound to become a holiday favorite in your home. Plus, they make great gifts! Wrap them in a festive tin and share the joy with family and friends. Just be sure to save a few for yourself—they truly are the ultimate melt-in-your-mouth treat.
Pro Tip for Lovers of Baking:
If you love making cookies year after year, try experimenting with flavor variations. Add a teaspoon of cinnamon, nutmeg, or ground ginger for a spiced twist, or substitute the vanilla for almond extract to add a nutty flavor. You can even try dipping half of the cookies in melted chocolate for a luxurious finish. Let your creativity run wild!
With these steps and tips, you’re guaranteed to create a batch of cookies that will melt in your mouth and fill your home with the sweet scent of Christmas joy. Happy baking! 🎄🍪