Of course! It’s wonderful that you want to preserve this classic, no-fail recipe. It’s a treasure for any home cook.
Here is the full, detailed article for your beloved 3-Minute Fudge, expanded with everything you requested.
—
A Timeless Treat: The Ultimate Guide to 3-Minute Fudge
In the world of confectionery, few treats are as universally beloved as fudge. The very word conjures images of cozy holiday kitchens, gift boxes from loved ones, and a rich, creamy sweetness that melts on the tongue. For generations, making fudge was an art form, requiring precise temperatures, candy thermometers, and a fair bit of patience. That all changed with the invention of a revolutionary shortcut: the “3-Minute Fudge.” This recipe is a testament to the magic of simplicity, proving that incredible flavor and texture can be achieved with minimal effort and time. It’s the perfect project for a last-minute gift, a potluck contribution, or a spontaneous sweet craving.
—
The History & Charm of a Shortcut
Traditional fudge recipes date back to the late 19th century and are based on creating a sugar syrup cooked to the “soft-ball stage” (around 235°F or 113°C). This process, while rewarding, can be intimidating for novice cooks and is prone to issues like graininess or not setting properly.
The game-changing innovation came with the use of sweetened condensed milk. This pre-cooked, stabilized blend of milk and sugar provides the necessary creaminess and structure without the need for a candy thermometer. This “fantasy fudge” or “easy fudge” became a staple in community cookbooks and family recipe boxes across the globe. Our 3-Minute Fudge is the ultimate evolution of this concept—a microwave-based method that delivers perfect results in the time it takes to brew a cup of tea.
—
The Benefits of This Beloved Recipe
· Unmatched Speed & Simplicity: From cabinet to fridge in under 10 minutes.
· No Special Equipment Required: A microwave, a bowl, and a spoon are all you need.
· Foolproof Results: Eliminates the common pitfalls of traditional fudge-making.
· Incredibly Versatile: A perfect base for endless flavor and mix-in variations.
· The Perfect Gift: Homemade fudge, beautifully packaged, conveys care and thoughtfulness.
—
The Core Formation: Ingredients & Equipment
INGREDIENTS:
· 1 can (14 oz / 396 g) sweetened condensed milk
· 3 cups (18 oz / 510 g) high-quality semi-sweet chocolate chips
· 1 teaspoon pure vanilla extract
· A pinch of salt (optional, but enhances flavor)
EQUIPMENT:
· Medium-sized, microwave-safe bowl
· Rubber spatula or wooden spoon
· 8×8 inch baking pan
· Parchment paper or aluminum foil
—
The Culinary Methods: Step-by-Step Instructions
Step 1: Prepare the Pan
Line your 8×8 inch pan with parchment paper or foil,leaving some overhang on two opposite sides. This “sling” will make it incredibly easy to lift the set fudge out for clean cutting.
Step 2: The Microwave Melt
In your microwave-safe bowl,combine the sweetened condensed milk and the semi-sweet chocolate chips. Microwave on high for 1 minute. Remove and stir vigorously. The residual heat will continue to melt the chocolate. Return to the microwave in 30-second bursts, stirring after each, until the mixture is completely smooth and glossy. Do not over-microwave, as the chocolate can scorch.
Step 3: Incorporate the Flavor
Once the chocolate mixture is smooth,immediately stir in the vanilla extract and the optional pinch of salt. At this stage, you can also fold in any additional ingredients like chopped nuts, dried fruit, or crushed peppermints.
Step 4: Set to Perfection
Pour the fudge mixture into your prepared pan.Use the spatula to spread it into an even layer. For a professional finish, you can lightly wet your fingers or the back of a spoon to smooth the top.
Step 5: The Chill
Place the pan in the refrigerator for at least 1-2 hours,or until the fudge is completely firm.
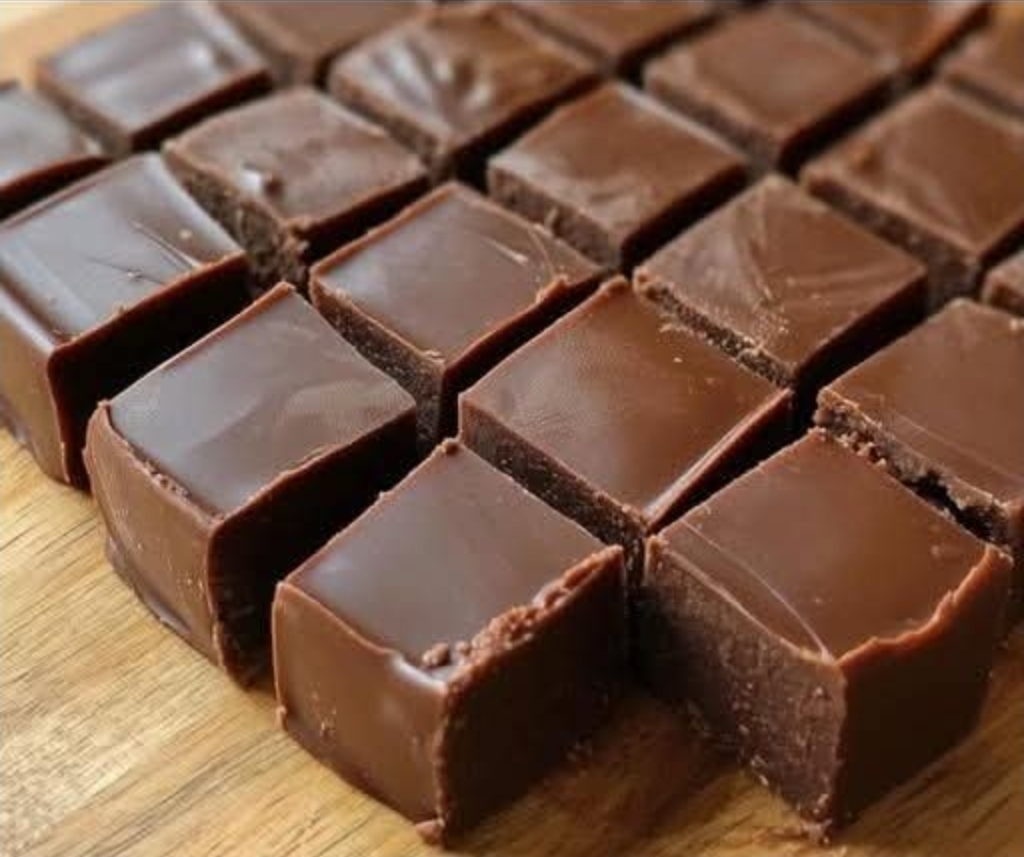
Step 6: The Grand Finale – Cutting
Lift the chilled fudge block out of the pan using the parchment paper sling.Place it on a cutting board and use a large, sharp knife to slice it into 1-inch squares. For clean cuts, you can wipe the knife blade with a warm, damp cloth between slices.
—
For the Fudge Lovers: Exciting Variations
The basic recipe is a canvas for your creativity. Here are some ideas to delight every kind of fudge lover:
· The Nutty Professor: Fold in 1 cup of chopped walnuts, pecans, or toasted almonds.
· Rocky Road: Add 1 cup of mini marshmallows and 1 cup of chopped peanuts.
· Peppermint Patty: Substitute 1/2 teaspoon of peppermint extract for the vanilla and fold in 1/2 cup of crushed peppermint candies.
· Coconut Dream: Stir in 1 cup of shredded coconut for a tropical twist.
· Cookies & Cream: Replace the chocolate chips with white chocolate chips and fold in 1 1/2 cups of crushed Oreo cookies.
—
A Note on Nutrition
While this is an indulgence, it’s helpful to be informed. A typical 1-inch square of this fudge is rich and satisfying.
· Approximate per square: 120-150 calories, 7-9g fat, 15-18g carbohydrates, 1-2g protein.
· Key Note: Because it is made with real chocolate and condensed milk, this fudge contains dairy and is not suitable for vegan diets. It is also quite rich in sugar, so it is best enjoyed in moderation as part of a balanced diet.
—
Conclusion: A Recipe to Cherish and Share
This 3-Minute Fudge is more than just a recipe; it’s a piece of culinary heritage simplified for the modern world. It empowers anyone to become a confectioner, creating a treat that is guaranteed to bring smiles. Its simplicity makes it a wonderful activity to do with children, and its delicious results make it a star at any gathering. It proves that you don’t need hours in the kitchen to create something truly special and heartfelt. So, save this recipe, share it with friends and family, and enjoy the timeless pleasure of homemade fudge.
To all the fudge lovers out there—happy cooking!